Fantasy Skirmish: Witch Hunter Captain

I’m still working on a system for statting out my fantasy minis, but until then, I’ll keep on posting progress on figures!

The Witch Hunters faction from Mordheim was one of my favorites, with lots of fanatical idiots running around causing all kinds of trouble for anyone else on the board. I knew getting started that I needed a strong showing from a faction similar to that, and there’s nowhere better to start than with a leader!

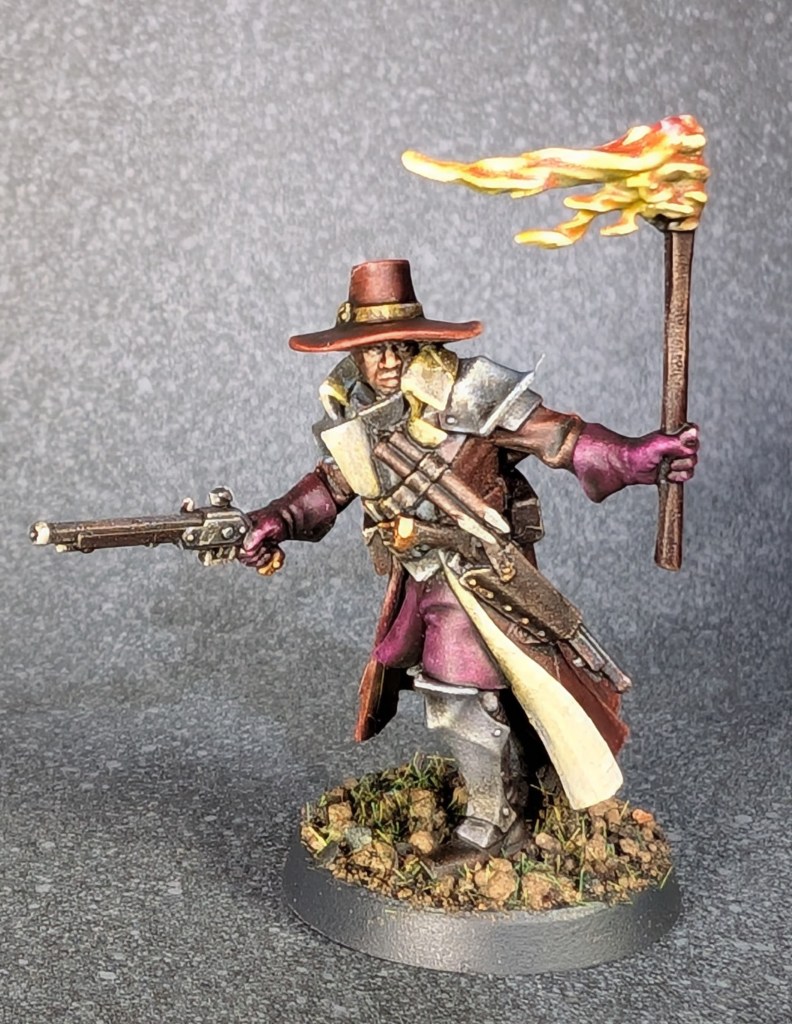
This mini is from a Warhammer Underworlds box that I’ve had kicking around for ages, and while he’s really tall compared to most of my minis, I figure he probably grew up with a lot of access to high quality foods. Yay! I found a way to grapple with scale creep!

This whole box is great, with three hunters and a couple of hounds. The captain has enough extra stuff on his belt that he shouldn’t be hard to stat out when I finally get a system worked out. I also want to add a mini to this group that’s sole function is to load pistols!

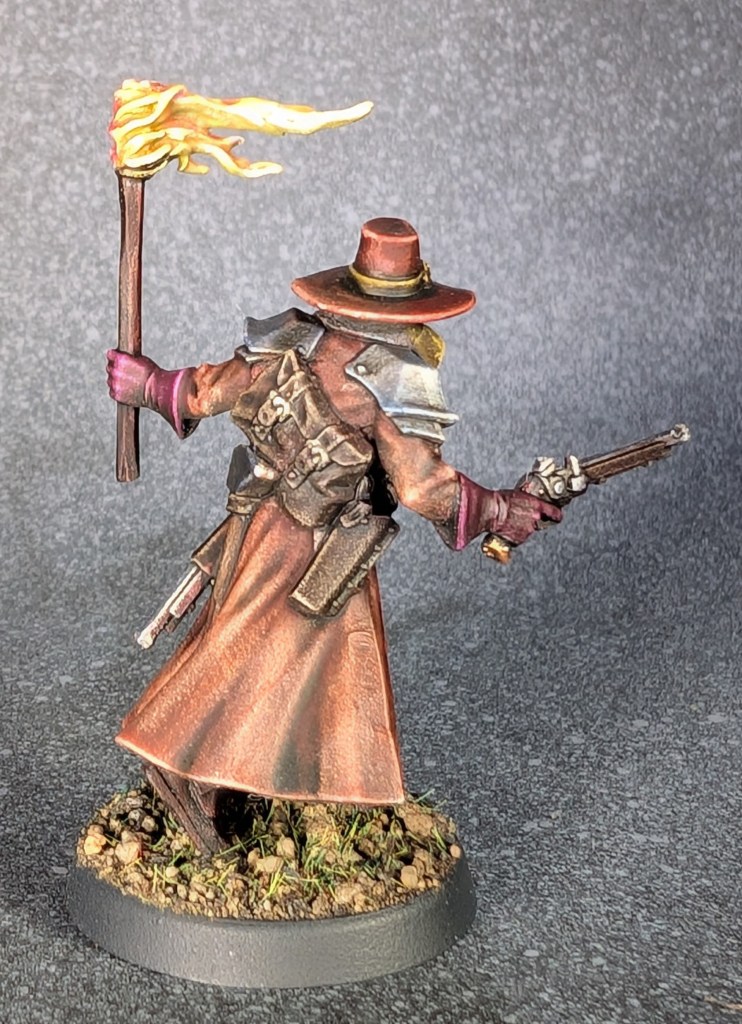
I decided to do something new with Rolf, and added some orange and purple tones to his clothing. I’ve been set on this whole “middle ages=drab earth tones” mindset for a while, so I want to shake things up and add some colors that I normally don’t play with much!

Next up will be a warrior priest. With a HUGE hammer, because of reasons.

Grimmleigh’s Guide to Painting Ork Skin

Since absolutely no one has asked, I thought it would be fun to put together a quick guide to how I paint ork skin. This is a speed paint method that I have been tinkering with for the better part of 20 years, and allows me to get a squad of orks (or goblins, or green dwarves, or emerald halflings) on the table pretty quickly!

Step One:

Start with a good foundation. Deeznudds here was sprayed with a coat of black primer, then I gave him a zenithal highlight pass with gray paint. Then, he got a downward drybrush of light grey paint. I’m going for high-contrast here, so subtlety is absolutely not a goal.


Step Two:

I blocked in the skin with some Sap Green ink from Daler Rowney, mixed with just a tiny bit of airbrush medium to dilute the pigment just a little. With the pre-shading done in step one, the skin could be considered done at this point and look just fine on the table-top…

Step Three:

…but we’re not Barbarians, are we? At this point, I started picking out the upper left side of the highlights with a little bit of yellow paint (Army Builder Babe Blond to be exact). Any light yellow will do the trick. I took a couple of passes to build up the lighter effect.

Step Four:

Why yellow? Well, Padawan, green is made out of yellow and blue, therefore it really likes being highlighted with yellow, and if you need to shade, blue works a wonder. At this step I have mixed a little Army Painter Arid Earth in with my yellow, and my highlights are getting smaller with each layer. It’s also time to paint that manky damned eye.


Step Five:

This step is completely optional, but I really like the effect. I paint in the highlights on the lips with a lighter skin tone, this adds a cool effect to the face and breaks up the monotony of a purely green face.


Step Six:

This is where I block in final highlights on the lips by adding a little Army Painter Arid Earth to the flesh tones. 


Step Seven:

Deeznuddz is looking pretty fierce, it’s time to line his gums and his manky damned eye with some Flesh Tearers Red Contrast Paint from Citadel.I also painted in his teeth with some Menoth White Highlight from Studio P3.

Step Eight:

The gums get a little highlight action by adding a little Army Builder Arid Earth to the Flesh Tearers Red. Yes, I do try to highlight with the same color, good eye! This is a good place to coat the teeth with some Skeleton Horde Contrast Paint from Citadel.

Step Nine:

At this point, all that’s left is the teeth. Since highlighting with a yellow based paint won’t give me the effect I’m looking for, I’ll be using Menoth White Highlight from Studio P3. Deeznuddz is ready to smash some skulls!

The same technique that was used on this face works perfectly for any green skin, whether it’s arms, torsos, or even squishy little goblins. Have fun!

Now, the colors may seem a bit washed out, but that’s because we’re looking at this guy much bigger than he is in real life. Look at your screen at about what his real world size would be, and you’ll see what I mean!

If you enjoyed this guide, let me know! I’m thinking about starting a series to help people navigate learning to paint miniatures!