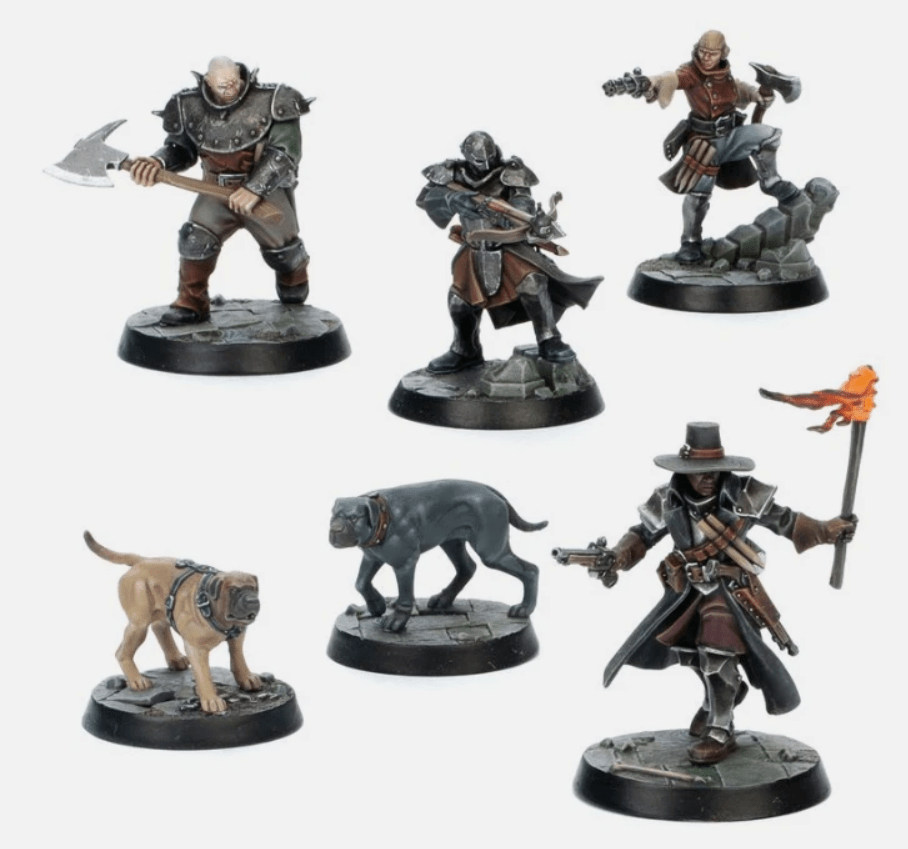
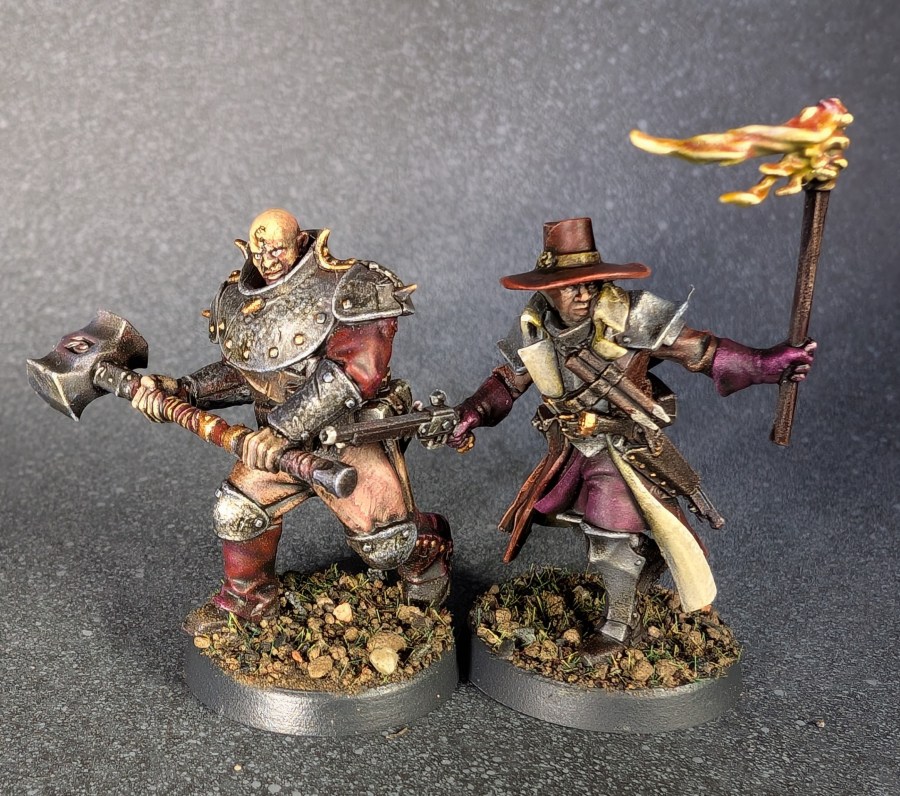
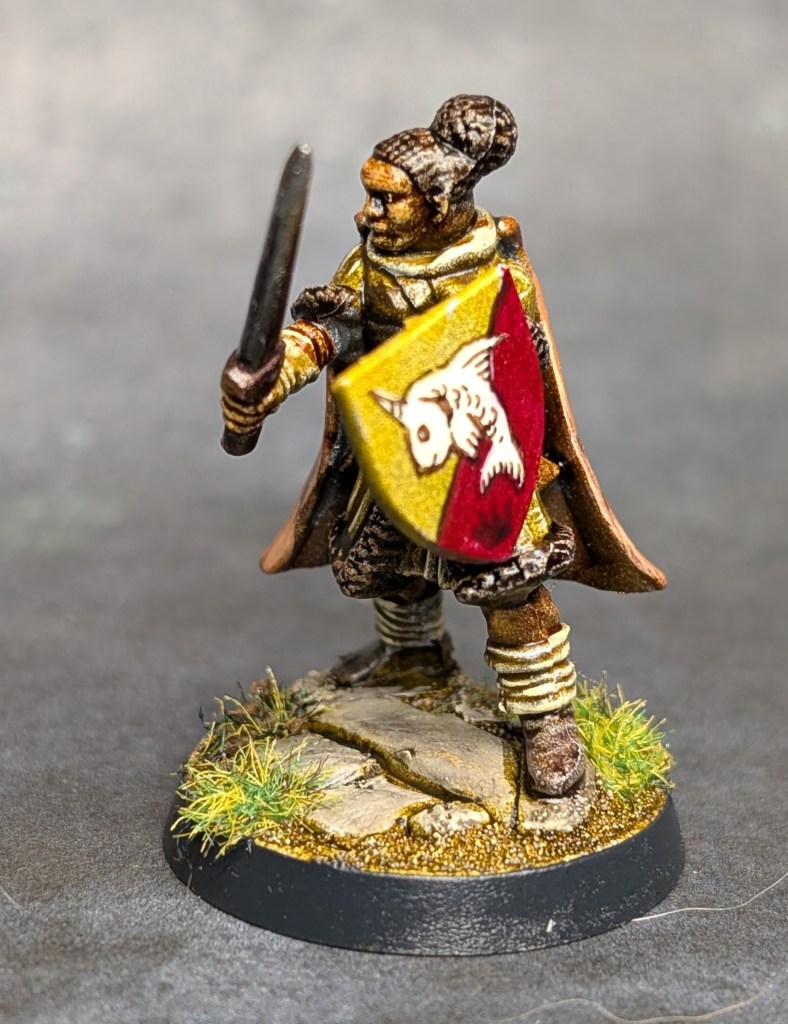
I’ve been working on building out a Witch Hunter warband for fantasy skirmish games, and with the Captain done, it was time to move on to the Warrior Priest.
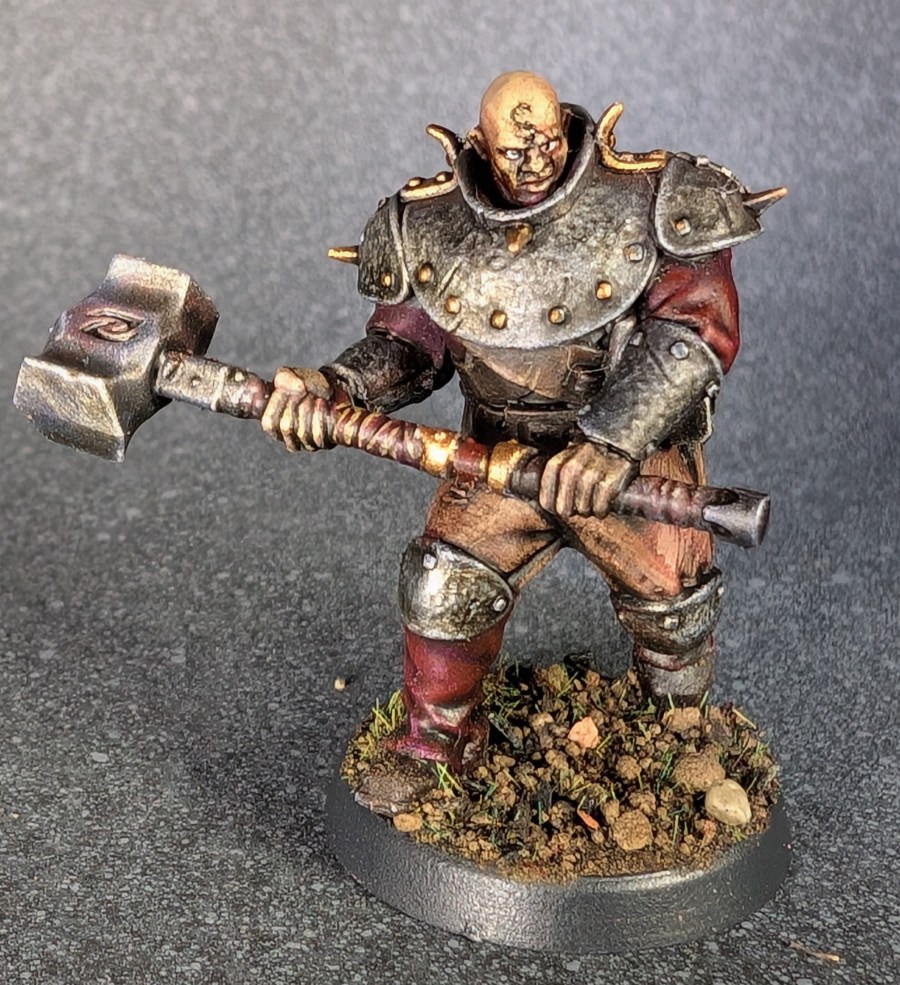
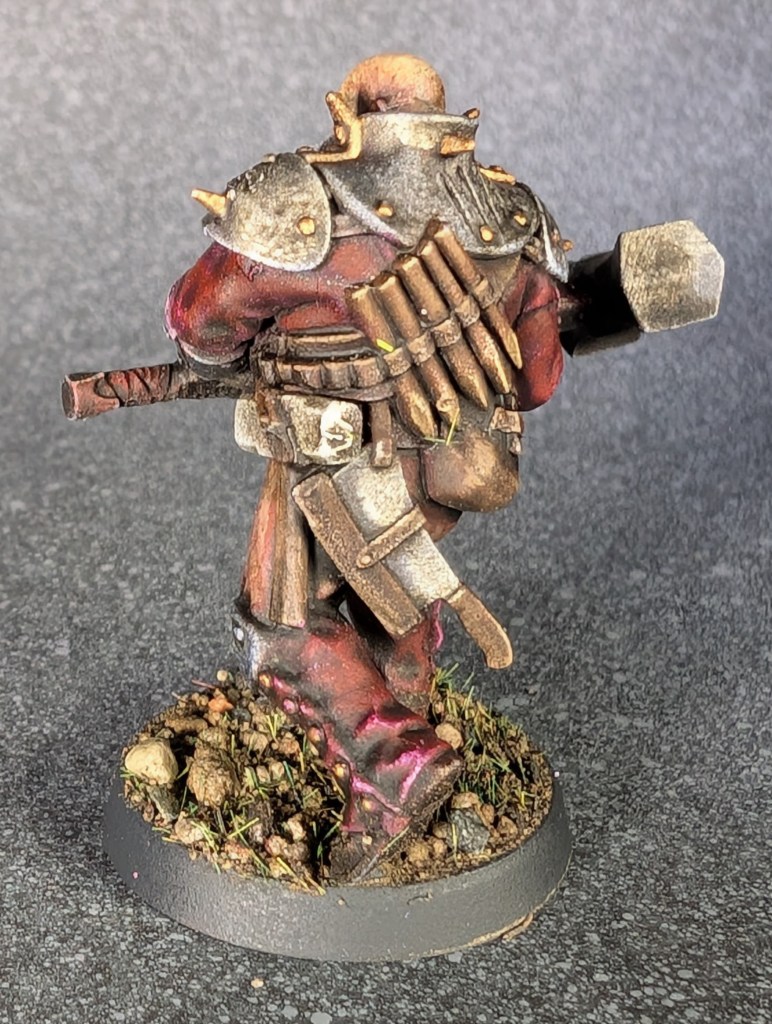
The Warrior Priest I fielded in Mordheim 25 years ago was a big bruiser with a two-handed warhammer. Going through the Hexbane’s Hunters warband from Warhammer Underworlds, I realized the big hunter with the mega axe could be converted without too much fuss.
I took a two handed hammer off of a Chaos Raider, then worked out the haft so that it fit the arms of the hunter. It was a pretty simple conversion and really brings back the way my old Warrior Priest, at least in spirit!
I kept to the same tones as the Captain, then put on an oil wash for this guy. After that was settled, I went back in for some highlights, then drew an “S” on his forehead. You know, for Squidward.
When I was in my early teens, Walt Simonson was working on the Thor comics for Marvel. He went really hard into the whole Cosmic Fantasy aspect of the character, and somehow managed to stay incredibly close to the design aesthetic established by Jack Kirby. As a comics smitten kid with a penchant for doodling, I was smitten.
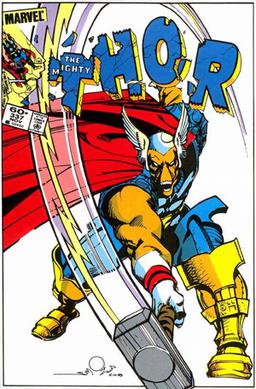
Somewhere along the line, Thor did something dumb, and Odin, being Odin, decided that Meow-meow needed to go to someone else, someone more worthy. So, the hammer made its way to Beta Ray Bill, a Korbonite warrior who was, as it turned out, pretty worthy. Look at this cover… it’s still metal as hell four decades later!
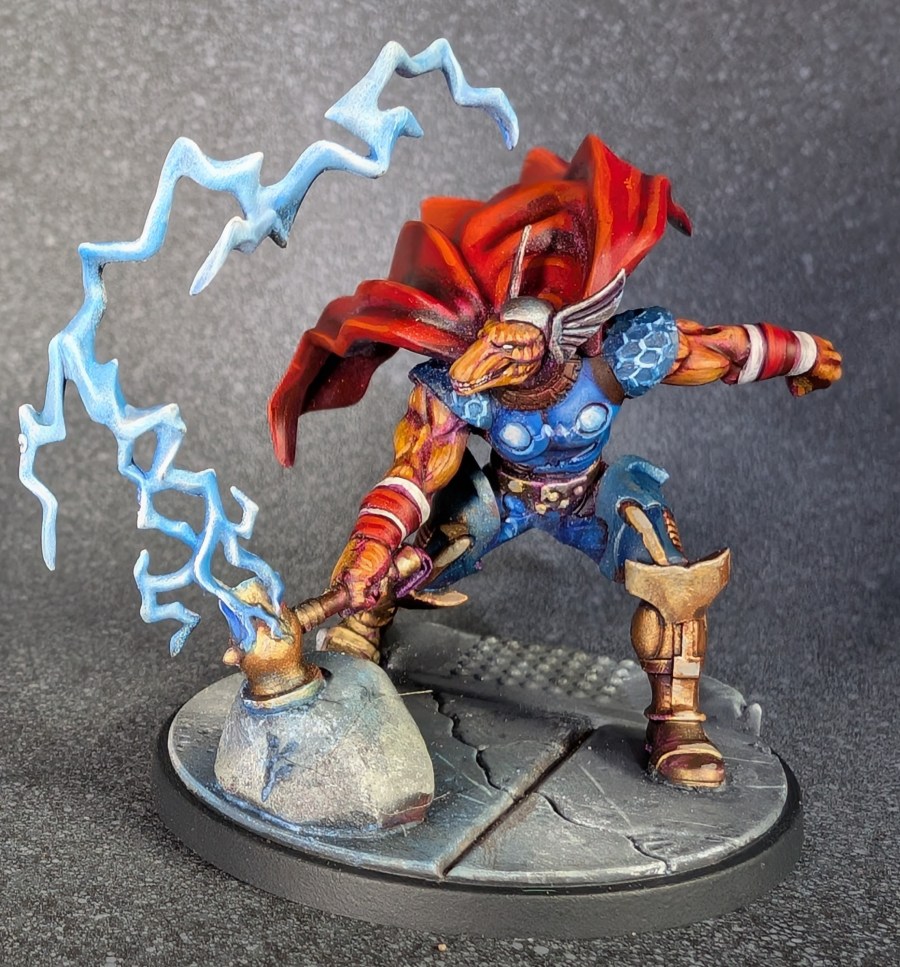
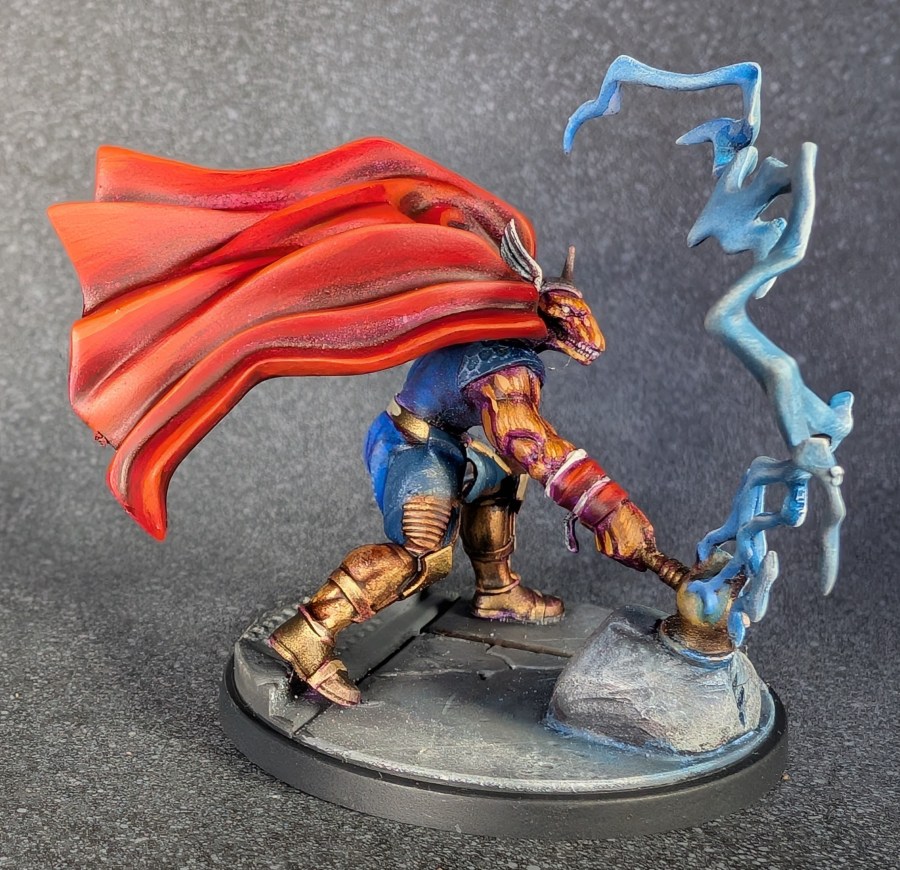
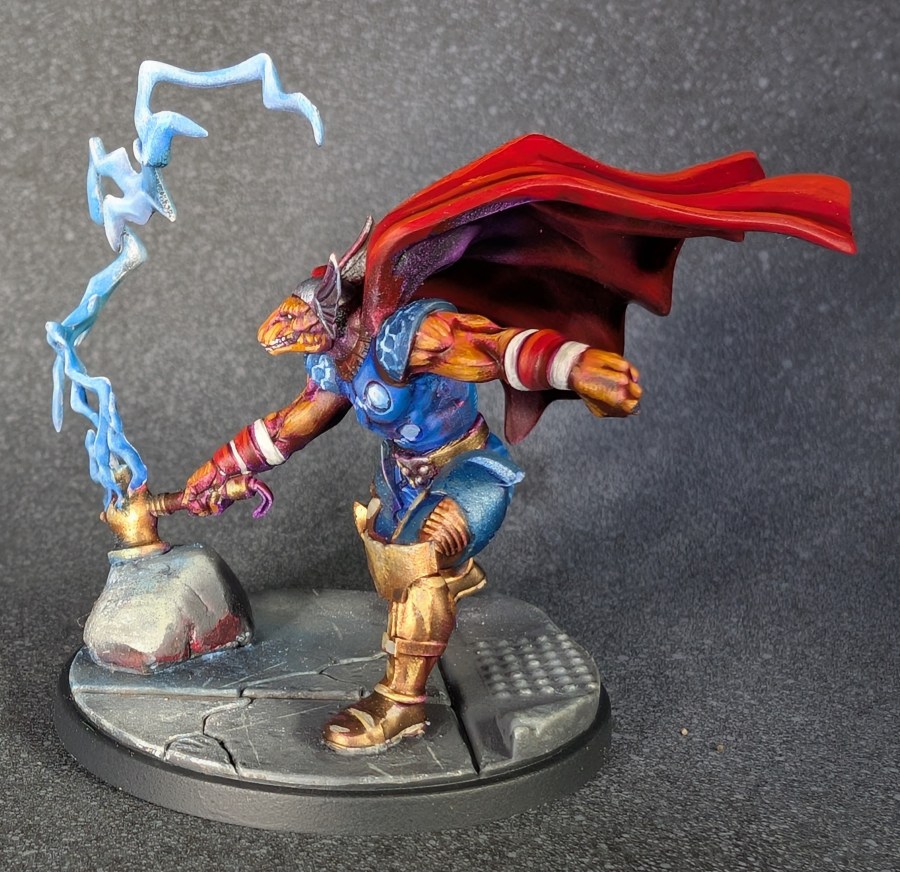
Atomic Mass Games released Beta Ray Bill for their Marvel Crisis Protocol game a couple of years back, and the box has been sitting neglected by me since then. I did paint up Ulik recently, and Bill was my reward for being a good boy and posting consistently through January and February.
Gaze upon the freaking MAJESTY of this sculpt! When you have something this amazing to work with, the miniature pretty much paints itself.
I still sometimes forget that this miniature line is part of a game and not a series of DIY collectible figurines. I guess it’s all in your mindset, right? Nightcrawler from the X-Men is up next!
Looks like we’re having a double dip week for Marvel Crisis Protocol, as I have a huge backlog of these minis and we’ll probably see a lot more as the month progresses!
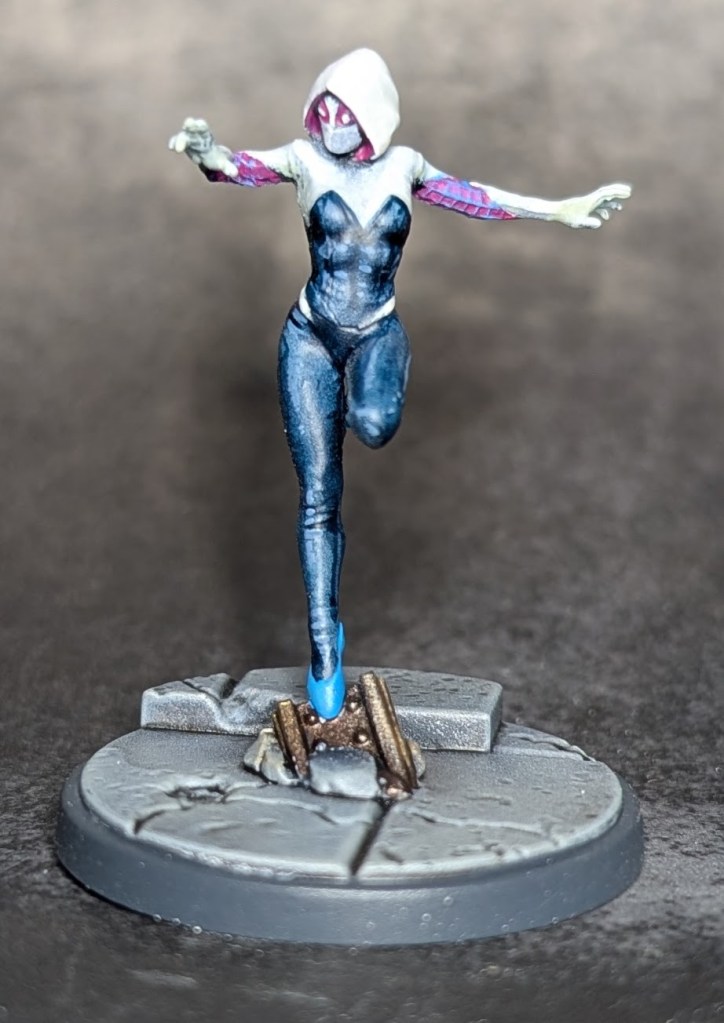
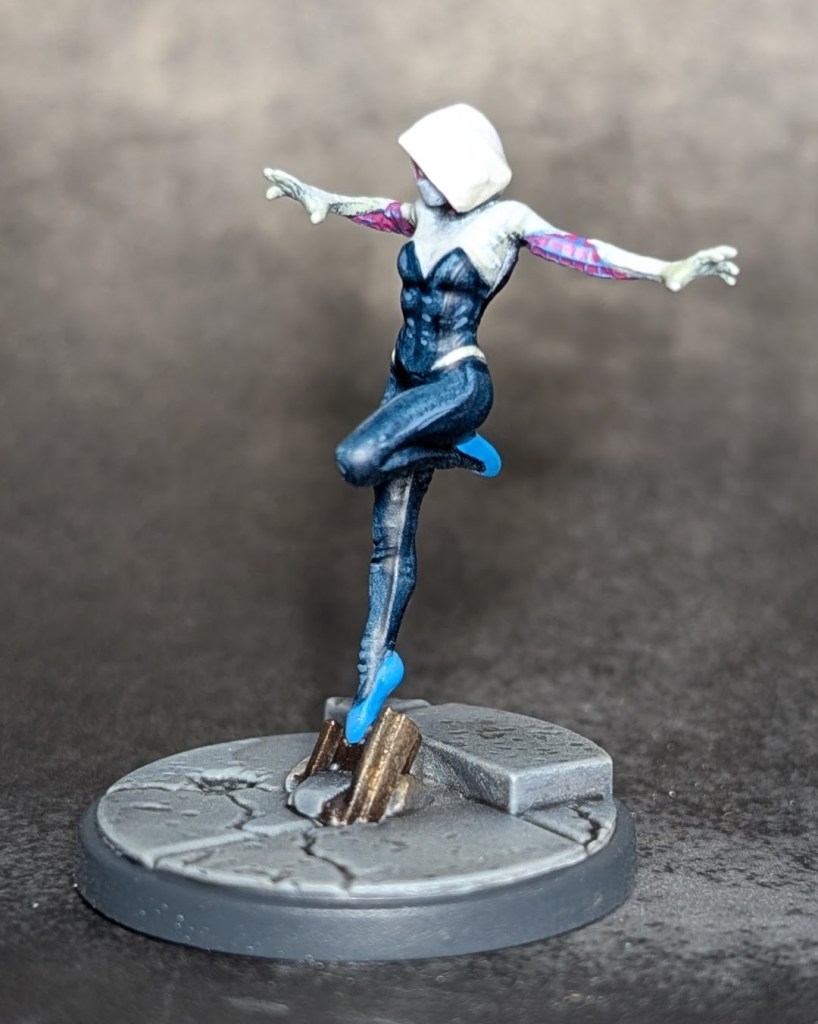
Ghost Spider is a great character, I really enjoy reading the comics and she’s one of the highlights of the Spiderverse movies that Sony put out.
MCP’s take on the character came pretty early on, which is great. The pose is still pretty good, but I would love to see a fresh take on the character now that the team at Atomic Mass Games has really hit their stride on the sculpts.
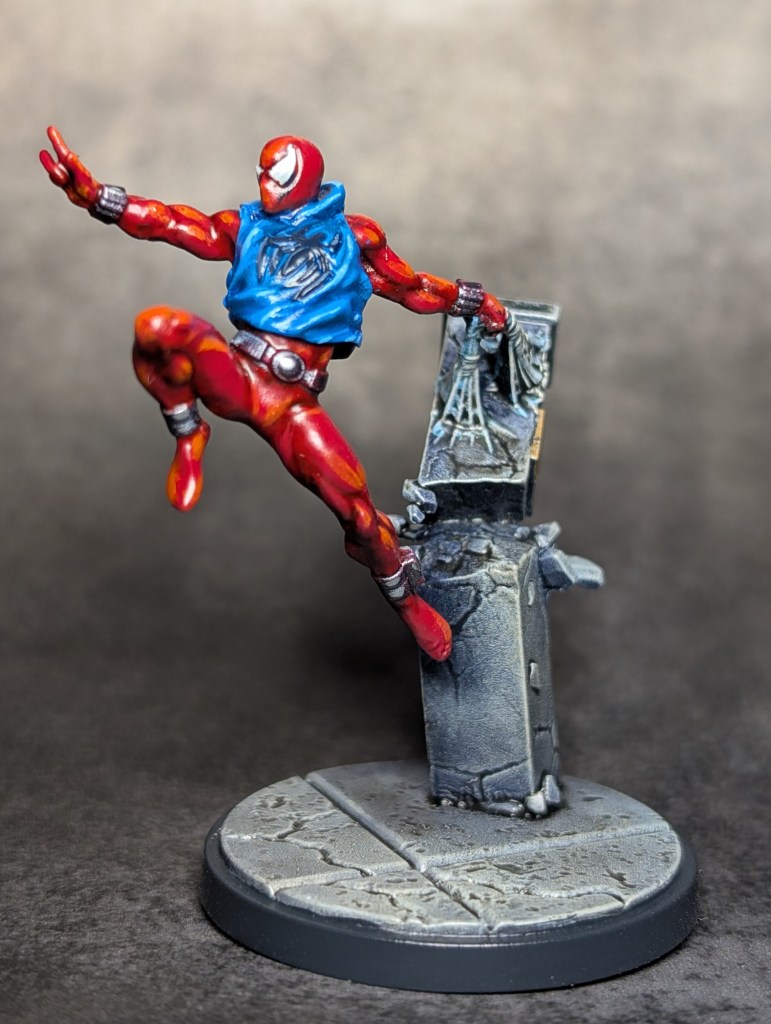
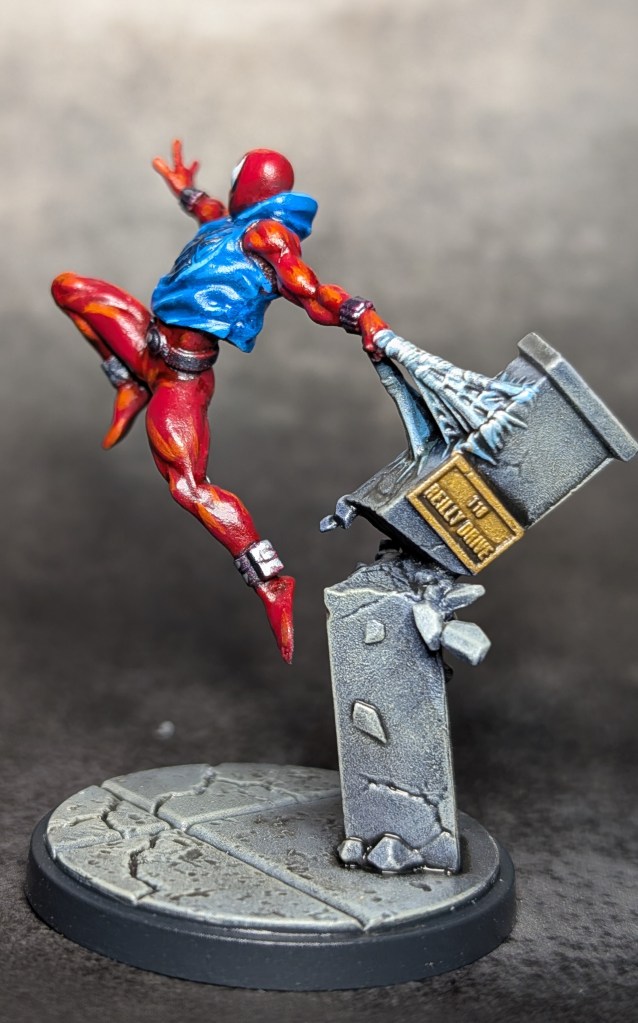
Ben Reilly, star of the much-aligned Clone Saga from the ’90s, is another great mini from the MCP crew, I especially enjoy the Reilly Drive signpost on the base!
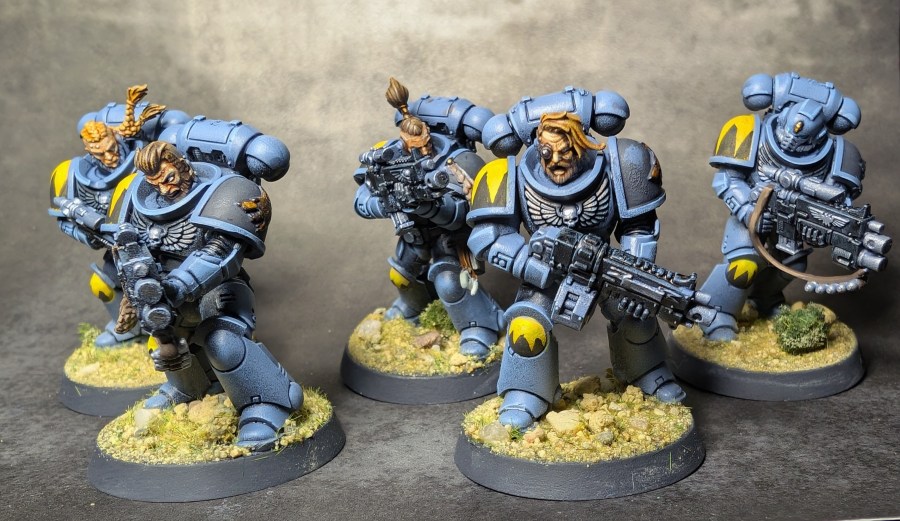
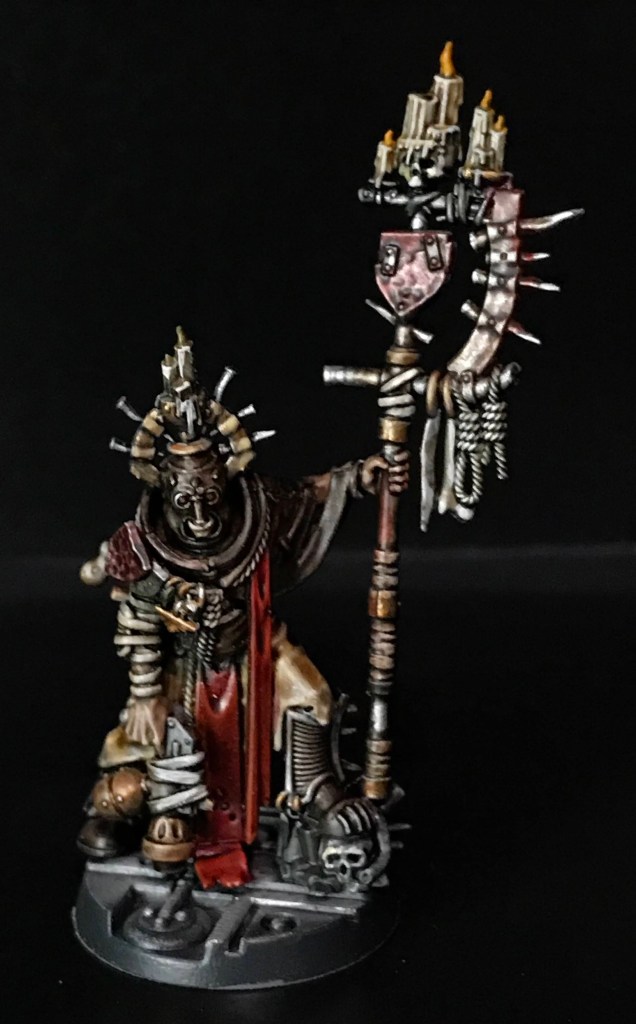
Anyone who has followed this blog for a longer period of time knows that I’ve been struggling with Warhammer 40,000 for a while. I’ve been playing off and on since 1989, and I honestly can’t stand the business model. If that game needs to be updated every three years after being in print for close to four decades? You’re doing a shit job.
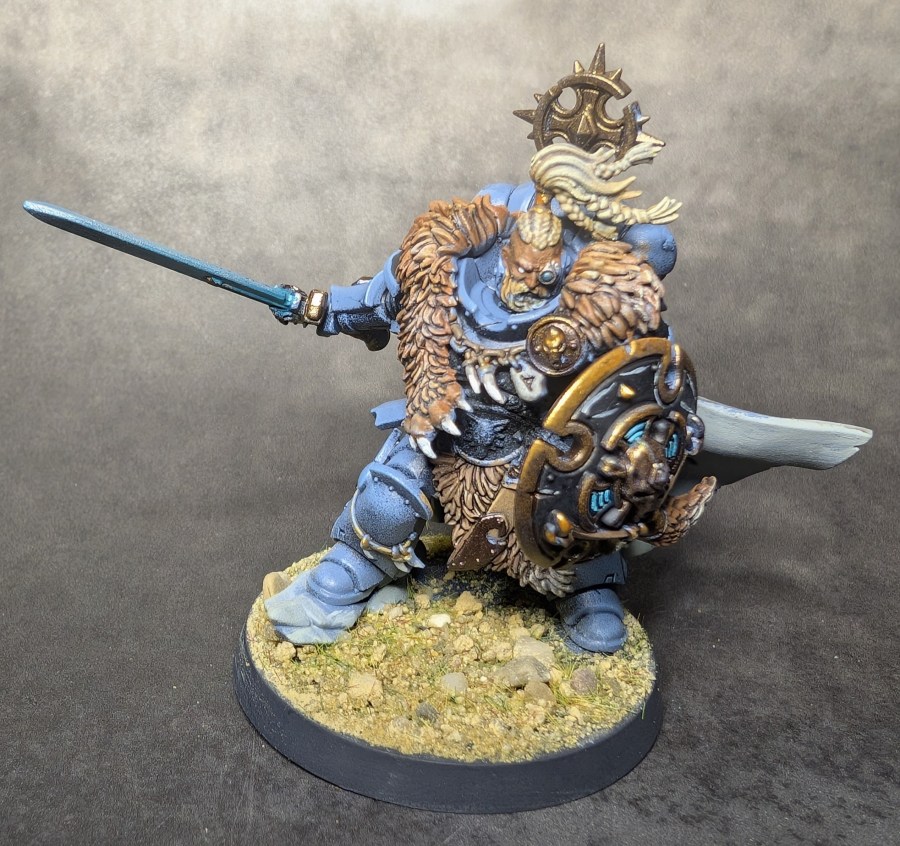
He’s mean! He’s beardy! He’s not a dwarf! But he should have a hammer anyway!
Sadly, most of my friends have a bad case of 40k Fever. It’s pretty much all they want to play, so I can either NOT play games with them and happily plug away on my other projects, or I can put together something that I do like in the lore and grumble about it a lot.
Yeah, I’m a bundle of fun. People line up around the block to play games with me.
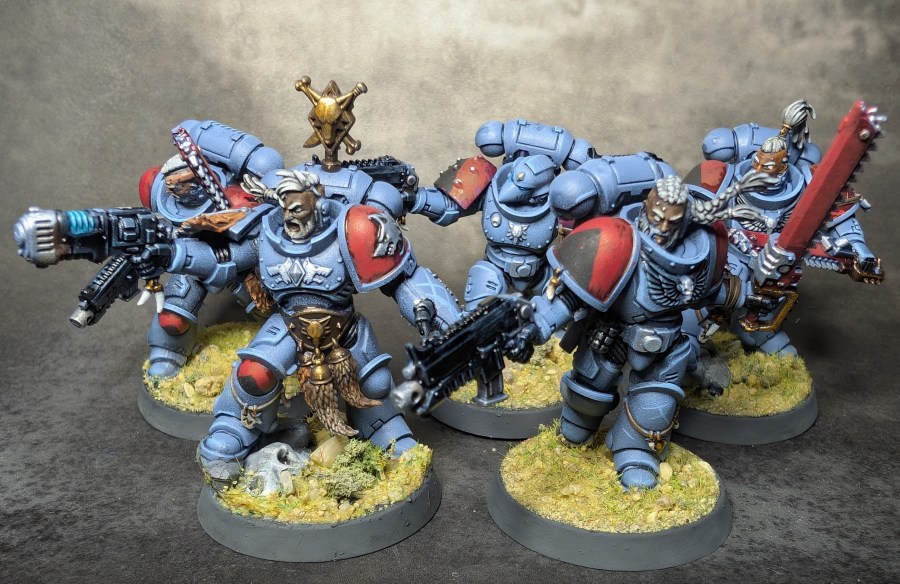
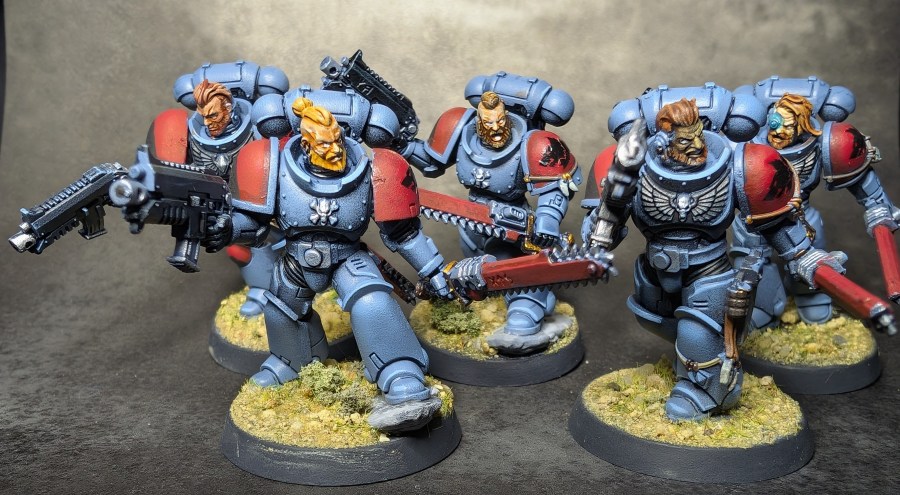
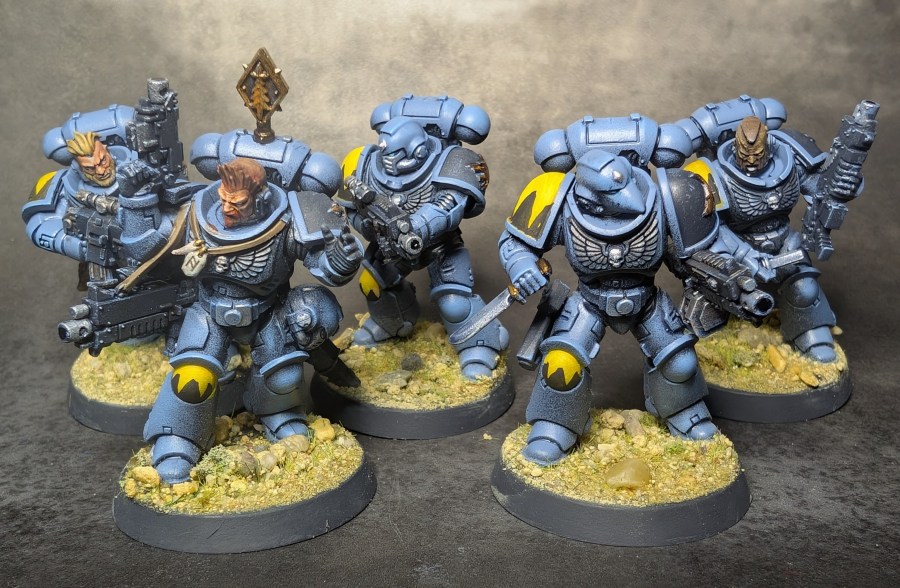
Space Wolves have always had a special place in my heart. They don’t care about the Codex Astartes, they look like they can pilot a longboat, and beards are cool. Plus, they have wolves. Wolves are cool.
I’m going to put together a total of 2,000 points for this army, for a game I really don’t like, just because the people I play with are a lot of fun and I don’t want to NOT play games with them!
Still not sure how to keep engaged enough to learn the janky ass rules without lighting it all on fire, though. Sure, One Page Rules has a good alternative, but good luck getting anyone with 40k Fever to break from the GeeDubs greed train. Grumble grumble.
I’ll have some Terminators up soon, and probably a Rhino or two. And some Bloodclaws and a Dreadnaught. That’s still not 2,000 points, but that’s what I own already, so it’ll have to do for now, hahaha!
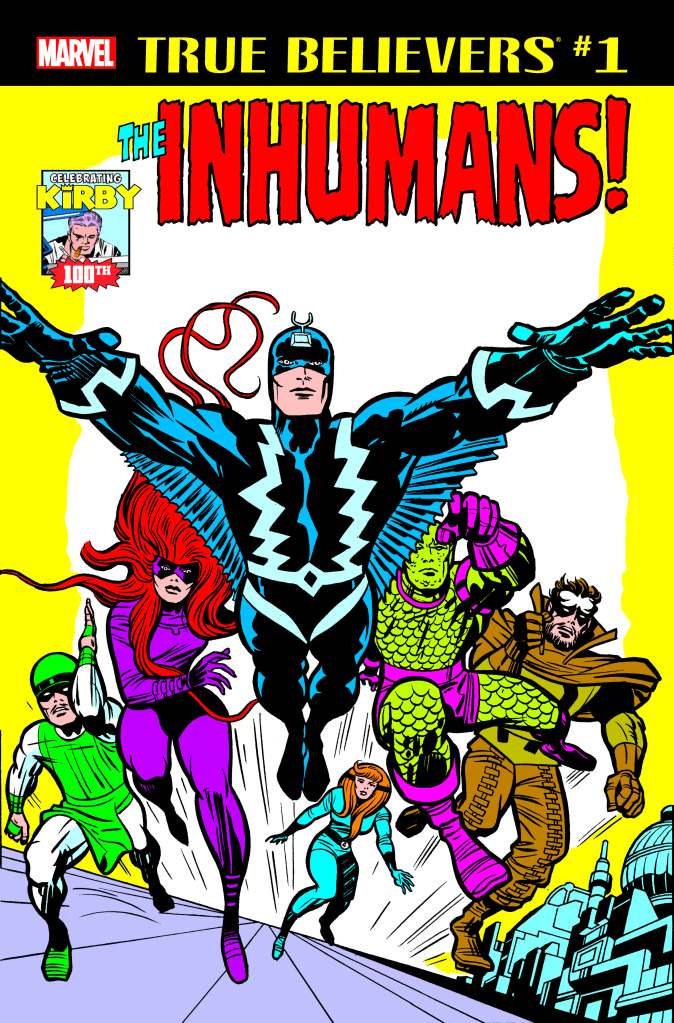
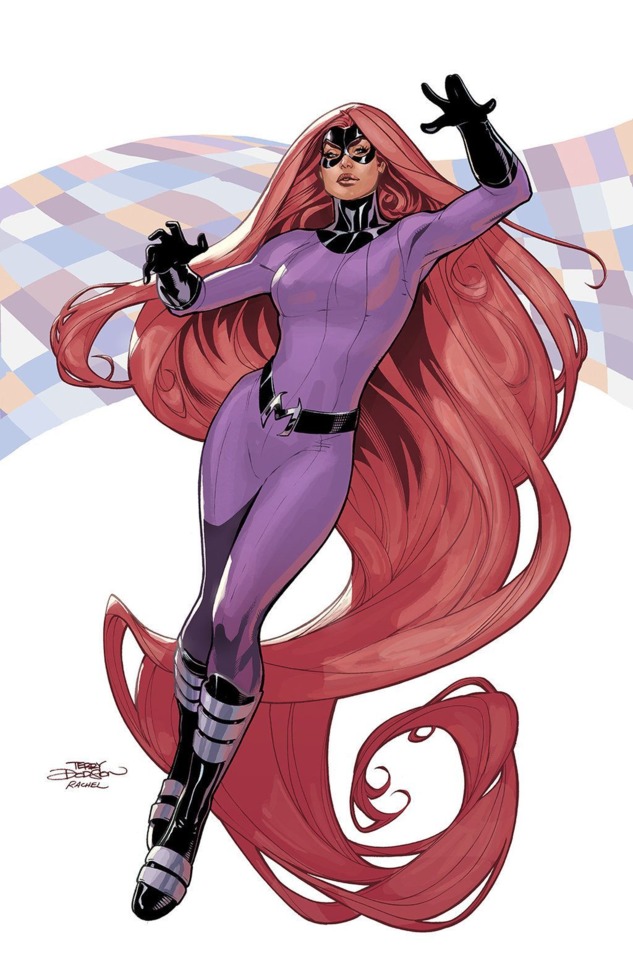
I started reading comics for real when I was about 10 years old, so indulge me as I take you on a trip in the Way Back Machine to my public library in 1980. I would spend hours there every week, since we didn’t have a television, and I would often find the big compendium books of comics and lose myself on a couch for a few hours. One of those books was a big Silver Surfer collection, and there were some cross-overs with The Inhumans, who seem kinda silly to me now, but 10-year-old me loved them. Especially the Jack Kirby stuff.
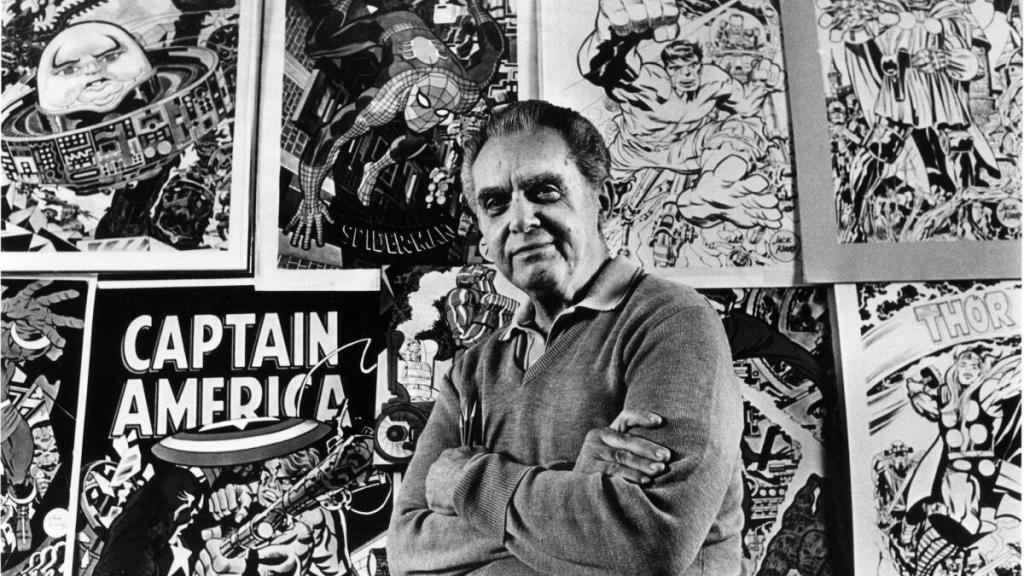
Why Kirby? By today’s standards, he looks to be a bit of a hack. But if you really look at his work, especially in the ’60s, he was a master of speed and efficiency. Kirby famously had no idea how many circles Thor had on his chest, he just drew what worked for the panel. He also drew over 100 issues of various Marvel titles in 1964… which is insane.
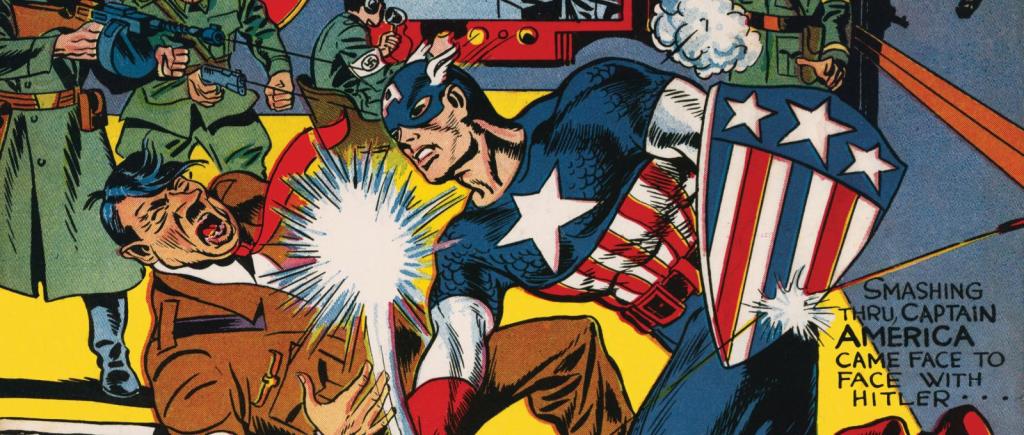
Plus, the dude drew this, and as we all know, everyone wins when a Nazi gets punched…
Kirby’s other big strength was an understanding of what works with four colors. We can learn a ton from the dude as miniature painters! Hulk doesn’t wear purple pants because they were the rage in 1963. He wears them because purple complements green on the color wheel, and we want our subjects to pop. Half the time I pull a blank on a color scheme for a miniature, I’ll just look at old four color comics and find something that works… and it always works.
Decades after her debut, artists are paying tribute to Kirby by keeping what works, working. Art by the incomparable Terry and Rachel Dodson.
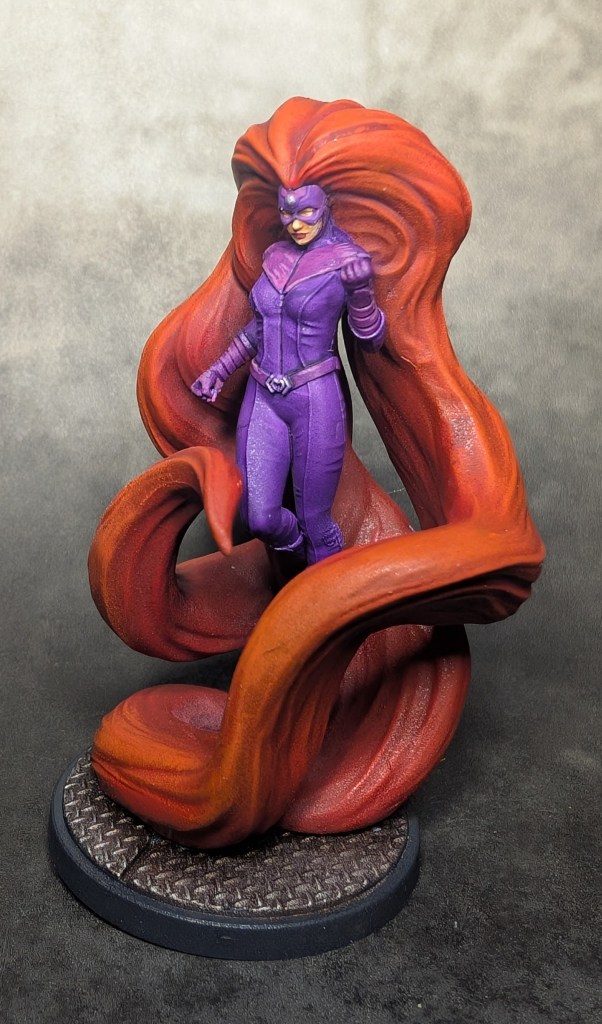
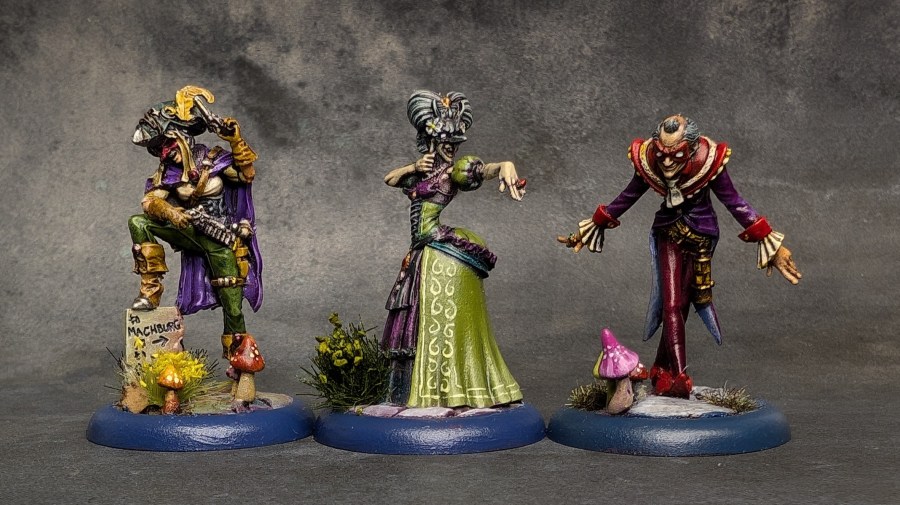
For the Marvel Crisis Protocol Medusa miniature, I wanted to make sure to honor the original color scheme. Luckily, most everyone since Kirby has stuck to the purple costume. It looks great with the red hair, and really draws the eye straight to the miniature!
I have to give huge props to Atomic Mass Games for this Medusa sculpt. My wife hardly ever comments on the minis on my workbench, but the second she saw Medusa, she was suddenly paying a lot of attention. In thirty years together, she’s patiently endured my hobby, but actual interest in a figure has been rare!
Looking back at the Dodson art, though, I’m debating going back in and doing the mask, gloves and boots in black. Regardless, this is a fantastic take on a classic character from Atomic Mass Games!
While perusing through some posts from Argent Badger’s inspiring blog I stumbled across Dave’s excellent Wargamesculptor’s blog, and his annual “Paint What You Got Challenge“. It runs from the end of December through the end of February each year, and it’s exactly what it says on the tin; a challenge to paint what you have started or just sitting in your collection.
Rasputina crew for Malifaux, painted in 2021
I’m not going to even try to hide my enthusiasm. I have WAY too much stuff, and every time I look at the news I somehow end up feeling bad and buying MORE stuff. So, I probably need to cut back on the news and hide my debit card while I’m at it.
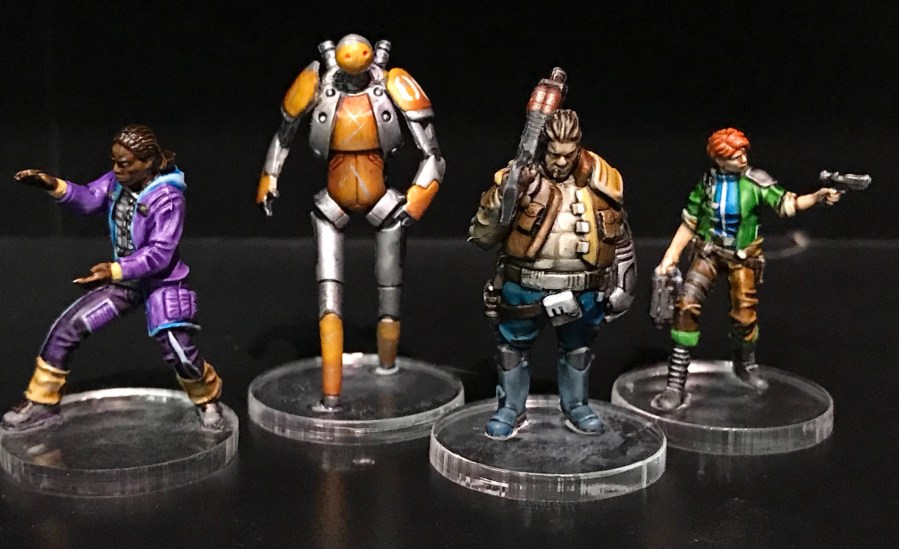
Core Space Minis painted in 2019
I’ve decided to take Dave’s idea and just run with it. So, from this post forward, I’m painting what I’ve got. I won’t be buying anything new, and barring gifts or something out of my control like that, everything you see posted from here on out will be stuff that’s just been sitting and waiting for some love.
Big Infinity terrain build for 2016!
Big thanks to Dave for the inspiration, and to Argent Badger and Kuribo for the great blogs!
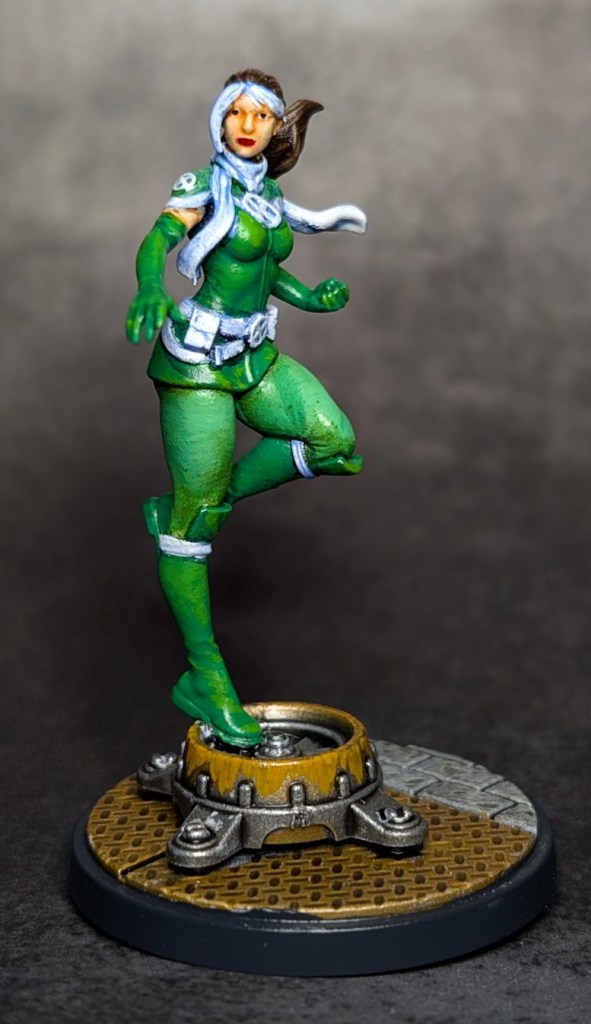
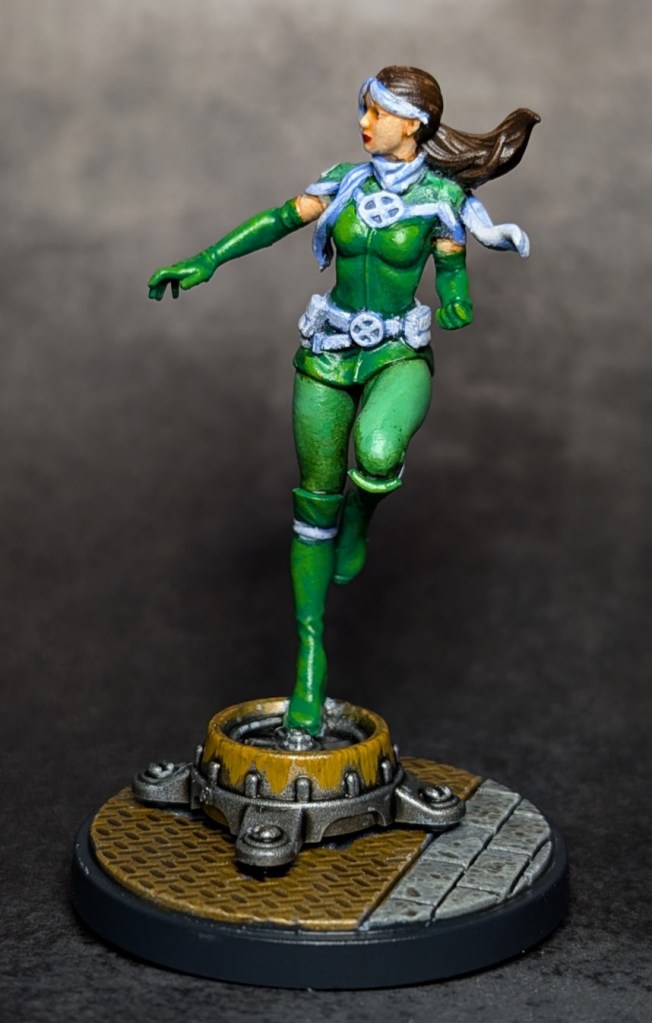
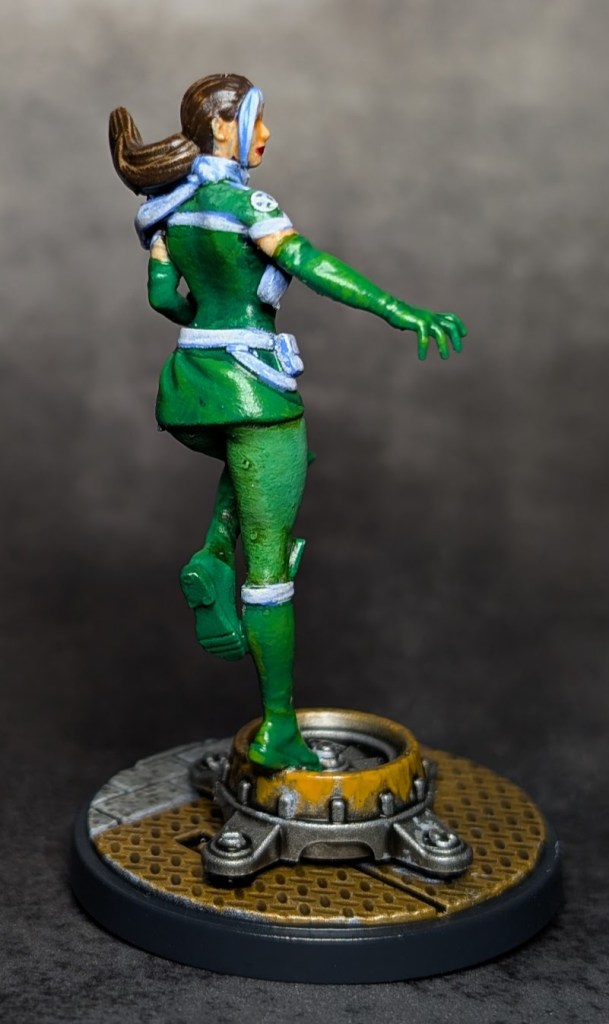
Here’s another proxy job for my 40mm miniature collection, it’s funny how much energy I spend trying to find that “goldilocks” scale! Rogue in classic MCP suffers from Jim Lee design syndrome, and again… I’m not knocking Jim Lee’s design, I would just like to acknowledge that she’s had other, really cool costumes!
Luckily, I had extra bases from other MCP figs, so I swiped an engine piece from a Necromunda model for her to perch on, and she looks pretty cool!
This is probably my favorite Rogue costume ever, so kudos to the folks who put in the work on it!
I am currently working out some fantasy prints in this scale, as I’m realizing that there are some benefits to working large like this. I love the challenge of painting 15mm scale minis, and you can’t beat the storage options, but 40mm has it’s charms as well! I’ll explore them more in depth in an upcoming post!
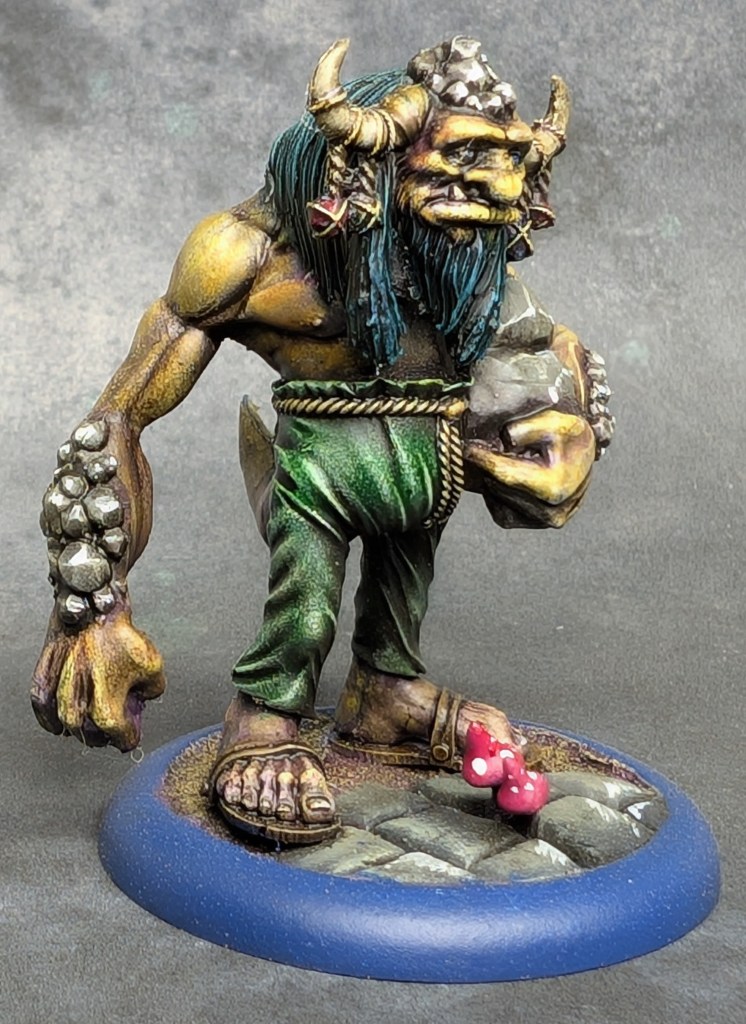
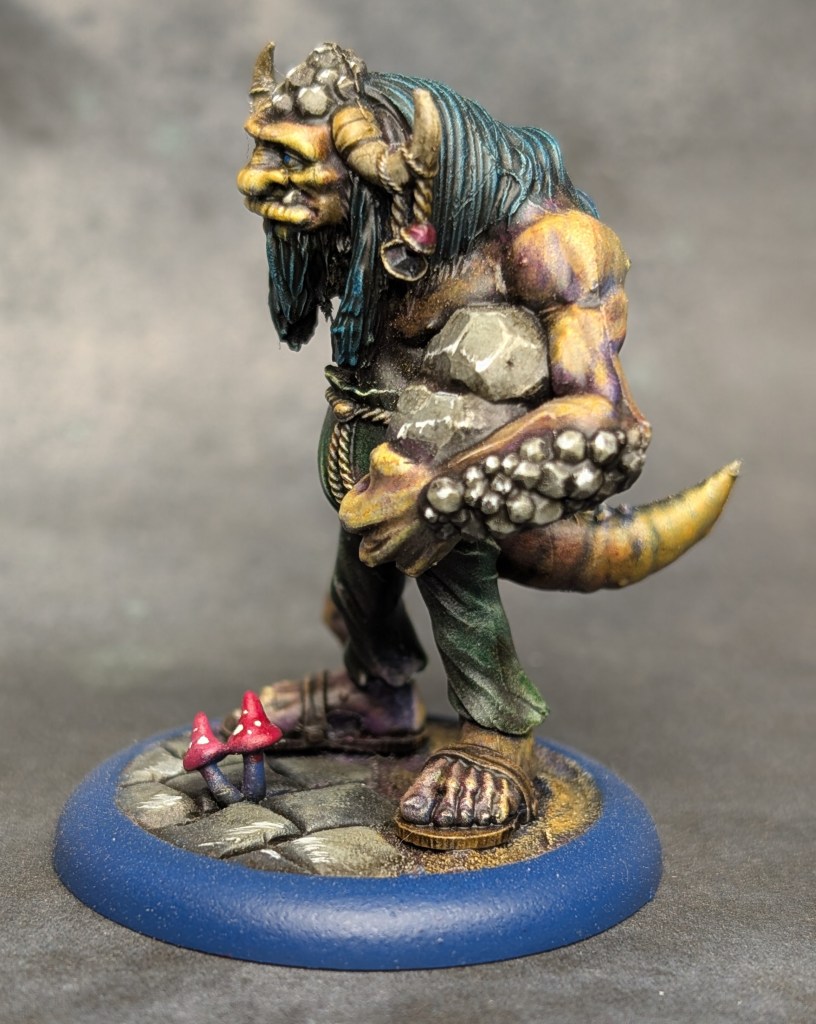
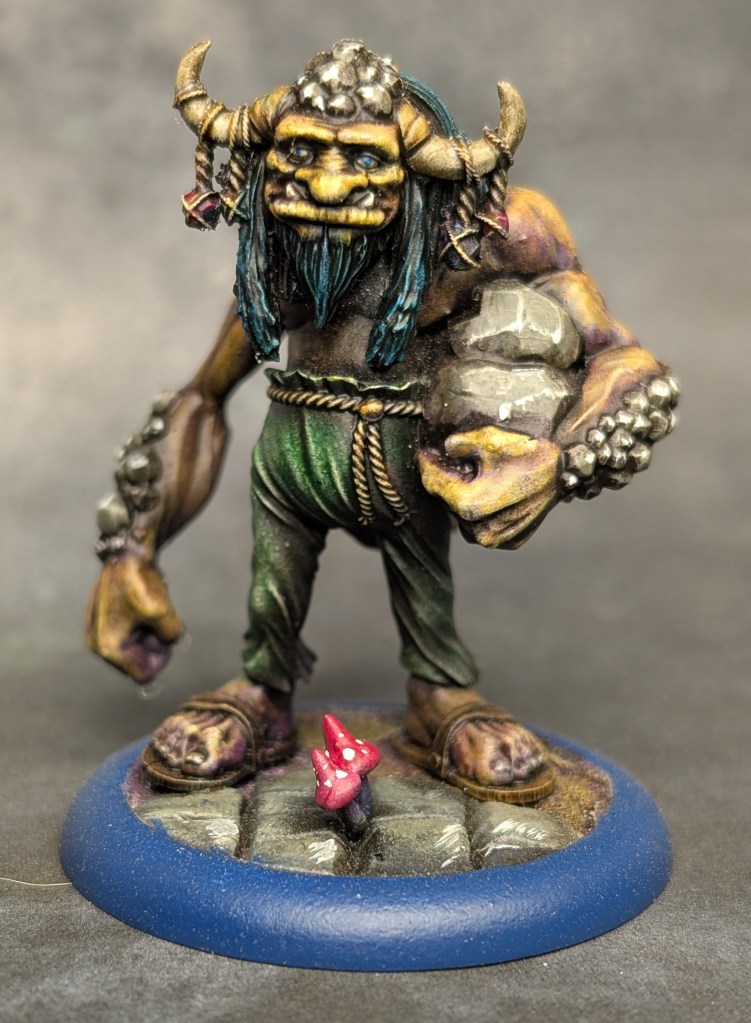
Here’s my first Moonstone miniature for 2025, and he’s one of my favorites! (They’re all my favorite, who am I kidding?) Boulder the Troll borrows a lot from Ludo the rockfriend from Labyrinth, but Ludo’s cool as hell, so I’m not faulting Goblin King Games for paying homage to such a great character!
In game, Boulder can summon rocks, which sounds pretty familiar. He also has a cool trick that lets him sing to Moonstones and bring them higher up out of the ground, effectively reducing the amount of time characters have to spend digging them up!
I went with a couple of oil washes on this figure, with a little Payne’s Grey on the cool colors, and a burnt umber wash on the skin tones. This toned down the greens pretty well, and really helps the figure stand out on my display shelf!
Boulder can be played with a goblin crew, I’ll have to post a shot of some of them together with their big friend!
I am blaming my friend Randon for this. I just fell helplessly back in love with Marvel Crisis Protocol. It’s not entirely his fault, the models are incredible, fun to paint, and really easy to collect… but I’m blaming him, primarily because he’s a fun guy to pal around with, but he’s also an incredible painter, which can get the inspiration juices flowing pretty easily!
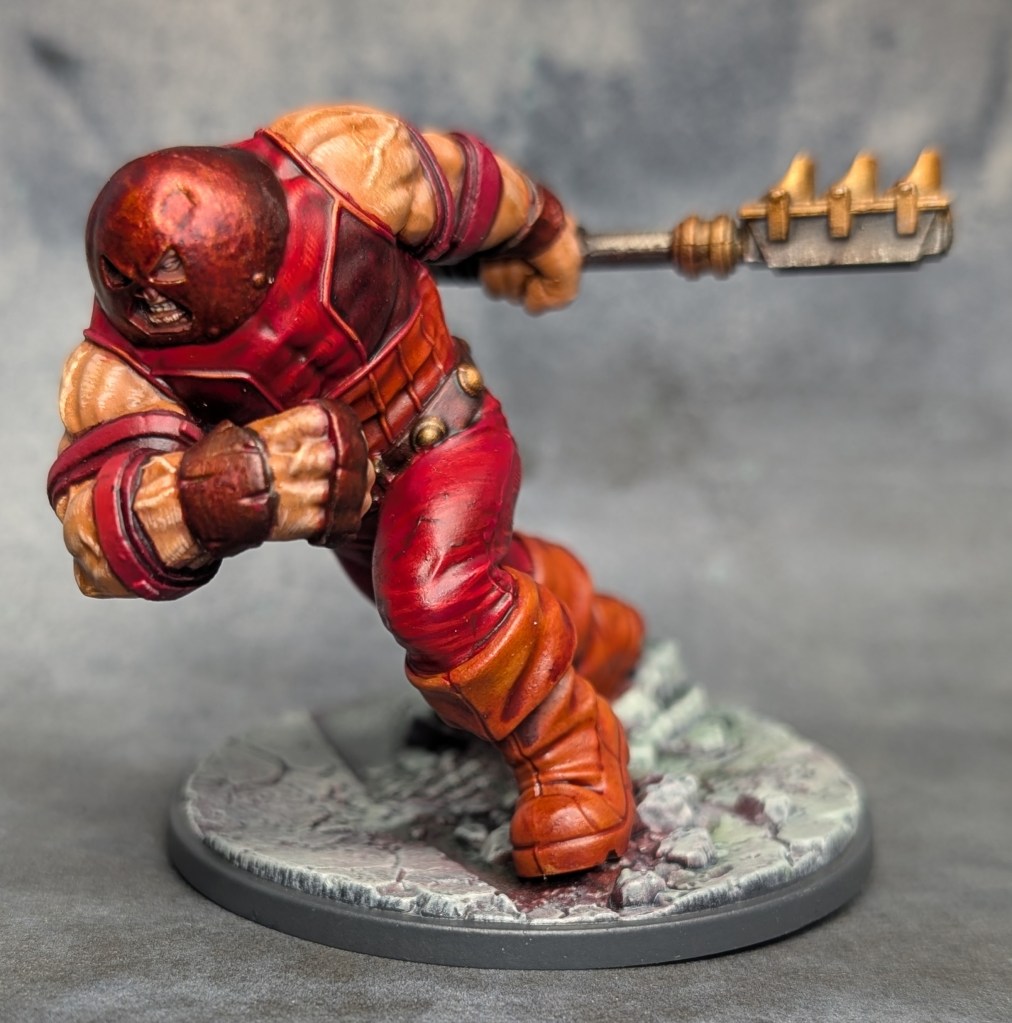
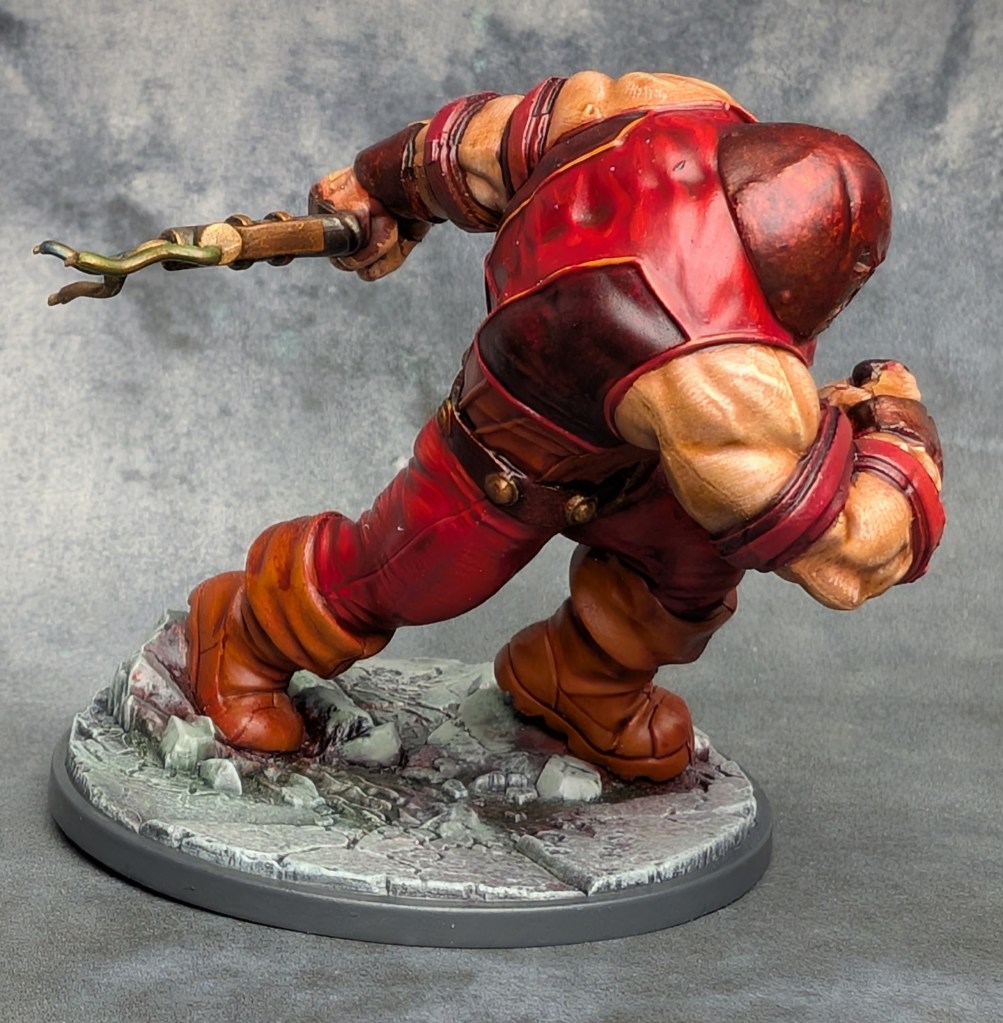
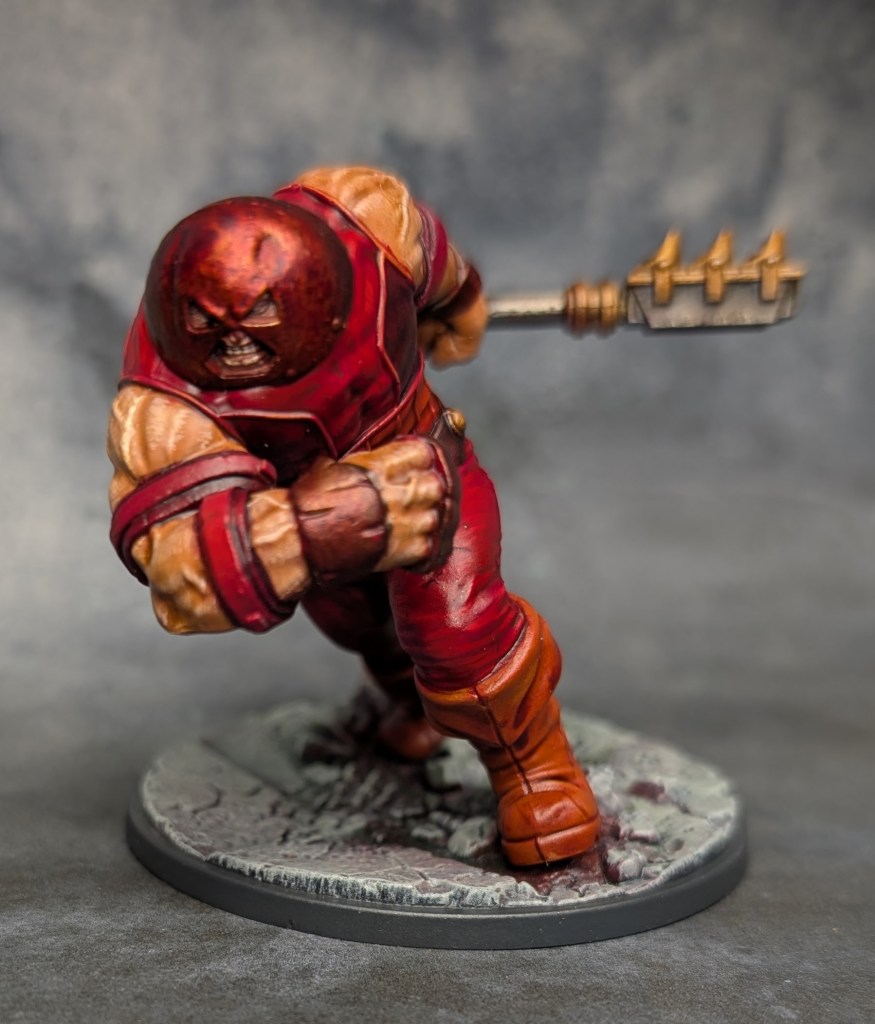
The first model off the workbench is Cain Marko, half-brother of Charles Xavier and the wielder of the Crimson Gem of Cyttorak… but you probably know him as the Juggernaut!
This model is incredible! He’s so dynamic, and the base alone conveys the brutal stompiness of the character in such a huge way! I also love that Cain just grabbed a stoplight to hit someone with on his way to the fight!
Juggernaut is one of those characters that I’ve loved since I was a kid. He’s a bad guy most of the time, but he seems to have some redeemable qualities. There was a run in the early 2000’s when he was a member of the X-Men that I loved, especially his friendship with Sammy the Squidboy. Good stuff, and it still hits me like a ton of bricks 20 years later!
There’s a bunch more MCP on the way, but Juggernaut is a great way to kick off this year’s projects! He also lets me check off a hobby bingo square, since he’s been sitting partially finished on a shelf for almost two years! Woohoo!
This is a first for me, I don’t normally post enough to warrant an actual year in review, but I’m getting healthier and a steady posting schedule has helped keep me motivated! The unpainted horde is slowly shrinking, and that’s a good thing, right?
I started out 2024 in the hospital after a nearly fatal bout of necrotizing pancreatitis, which I’m still dealing with today… and probably will for the rest of my life. My motor skills were shot, and I had lost nearly a third of my body mass from atrophy. It took a few months, but I was eventually able to control my hands well enough to paint for more than a few minutes, and now, rounding out the year, I’m back to a pretty steady level of quality and able to chip away at the horde.
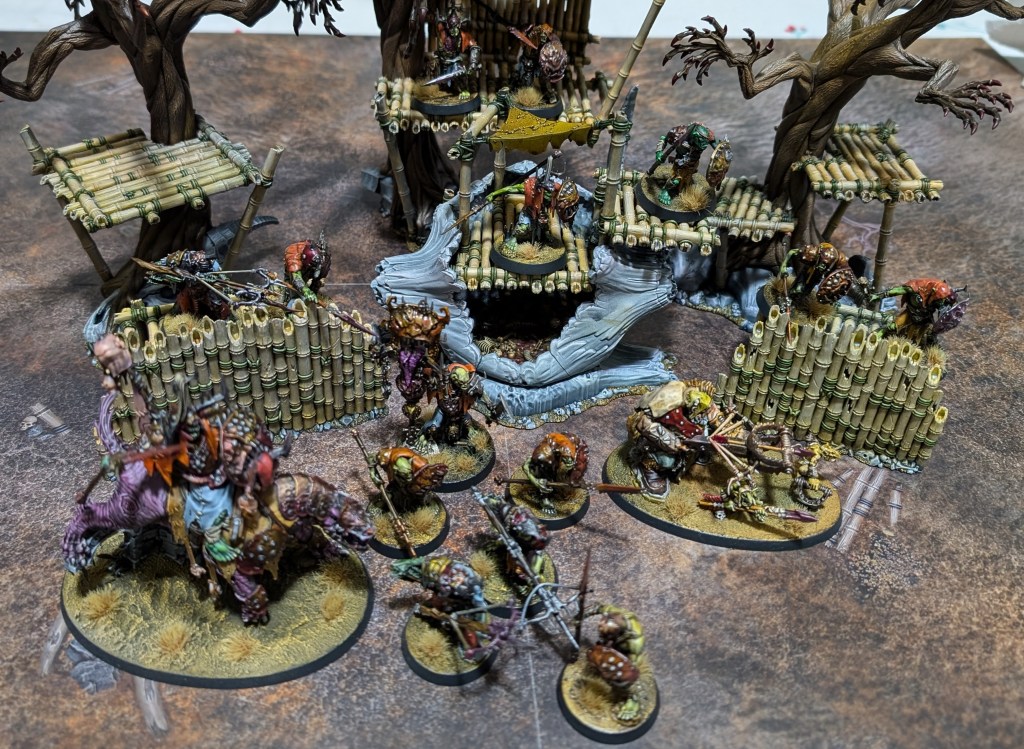
I also came really close to throwing away a couple of big, horde type armies, one a Tyranid group that was doing nothing but piss me off, and the other a Kruleboyz army that was just gathering dust. Spearhead helped me get over the Kruleboyz blocker, and I’m close to finishing off 1,000 points of painted figs for AOS, which will be cool.
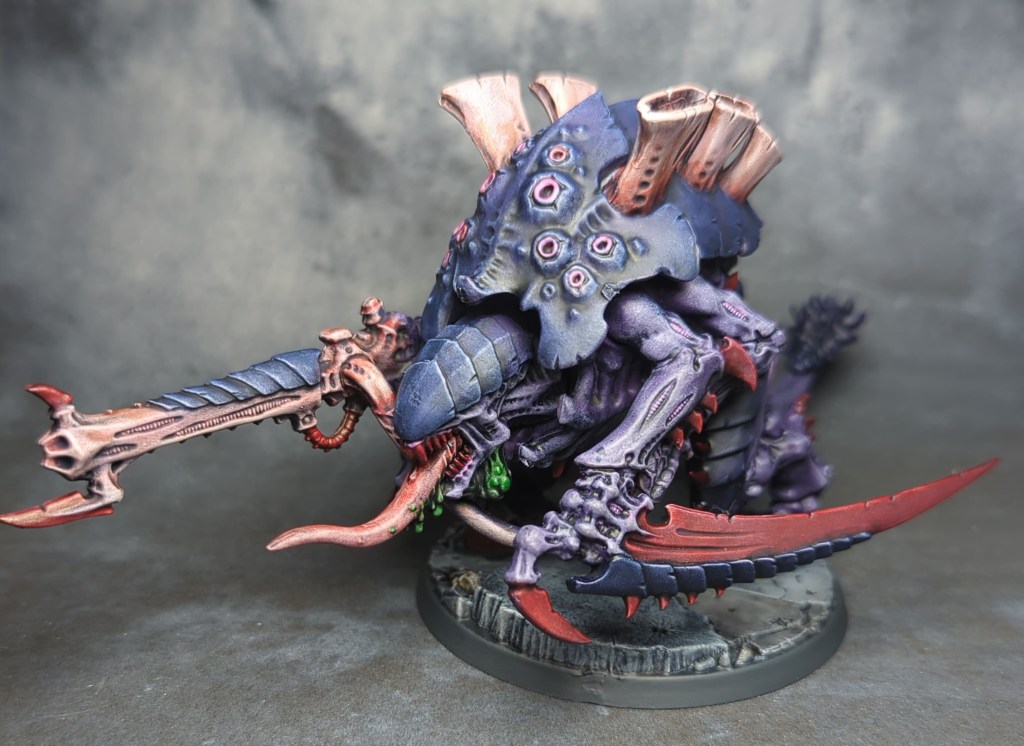
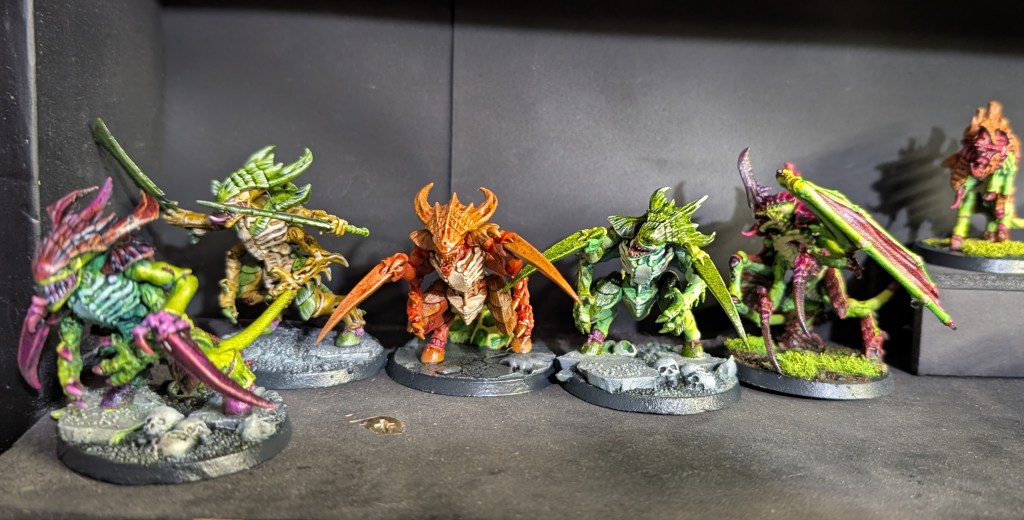
The Tyranids were a whole other story! I have always loved the bugs, but I struggle with painting the same damned pattern and color scheme on a hundred models. I got bored. I changed my color scheme a hundred million times. I also played a game of 10th edition 40k, and freaking hated it. I go You go HAS TO GO!
Since then, though, I’ve played two games of boarding actions, and had a bit more fun. It’s still a giant pain in the ass, but I see some fun to be had here… only because my game group is amazing. If I was playing modern 40k with random folks? I would become a hermit and leave society altogether.
I also settled on a color scheme, which is essentially ALL THE COLORS. I’m happy with that, and the combined effect of all these colorful bugs makes me happy. I’m close t0 500 points of painted bugs, mostly chaff, so I’ll be sure to fill that out in the future.
The Marvel Zombicide figs are coming along, with about a dozen figs finished out of several hundred. I’ll be making steady progress on those in the year to come!
My Frostgrave/Five Parsecs/Mordheim project finally got off the ground, but it’s mostly assembled figs with very little paint. Still, it’s progress, and I’m having fun getting the stories for the characters together and have started building out terrain.
I’m also plowing right back in to Necromunda, mostly because it’s a great game to kitbash figures from. I’m hoping to build out some scenarios in the future, but for now I’m focused on building out my warbands and terrain for the game.
Warcry is also something I should be focusing on more, it’s probably the best modern GW game, but I went overboard on it and have too many warbands. But, that being said, I did get a chunk of the terrain done and was able to use it at a Spearhead retreat back in September, which I loved.
My Malifaux projects have been getting wrapped up a bit as well, with several gangs getting finished up. I had grand plans towards collecting entire keywords of Malifaux figs, but I had a change of heart that has me strongly considering divesting a large amount of the figs from this game, and probably all the games I play.
Moonstone has continued to be the salve from Grimdark burnout, the minis are cheery and whimsical, tons of fun to paint, and look great on a shelf. Plus, my wife likes them, so that’s a plus! The other side effect is that I find myself painting my other stuff with a much brighter palette now, which is making me happy.
15mm minis took a huge amount of my attention over the summer, which was a welcome break. I really love painting the smaller figs, and the scenery is a ton of fun to paint up as well. As much as I dream of playing 15mm Mordheim, however, I’m not sure it’s ever going to happen, unless I paint up entire warbands for other folks to play. Still, solo play is an option, and I really enjoy looking at these tiny models!
The last big project of 2024 was realizing that I am only one person, and that during my rehabilitation period I spend a bit of time feeling sorry for myself and buying models that I will never get around to painting. I made a goal to re-home a lot of the unopened boxes, especially from games that have been sitting in storage for more than two years. That’s resulted in me gaining back a lot of space in my studio, and has helped me focused on prioritizing what I want to do with whatever time I have left in this world to do it.
That sounds a little glum, but it’s actually the opposite. The effect of nearly dying last year has been a rally cry for me; I don’t want my hobby to be a chore. I want to celebrate these toy soldiers, and I want to really explore how painting and collecting, mindfully and with purpose, makes me feel! It’s really cathartic, in a way, and has helped me cope with my new reality in a way that I never thought possible.
Using this blog to chart my progress has been really healthy, and has helped keep me motivated towards finishing projects. I have some huge, but attainable goals for next year, so stay tuned!
I hope you all have had a positive hobby journey over this last year, and here’s to hobby tranquility in 2025!