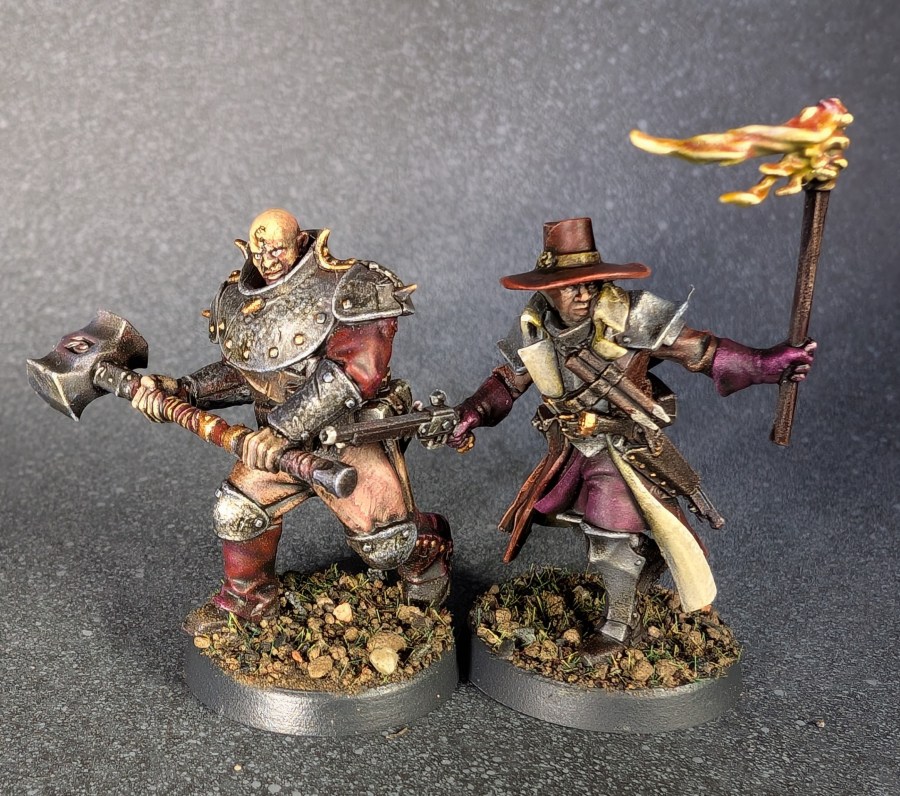
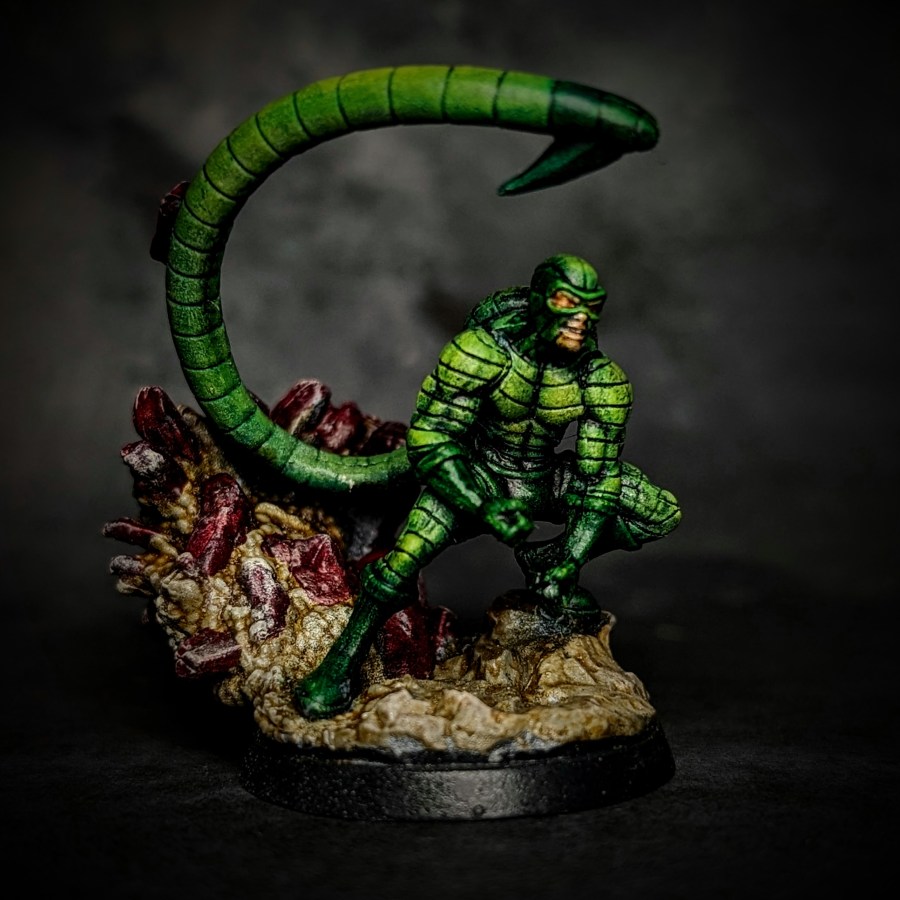
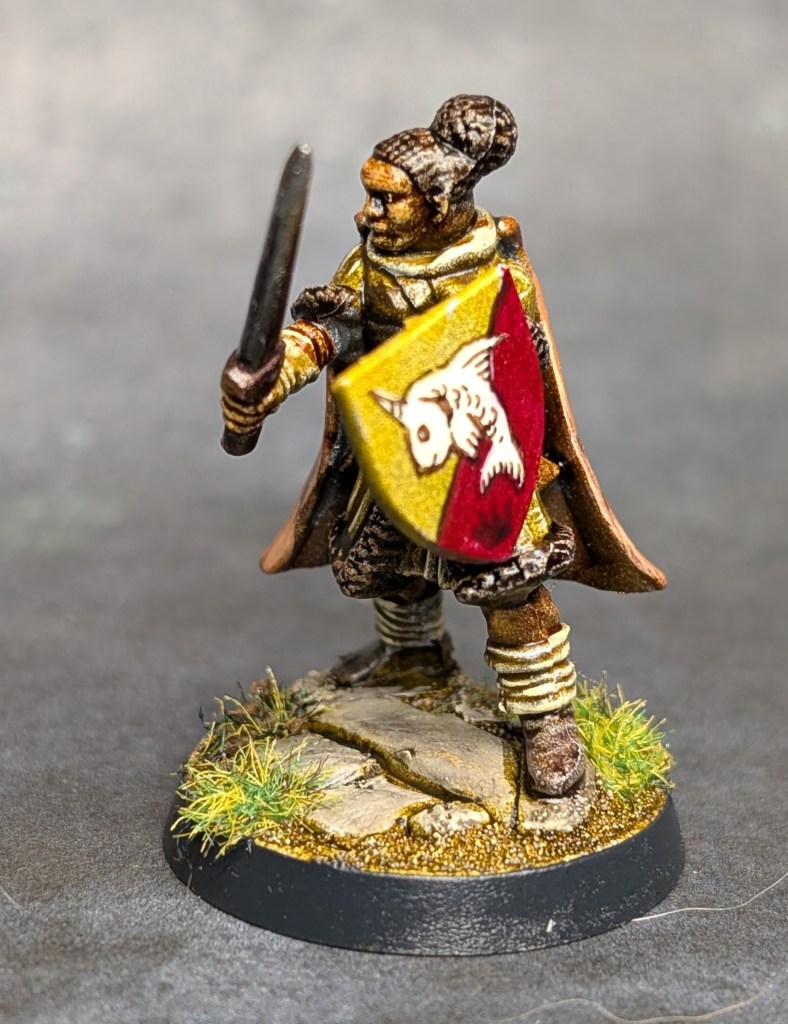
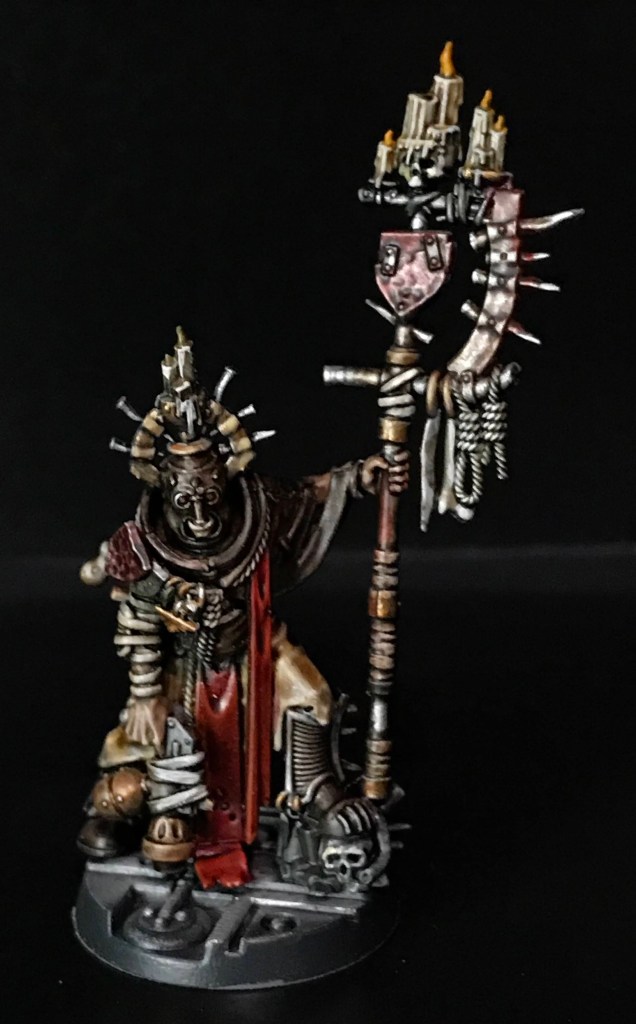
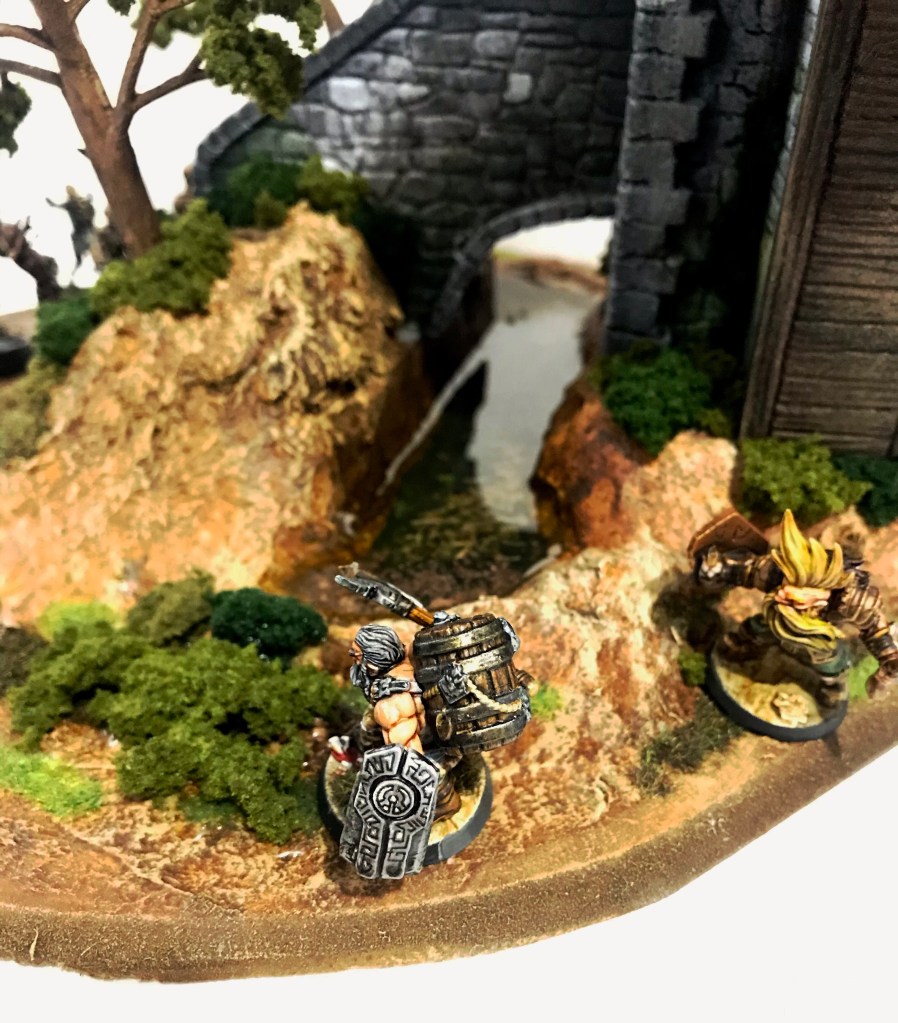
I’ve been working on building out a Witch Hunter warband for fantasy skirmish games, and with the Captain done, it was time to move on to the Warrior Priest.
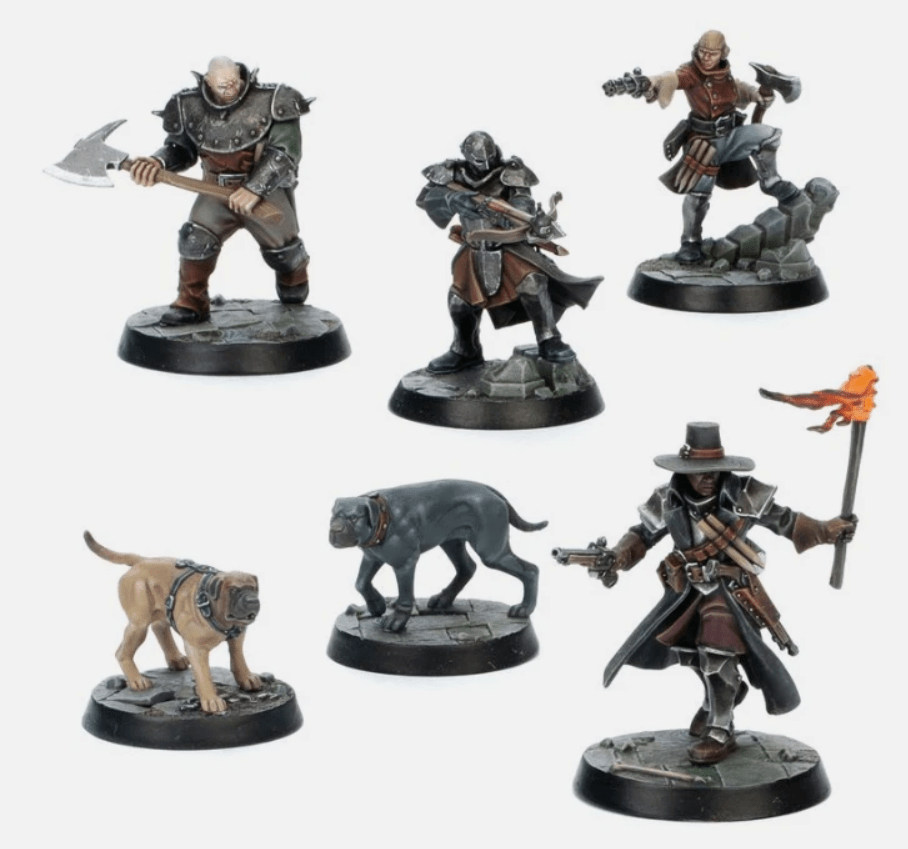
The Warrior Priest I fielded in Mordheim 25 years ago was a big bruiser with a two-handed warhammer. Going through the Hexbane’s Hunters warband from Warhammer Underworlds, I realized the big hunter with the mega axe could be converted without too much fuss.
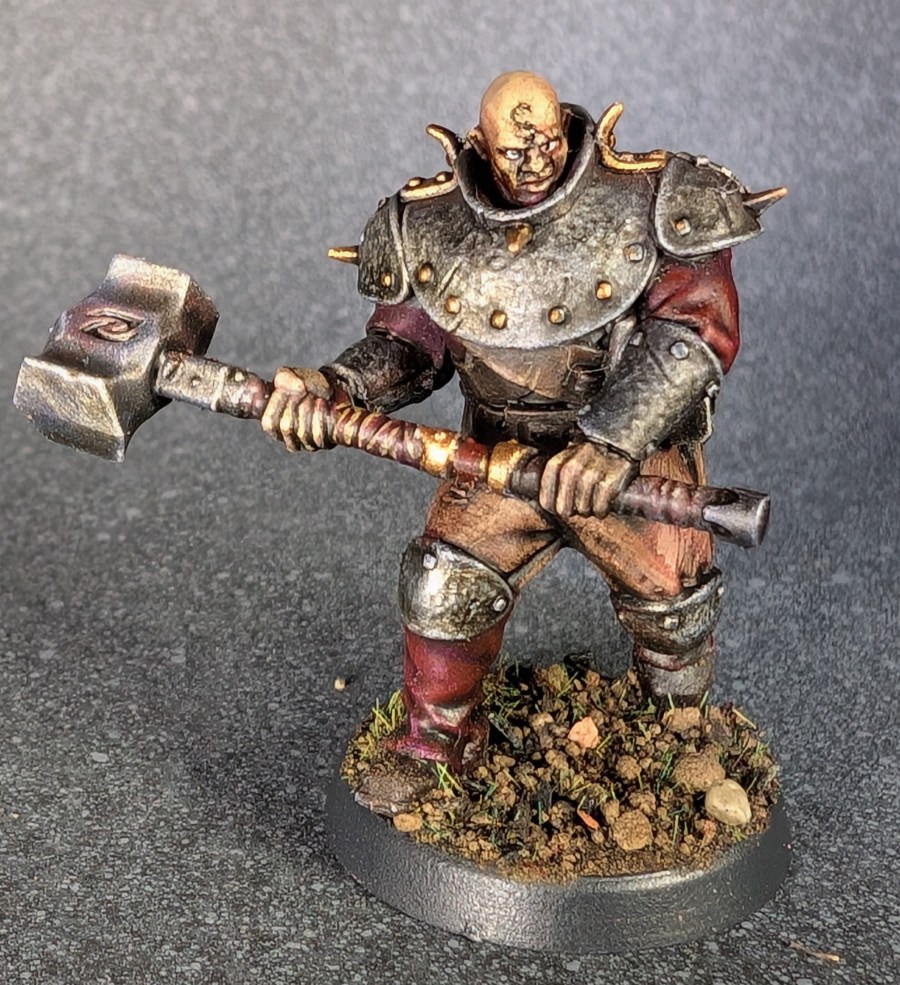
I took a two handed hammer off of a Chaos Raider, then worked out the haft so that it fit the arms of the hunter. It was a pretty simple conversion and really brings back the way my old Warrior Priest, at least in spirit!
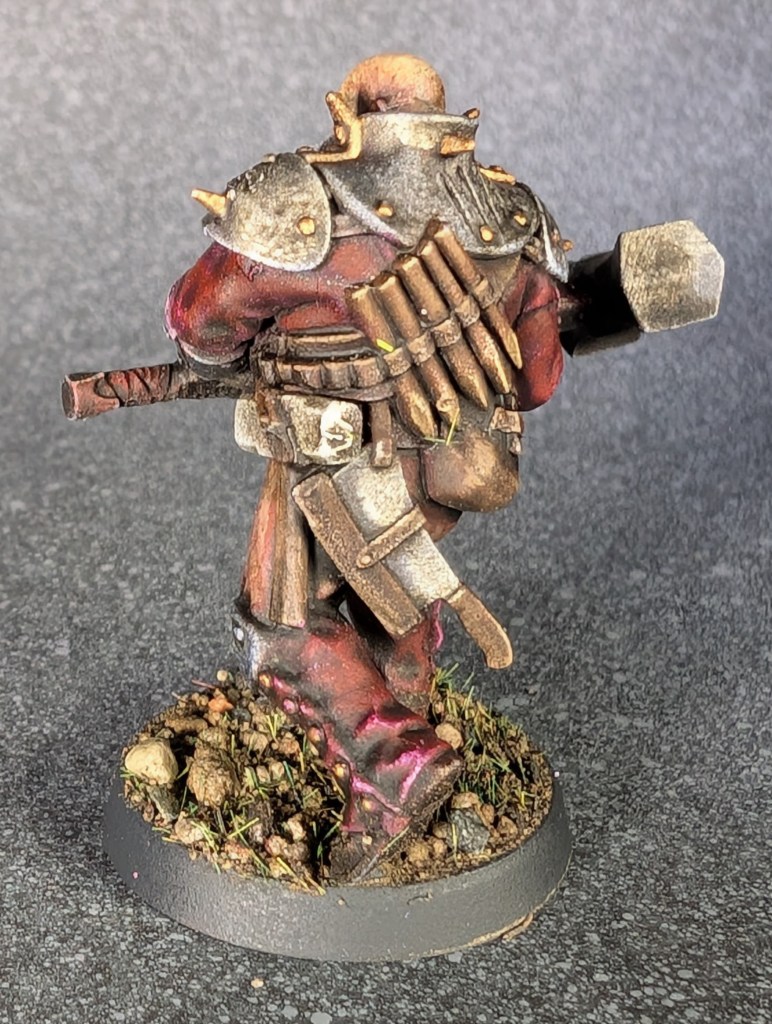
I kept to the same tones as the Captain, then put on an oil wash for this guy. After that was settled, I went back in for some highlights, then drew an “S” on his forehead. You know, for Squidward.
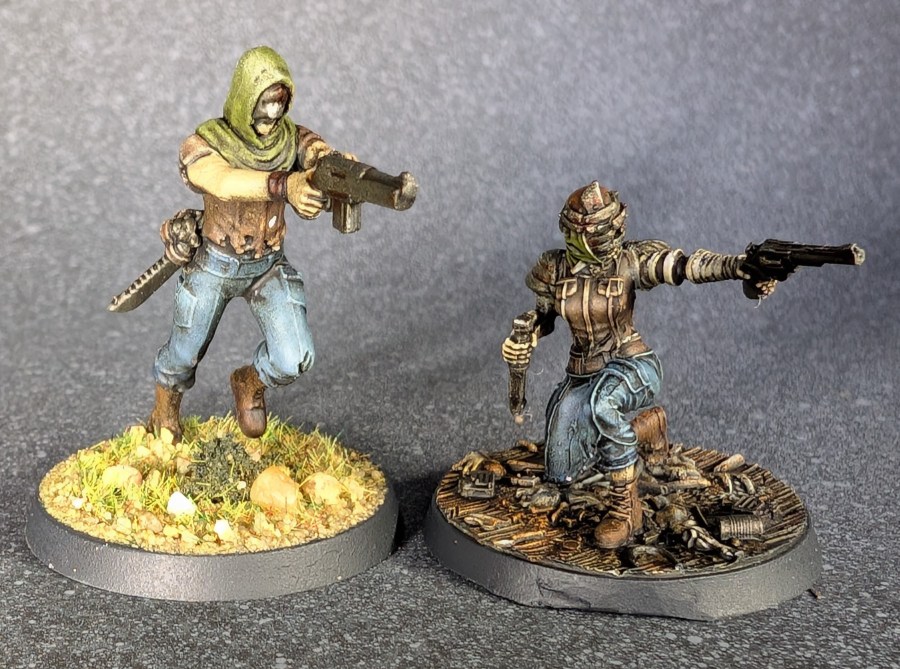
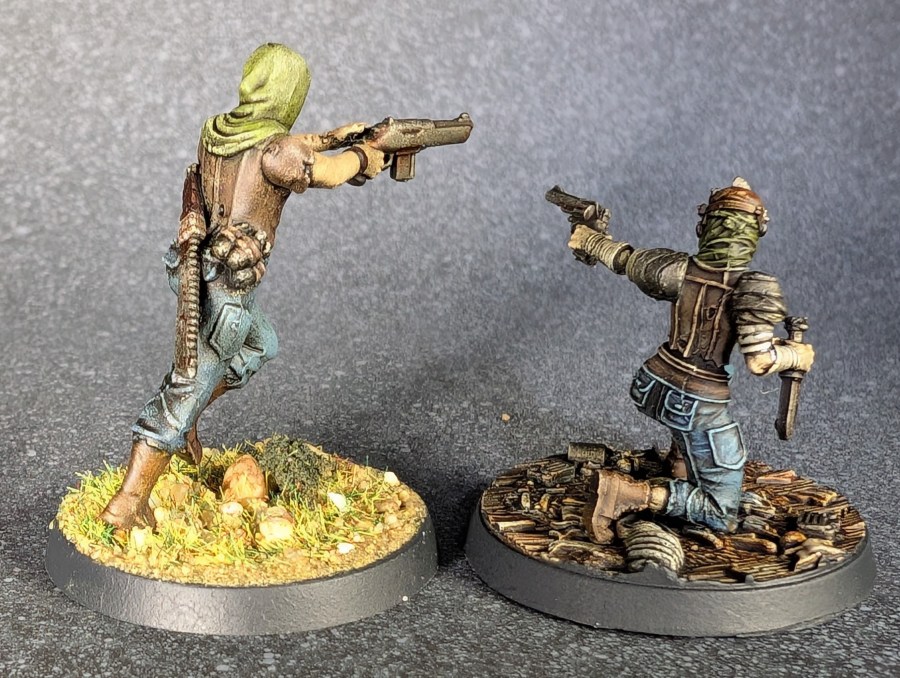
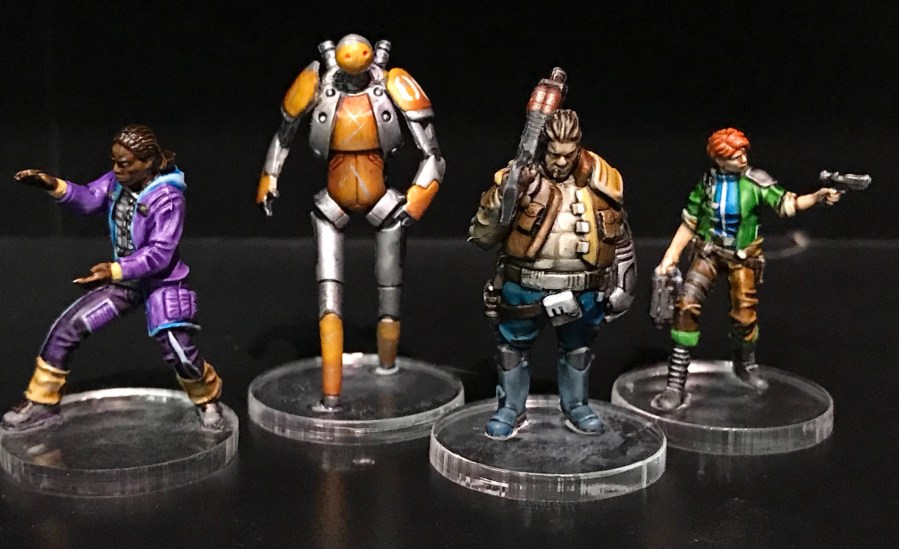
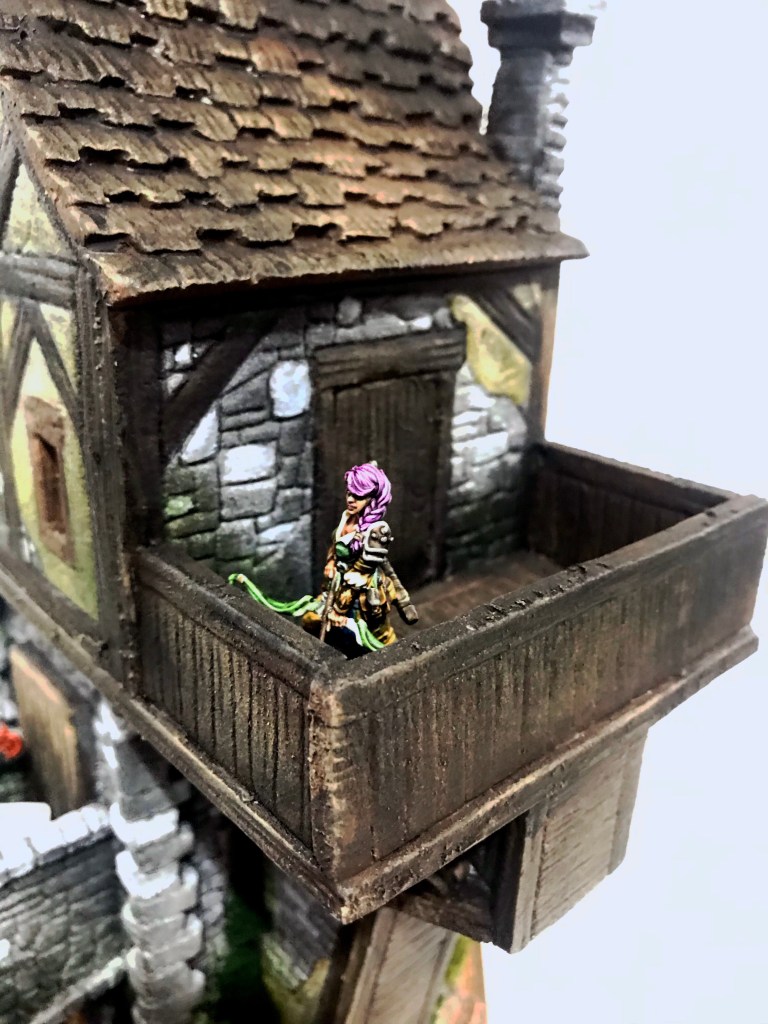
Continuing to work on my Disciples warband for Fallout: Factions! I’m adding another base mook and a leader model this time around.
First up is a basic raider with a gun, grenades, and knife. I didn’t mess around too much with it and just did base colors with an oil wash on it.
The kneeling figure is Dixie, one of the lieutenants of the Disciples group. She’s particularly blood-thirsty, and has a ton of hacked up corpses just hanging around her barracks. Sadly, the resin on the base got hacked pretty good when I was trying to trim the pour gate, but I don’t think it ruins the figure.
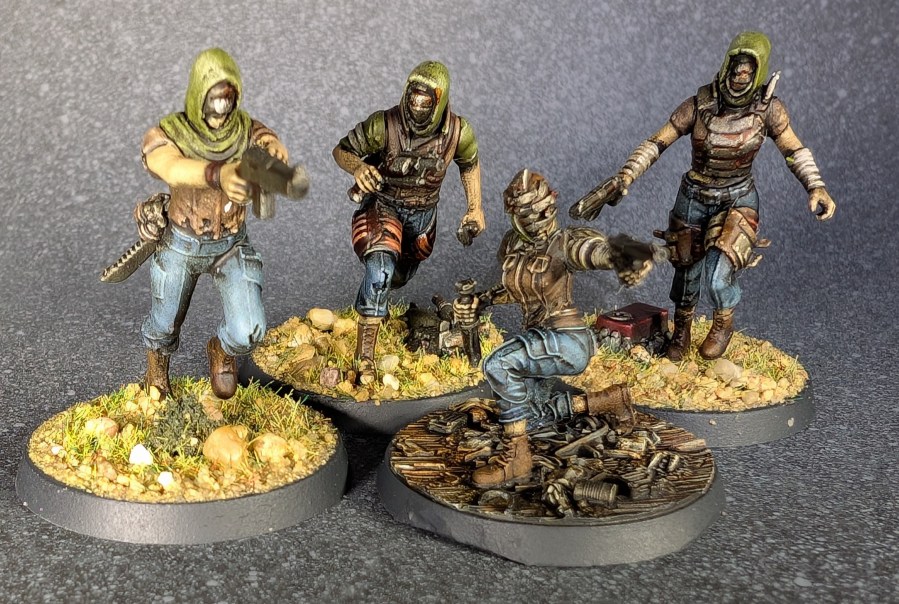
I’ll be using Dixie in Fallout: Factions as a random leader or fill-in trooper, depending on the situation. Here’s the group so far!
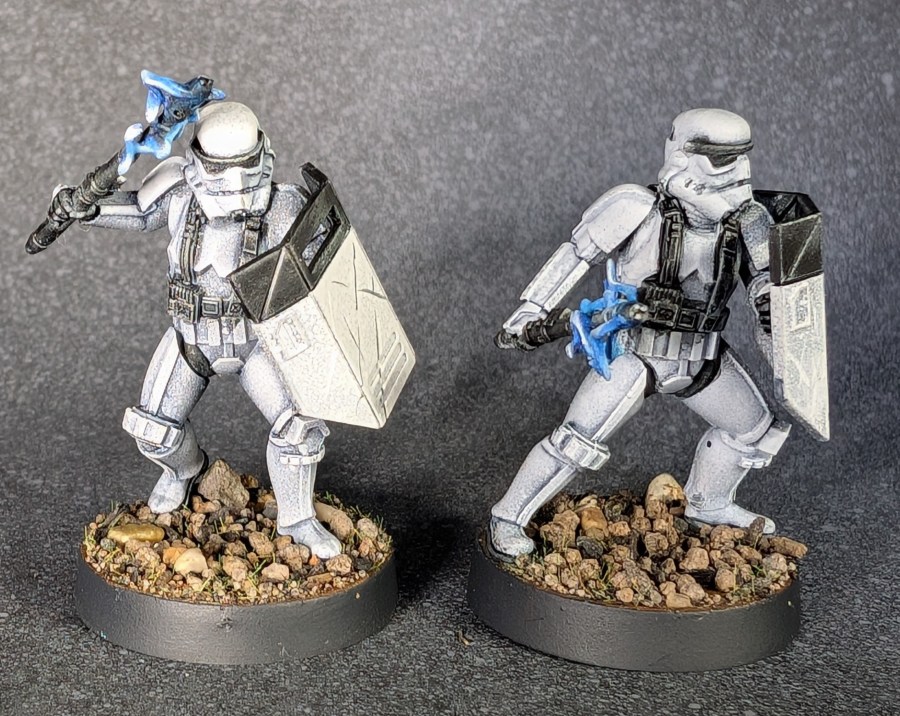
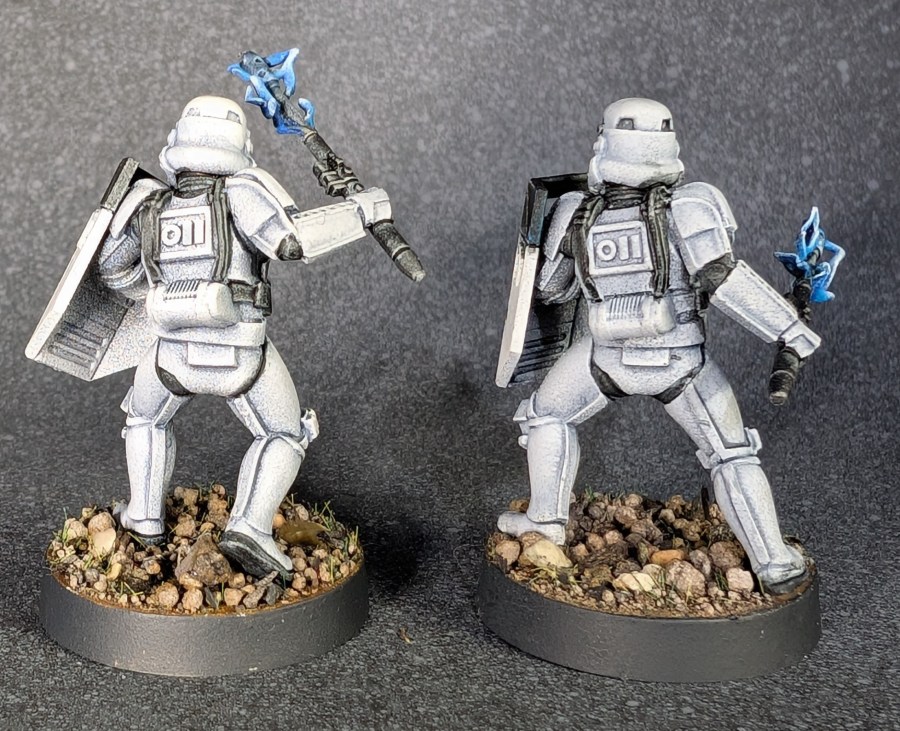
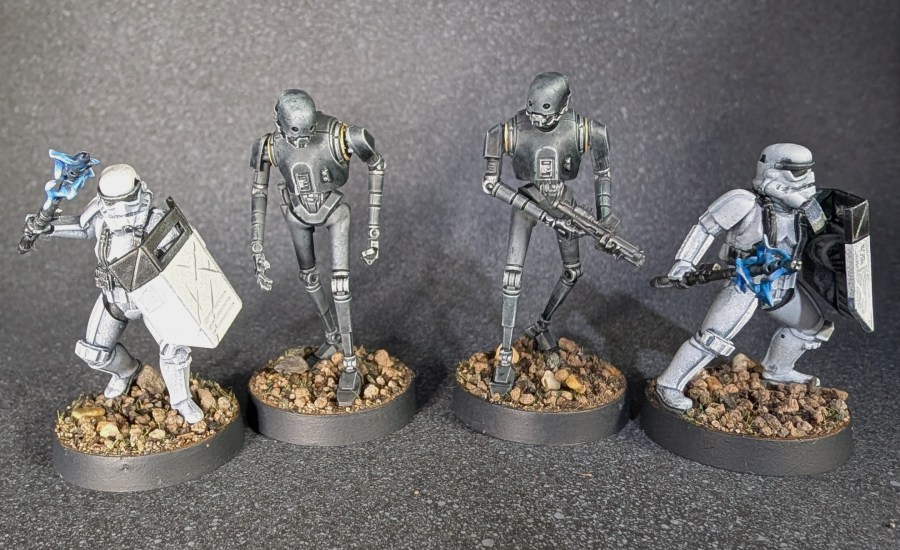
Getting back to the Empire Riot Control Squad fromAtomic Mass Games, we’re taking on the energy mace troopers today! Once again, I’m a huge fan of this entire box set.
These dudes remind me a lot of the electro mace trooper from The Force Awakens, so having two of them for this squad is pretty cool.
Painting them up wasn’t too bad, either. I went with a straight white undercoat, then used an oil wash to add the shading. The oil wash was two parts Payne’s Grey to one part burnt umber, then a liberal amount of white spirits to dilute.
Energy effects were a blue speed paint over silver, then general white highlights over the whole model after picking out the eyes and helmet rim in black. Some light damage effects on the shields, and I think I’ll call them done!
Anyone who has followed this blog for a longer period of time knows that I’ve been struggling with Warhammer 40,000 for a while. I’ve been playing off and on since 1989, and I honestly can’t stand the business model. If that game needs to be updated every three years after being in print for close to four decades? You’re doing a shit job.
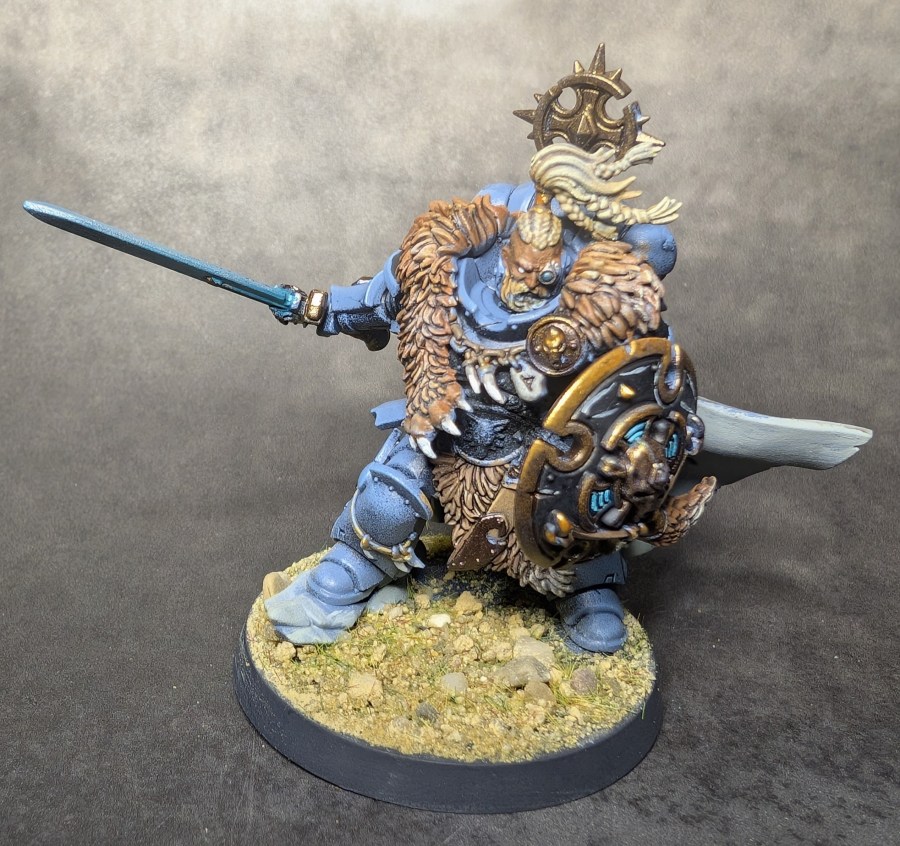
He’s mean! He’s beardy! He’s not a dwarf! But he should have a hammer anyway!
Sadly, most of my friends have a bad case of 40k Fever. It’s pretty much all they want to play, so I can either NOT play games with them and happily plug away on my other projects, or I can put together something that I do like in the lore and grumble about it a lot.
Yeah, I’m a bundle of fun. People line up around the block to play games with me.
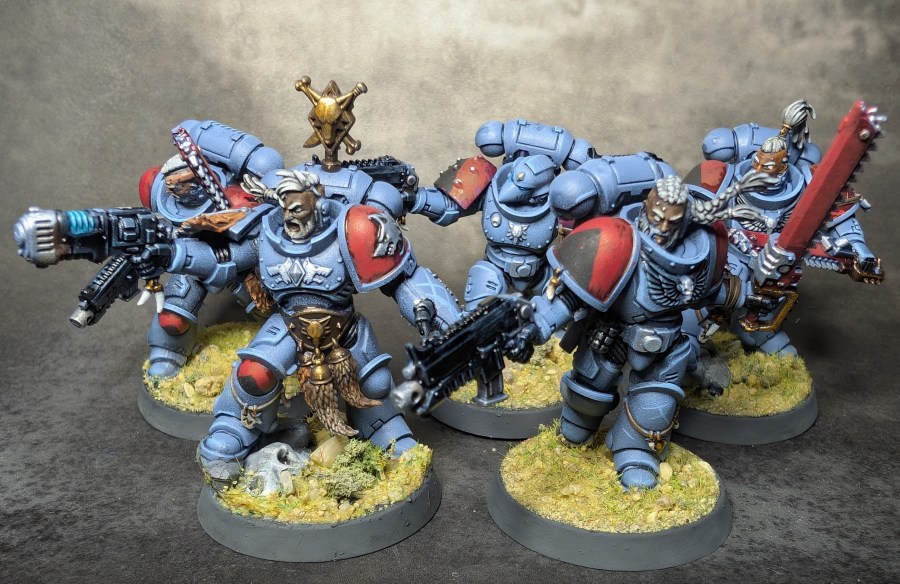
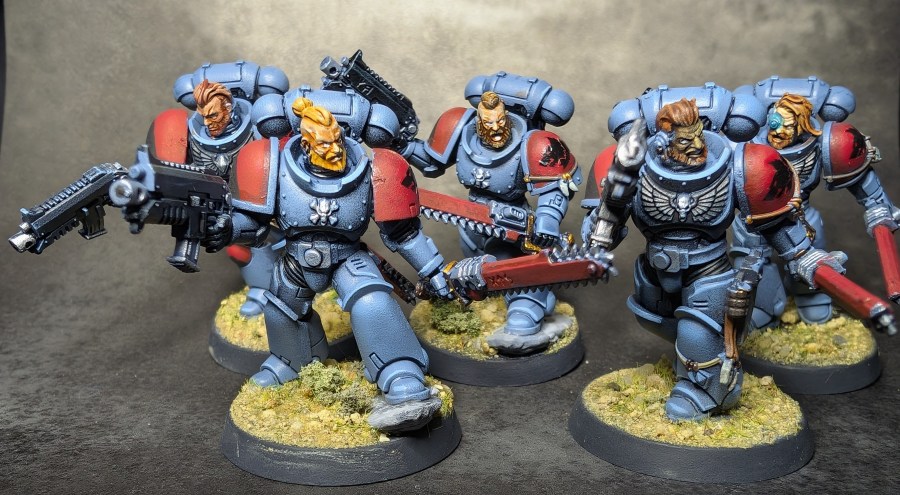
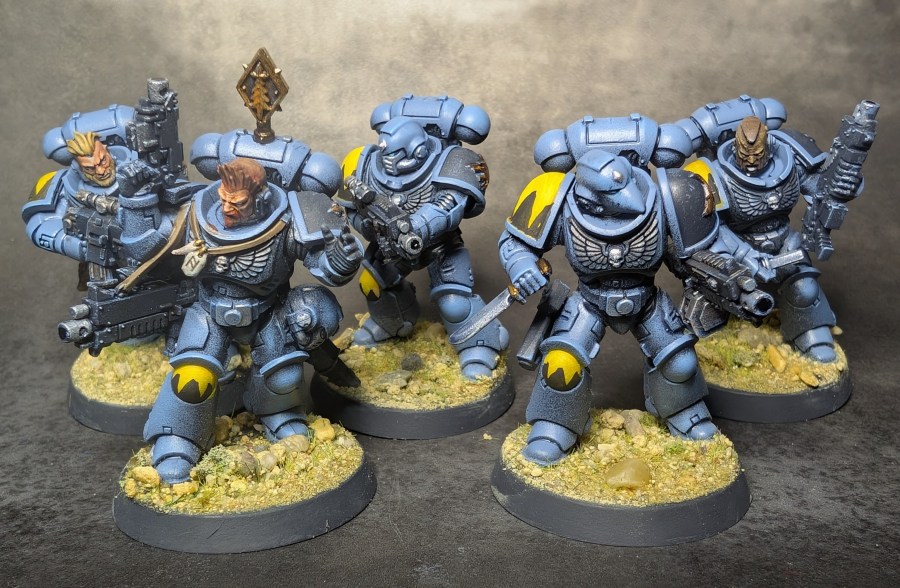
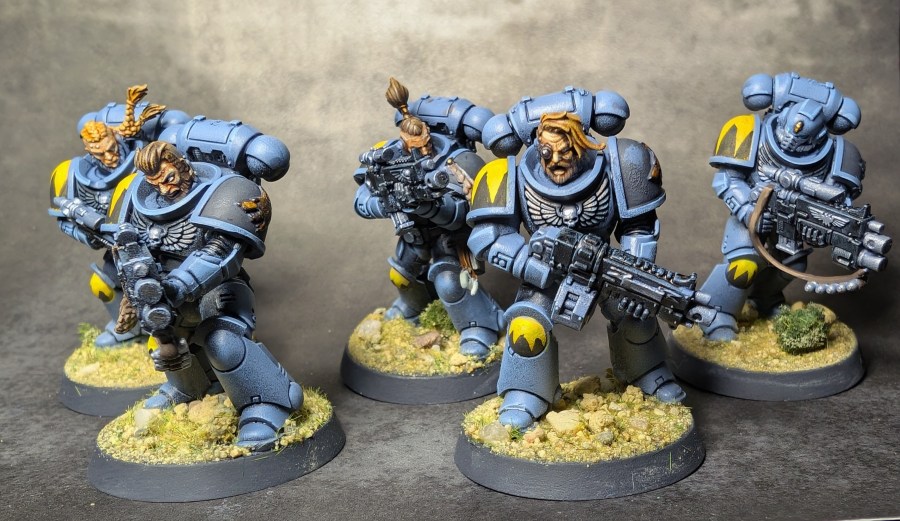
Space Wolves have always had a special place in my heart. They don’t care about the Codex Astartes, they look like they can pilot a longboat, and beards are cool. Plus, they have wolves. Wolves are cool.
I’m going to put together a total of 2,000 points for this army, for a game I really don’t like, just because the people I play with are a lot of fun and I don’t want to NOT play games with them!
Still not sure how to keep engaged enough to learn the janky ass rules without lighting it all on fire, though. Sure, One Page Rules has a good alternative, but good luck getting anyone with 40k Fever to break from the GeeDubs greed train. Grumble grumble.
I’ll have some Terminators up soon, and probably a Rhino or two. And some Bloodclaws and a Dreadnaught. That’s still not 2,000 points, but that’s what I own already, so it’ll have to do for now, hahaha!
While perusing through some posts from Argent Badger’s inspiring blog I stumbled across Dave’s excellent Wargamesculptor’s blog, and his annual “Paint What You Got Challenge“. It runs from the end of December through the end of February each year, and it’s exactly what it says on the tin; a challenge to paint what you have started or just sitting in your collection.
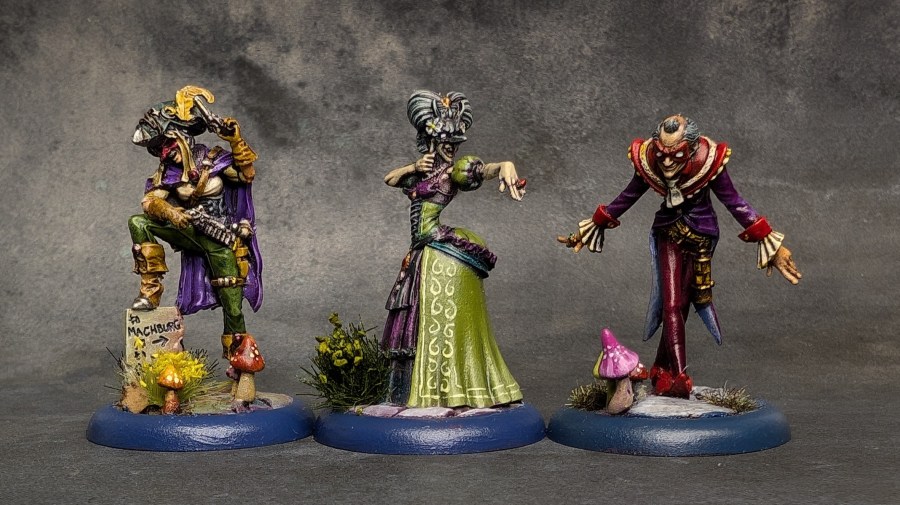
Rasputina crew for Malifaux, painted in 2021
I’m not going to even try to hide my enthusiasm. I have WAY too much stuff, and every time I look at the news I somehow end up feeling bad and buying MORE stuff. So, I probably need to cut back on the news and hide my debit card while I’m at it.
Core Space Minis painted in 2019
I’ve decided to take Dave’s idea and just run with it. So, from this post forward, I’m painting what I’ve got. I won’t be buying anything new, and barring gifts or something out of my control like that, everything you see posted from here on out will be stuff that’s just been sitting and waiting for some love.
Big Infinity terrain build for 2016!
Big thanks to Dave for the inspiration, and to Argent Badger and Kuribo for the great blogs!
I was born in 1969, burned bright in my punk rock days, and never thought I would see 30, let alone 50. Sure, I was a dedicated miniature hobbyist by the age of 14, but I also spent plenty of time in mosh pits and dabbled in things that Mother Warned Me About, so sitting here, in the far future and 55 years of age is not something I was ever prepared for.
Despite the apparent zeal the human race holds towards teetering off the narrow precipice of civilization into George Miller’s Mad Max future, the state of the miniature hobby has never looked brighter.
If supply chains hold up, that is.
2024 saw games like Trench Crusade pop up and cause a lot of folks to not only recognize that there are games outside of the GW Sphere, but that those games might be viable as well. That’s nothing but good news.
Even GW seems intent on putting out material for their specialist games, which allows titles like Warcry and Necromunda to thrive despite the all consuming nature of 40k and AOS.
Now that I’m looking at the year ahead, I am really excited to double down on some commitments I made to myself in the latter part of last year.
I want to adhere to a couple of posts a week here on the blog, since it keeps me motivated and helps thin out the horde of unpainted minis that have taken over my studio.
I want to focus on smaller games from smaller companies, but I also want to play with stuff that I forgot I loved, like Marvel Crisis Protocol and Shatterpoint.
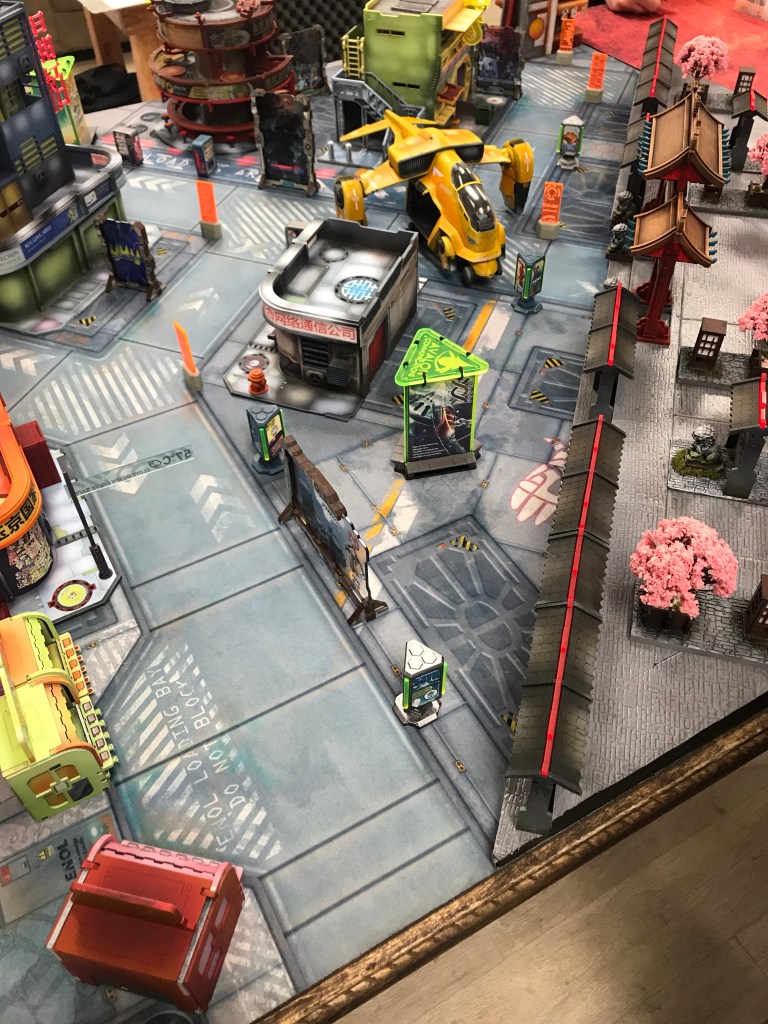
I am also going to be making a lot more terrain this year, because I finally finished up a building that I printed off, and I really loved the process and want to PLAY A GAME with the buildings!
The biggest thing I plan on focusing on, however, is my health. Miniature painting has been a large part of my life for over 40 years, and it has been a form of meditation for me that has seen me through a lot of adversity, as well as good times.
BUT, as with all hobbies, it can be a bit all consuming! I really like to buy new models. Sometimes those will sit on a shelf for years, untouched. Part of focusing on my mental health is recognizing that it’s really not healthy to throw money at stuff that I’m not doing anything with!
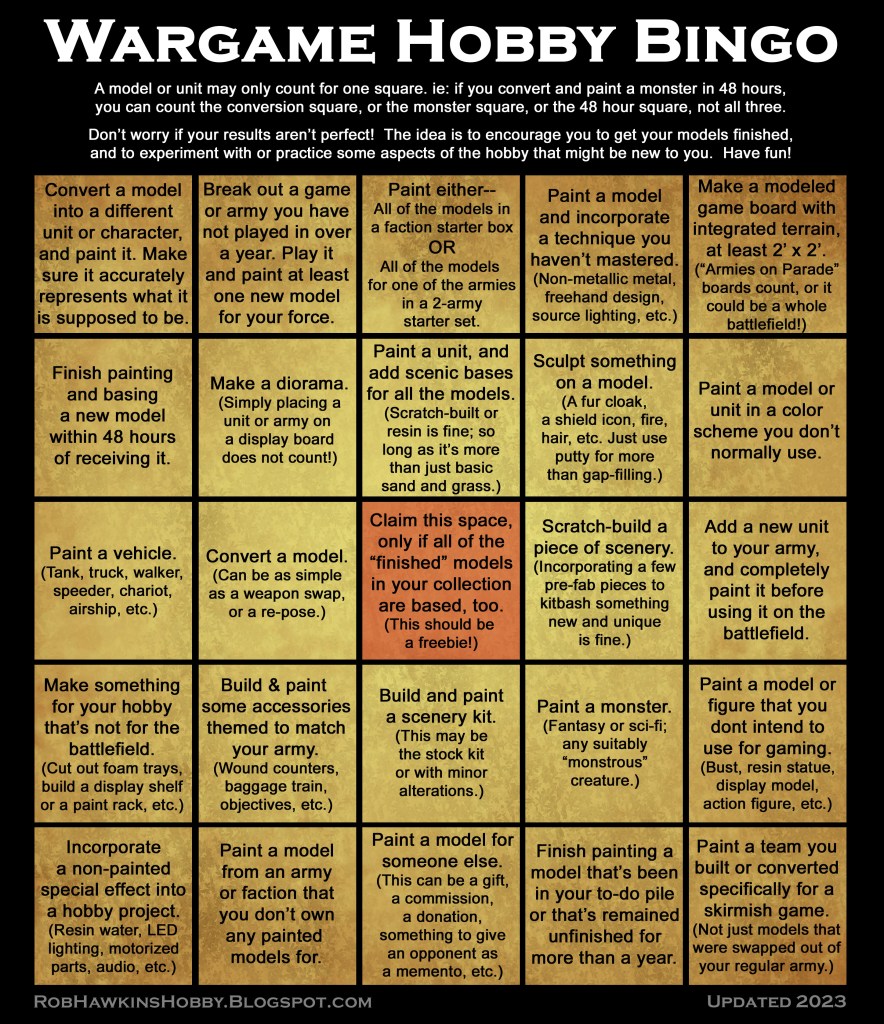
It’ll be an interesting year. I’m also thinking about taking on Rob Hawkin’s hobby bingo challenge, because this bingo card is epic and it would be fun to challenge myself to do some of these!
That’s the year ahead. Hopefully, you are all well, and have plenty of hobby happiness to come!
This is a first for me, I don’t normally post enough to warrant an actual year in review, but I’m getting healthier and a steady posting schedule has helped keep me motivated! The unpainted horde is slowly shrinking, and that’s a good thing, right?
I started out 2024 in the hospital after a nearly fatal bout of necrotizing pancreatitis, which I’m still dealing with today… and probably will for the rest of my life. My motor skills were shot, and I had lost nearly a third of my body mass from atrophy. It took a few months, but I was eventually able to control my hands well enough to paint for more than a few minutes, and now, rounding out the year, I’m back to a pretty steady level of quality and able to chip away at the horde.
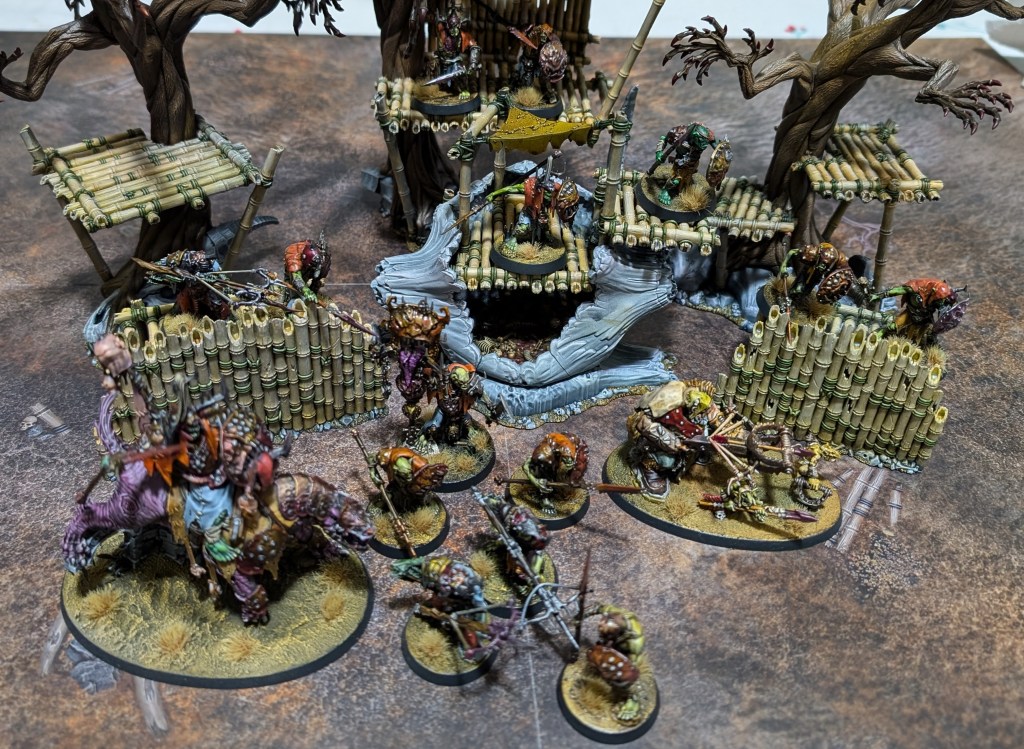
I also came really close to throwing away a couple of big, horde type armies, one a Tyranid group that was doing nothing but piss me off, and the other a Kruleboyz army that was just gathering dust. Spearhead helped me get over the Kruleboyz blocker, and I’m close to finishing off 1,000 points of painted figs for AOS, which will be cool.
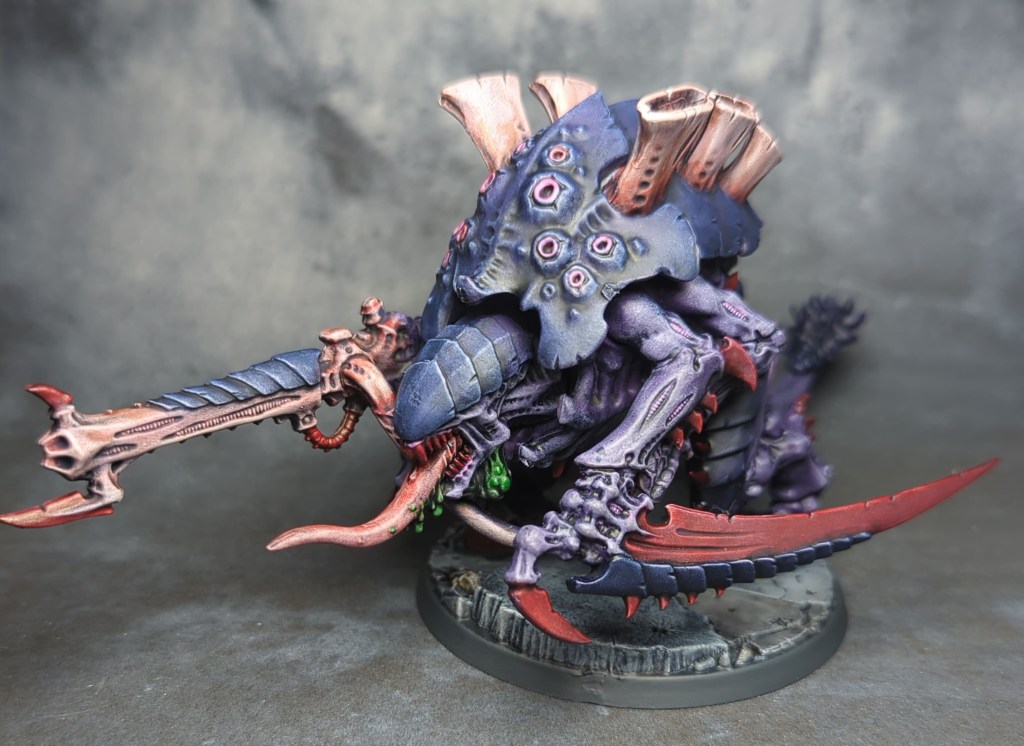
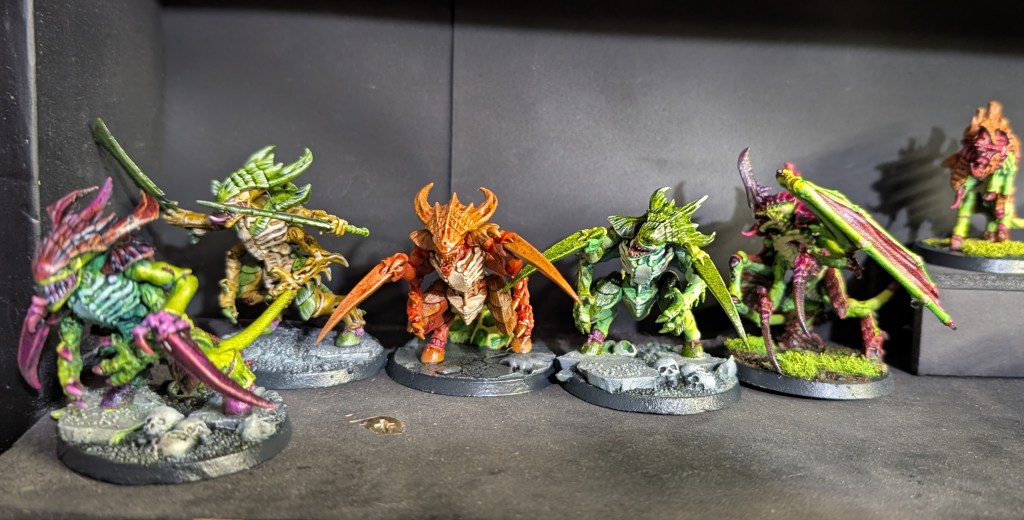
The Tyranids were a whole other story! I have always loved the bugs, but I struggle with painting the same damned pattern and color scheme on a hundred models. I got bored. I changed my color scheme a hundred million times. I also played a game of 10th edition 40k, and freaking hated it. I go You go HAS TO GO!
Since then, though, I’ve played two games of boarding actions, and had a bit more fun. It’s still a giant pain in the ass, but I see some fun to be had here… only because my game group is amazing. If I was playing modern 40k with random folks? I would become a hermit and leave society altogether.
I also settled on a color scheme, which is essentially ALL THE COLORS. I’m happy with that, and the combined effect of all these colorful bugs makes me happy. I’m close t0 500 points of painted bugs, mostly chaff, so I’ll be sure to fill that out in the future.
The Marvel Zombicide figs are coming along, with about a dozen figs finished out of several hundred. I’ll be making steady progress on those in the year to come!
My Frostgrave/Five Parsecs/Mordheim project finally got off the ground, but it’s mostly assembled figs with very little paint. Still, it’s progress, and I’m having fun getting the stories for the characters together and have started building out terrain.
I’m also plowing right back in to Necromunda, mostly because it’s a great game to kitbash figures from. I’m hoping to build out some scenarios in the future, but for now I’m focused on building out my warbands and terrain for the game.
Warcry is also something I should be focusing on more, it’s probably the best modern GW game, but I went overboard on it and have too many warbands. But, that being said, I did get a chunk of the terrain done and was able to use it at a Spearhead retreat back in September, which I loved.
My Malifaux projects have been getting wrapped up a bit as well, with several gangs getting finished up. I had grand plans towards collecting entire keywords of Malifaux figs, but I had a change of heart that has me strongly considering divesting a large amount of the figs from this game, and probably all the games I play.
Moonstone has continued to be the salve from Grimdark burnout, the minis are cheery and whimsical, tons of fun to paint, and look great on a shelf. Plus, my wife likes them, so that’s a plus! The other side effect is that I find myself painting my other stuff with a much brighter palette now, which is making me happy.
15mm minis took a huge amount of my attention over the summer, which was a welcome break. I really love painting the smaller figs, and the scenery is a ton of fun to paint up as well. As much as I dream of playing 15mm Mordheim, however, I’m not sure it’s ever going to happen, unless I paint up entire warbands for other folks to play. Still, solo play is an option, and I really enjoy looking at these tiny models!
The last big project of 2024 was realizing that I am only one person, and that during my rehabilitation period I spend a bit of time feeling sorry for myself and buying models that I will never get around to painting. I made a goal to re-home a lot of the unopened boxes, especially from games that have been sitting in storage for more than two years. That’s resulted in me gaining back a lot of space in my studio, and has helped me focused on prioritizing what I want to do with whatever time I have left in this world to do it.
That sounds a little glum, but it’s actually the opposite. The effect of nearly dying last year has been a rally cry for me; I don’t want my hobby to be a chore. I want to celebrate these toy soldiers, and I want to really explore how painting and collecting, mindfully and with purpose, makes me feel! It’s really cathartic, in a way, and has helped me cope with my new reality in a way that I never thought possible.
Using this blog to chart my progress has been really healthy, and has helped keep me motivated towards finishing projects. I have some huge, but attainable goals for next year, so stay tuned!
I hope you all have had a positive hobby journey over this last year, and here’s to hobby tranquility in 2025!
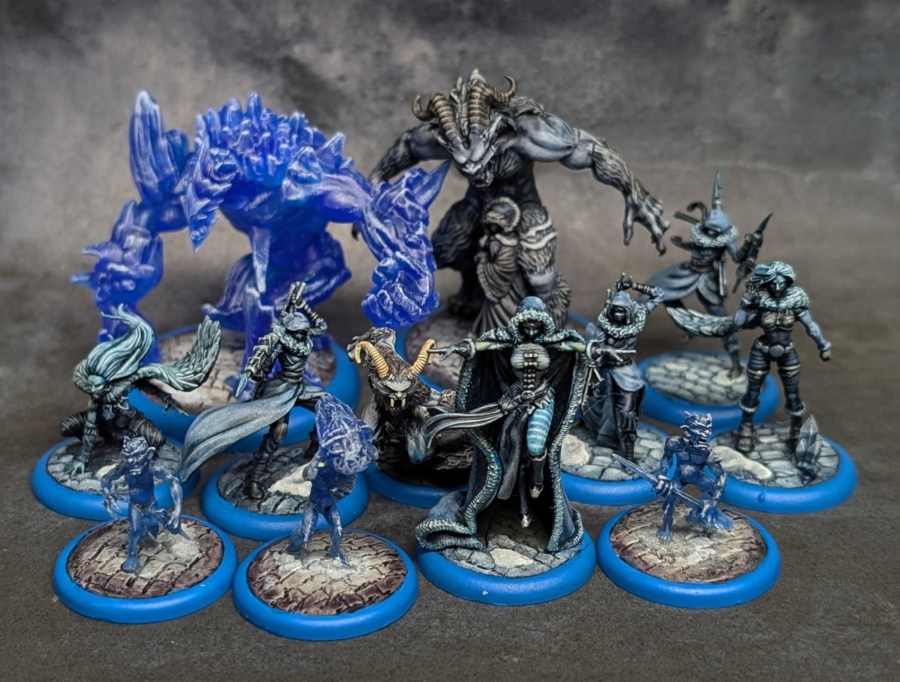
I’ve been painting up Malifaux models for over a decade now, and honestly, I couldn’t quit this range of miniatures if I tried. The lore is hands-down the best out there (for my sensibilities), and the models are incredible, even if you lose years of sanity every time you build one. My latest project has been putting together a Leveticus crew. He’s a right bastard, so I’ll be saving him for last!
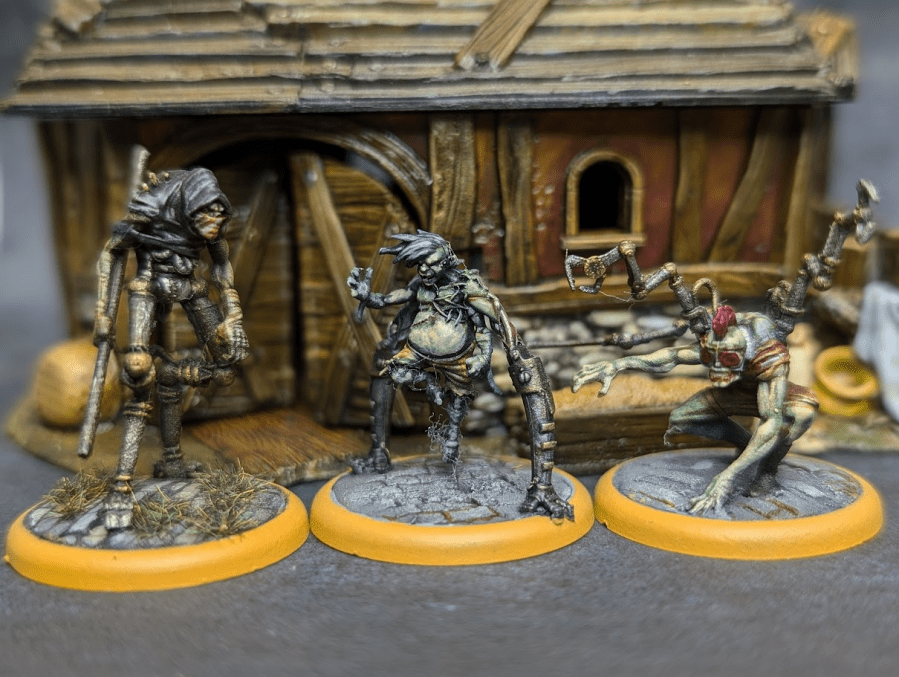
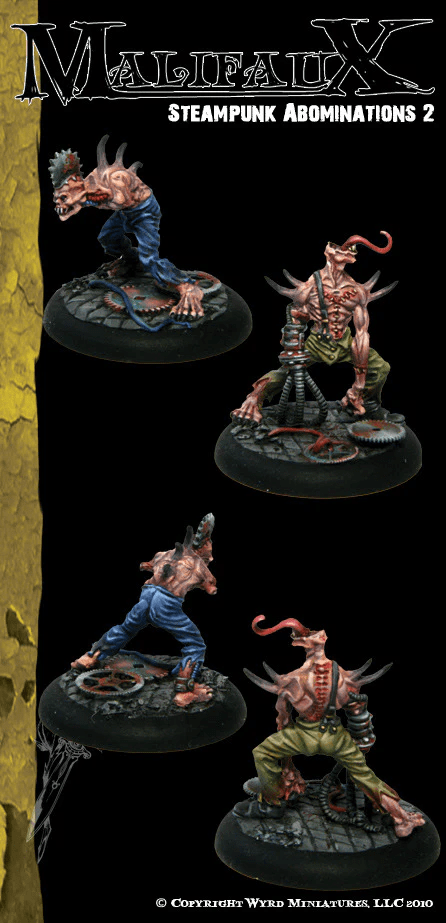
Leveticus uses the Amalgam keyword, so he has access to a pretty wild assortment of gribbly monsters and abominations. Necropunks are part of that list, and I’m really happy that they’ve had a refresh since the original sculpts… They weren’t terrible, by any means, just not what I was looking for in a Weird West mini!
Not 100% sure these are the originals, but they’re pretty damned close!
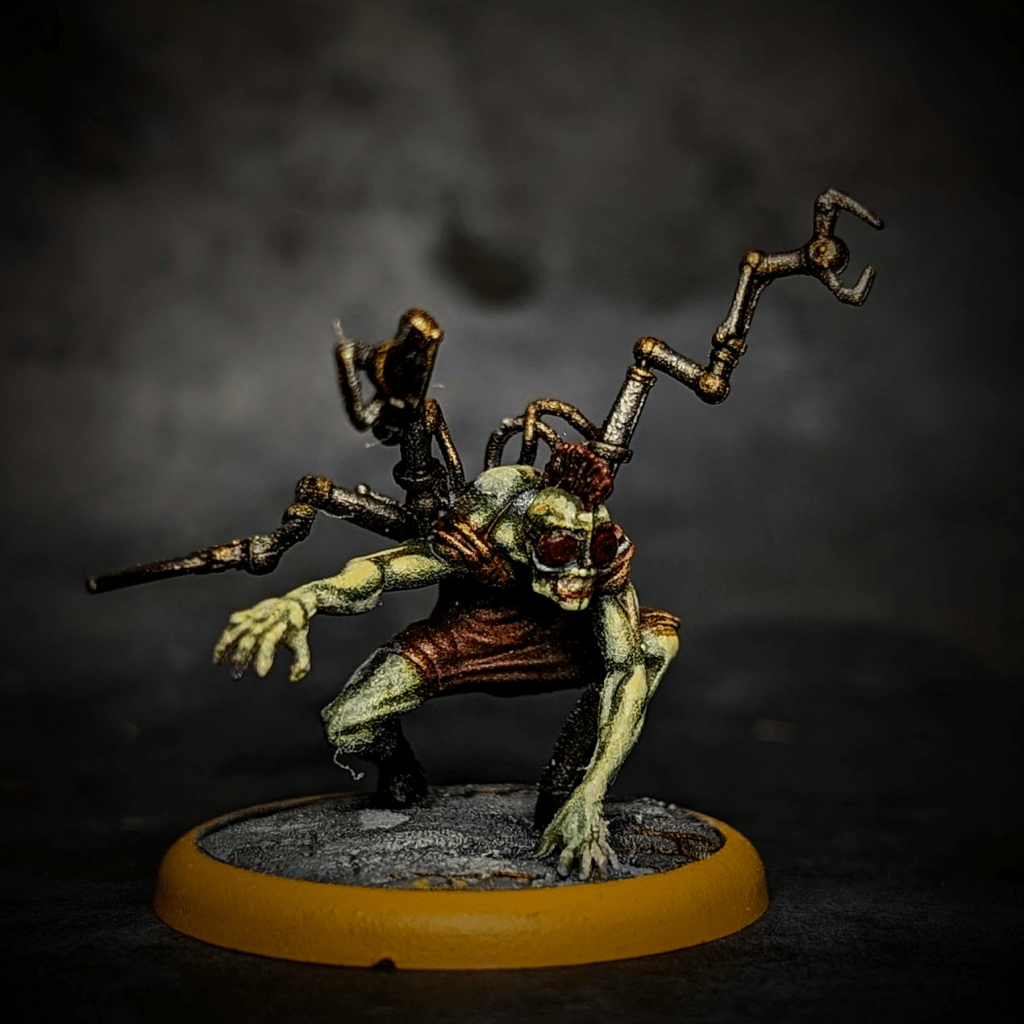
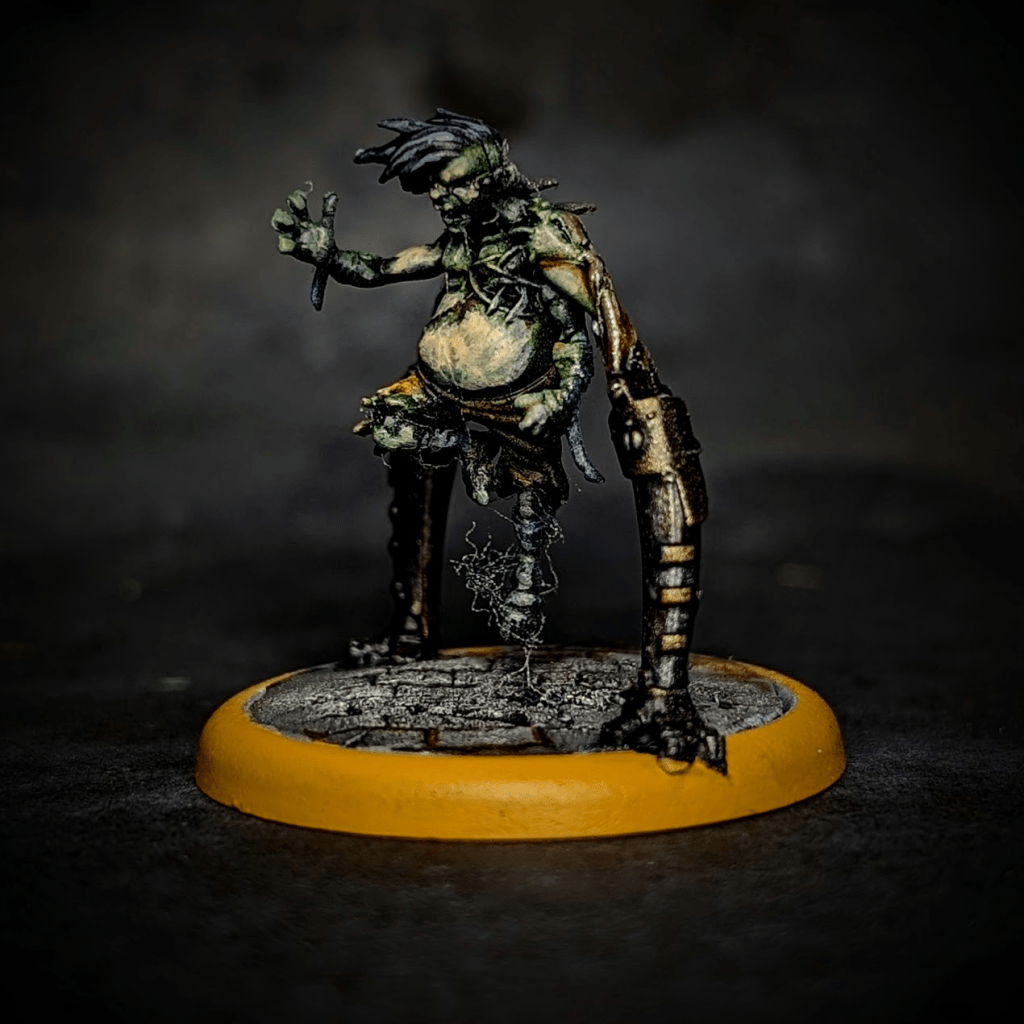
The new Necropunks came out for 2nd edition, and maintain the gross level pretty well. Here’s punk #1:
I went with a greenish pallor on the skin, he is a dead guy, after all. Love the gear on his back, too! Such a grotesque fella!
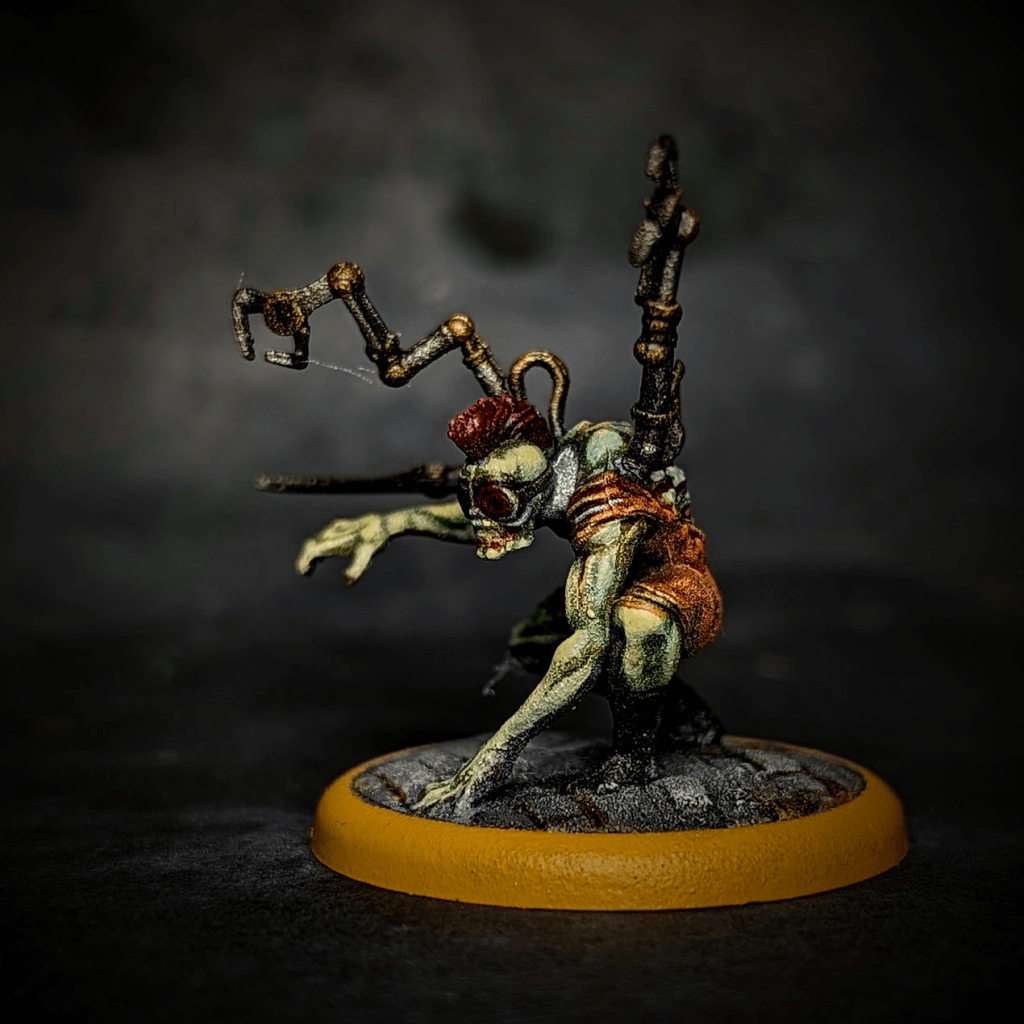
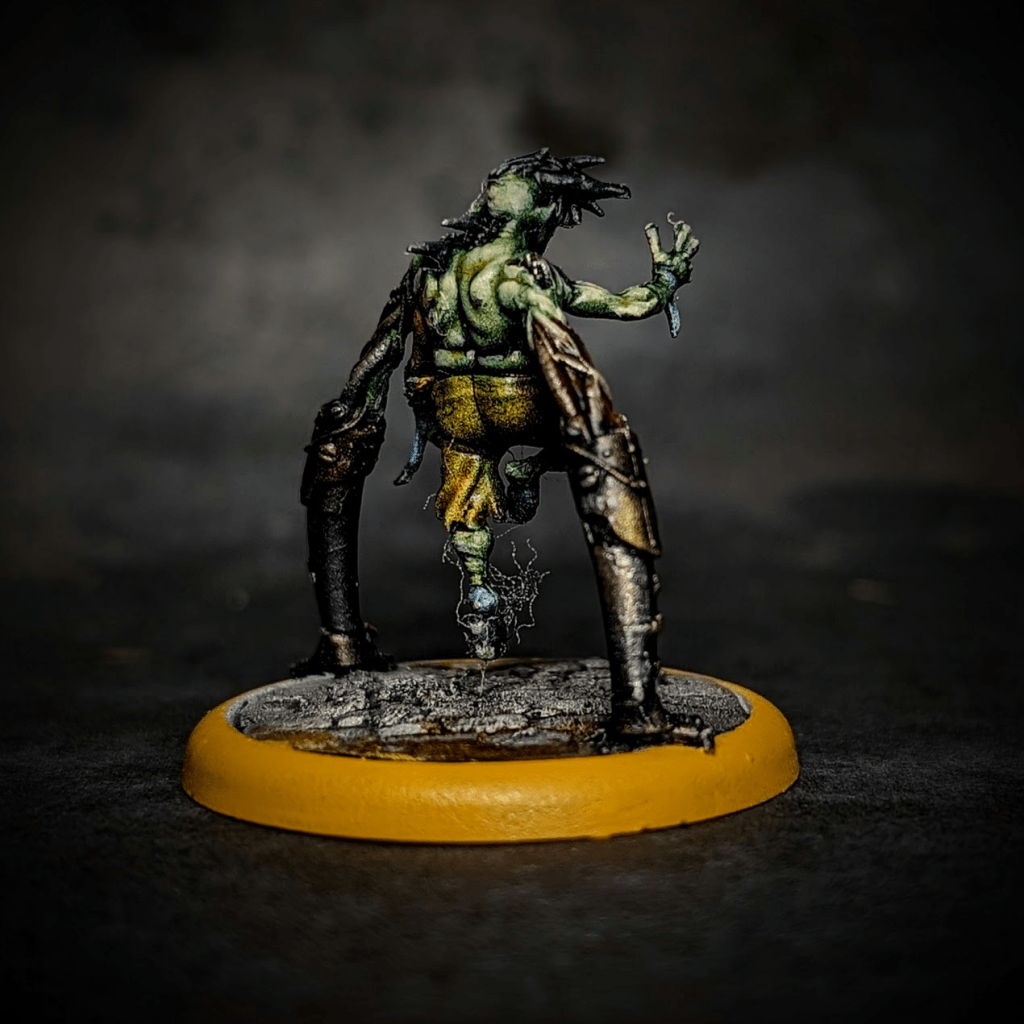
Punk 2 has some Go-Go Gadget arms action going down, which is probably good, he’s a little guy, after all. Those extendo-arms probably come in handy when he bellies up to the bar at the saloon!
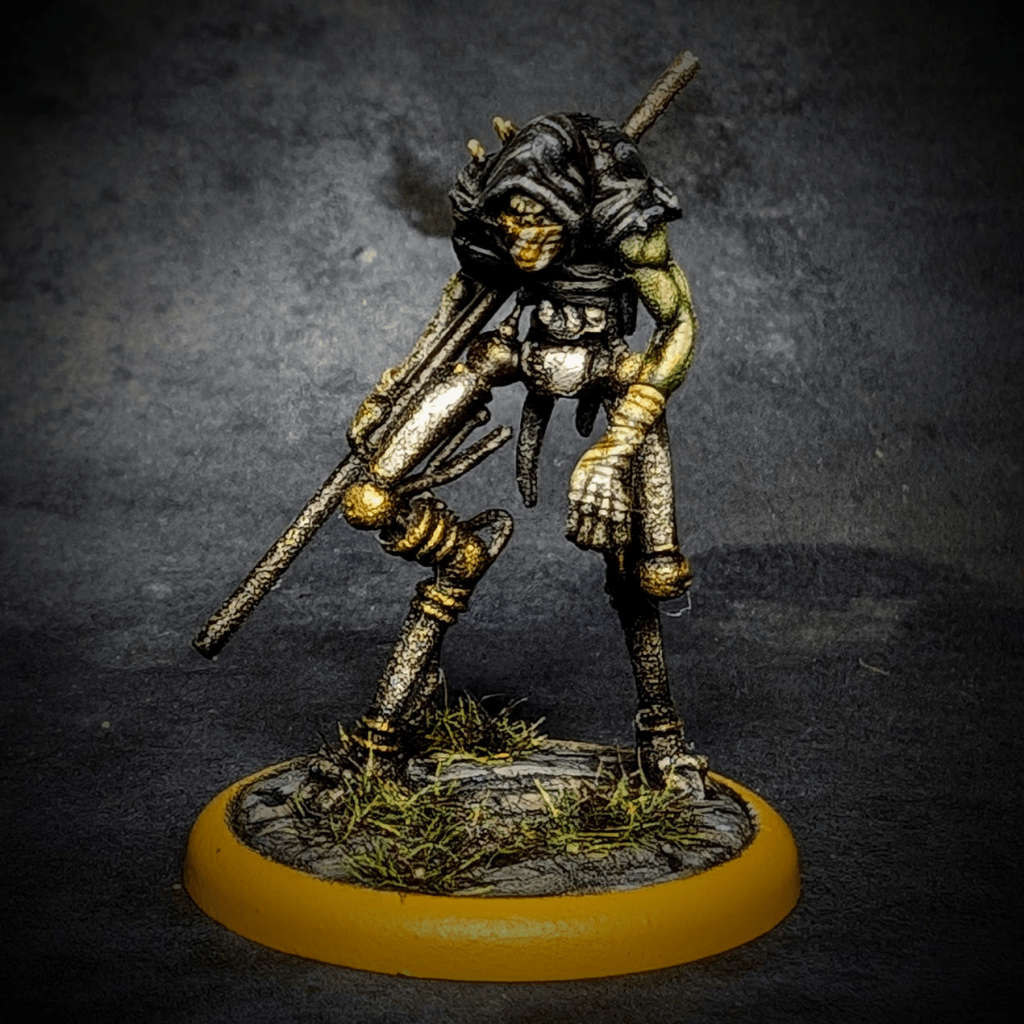
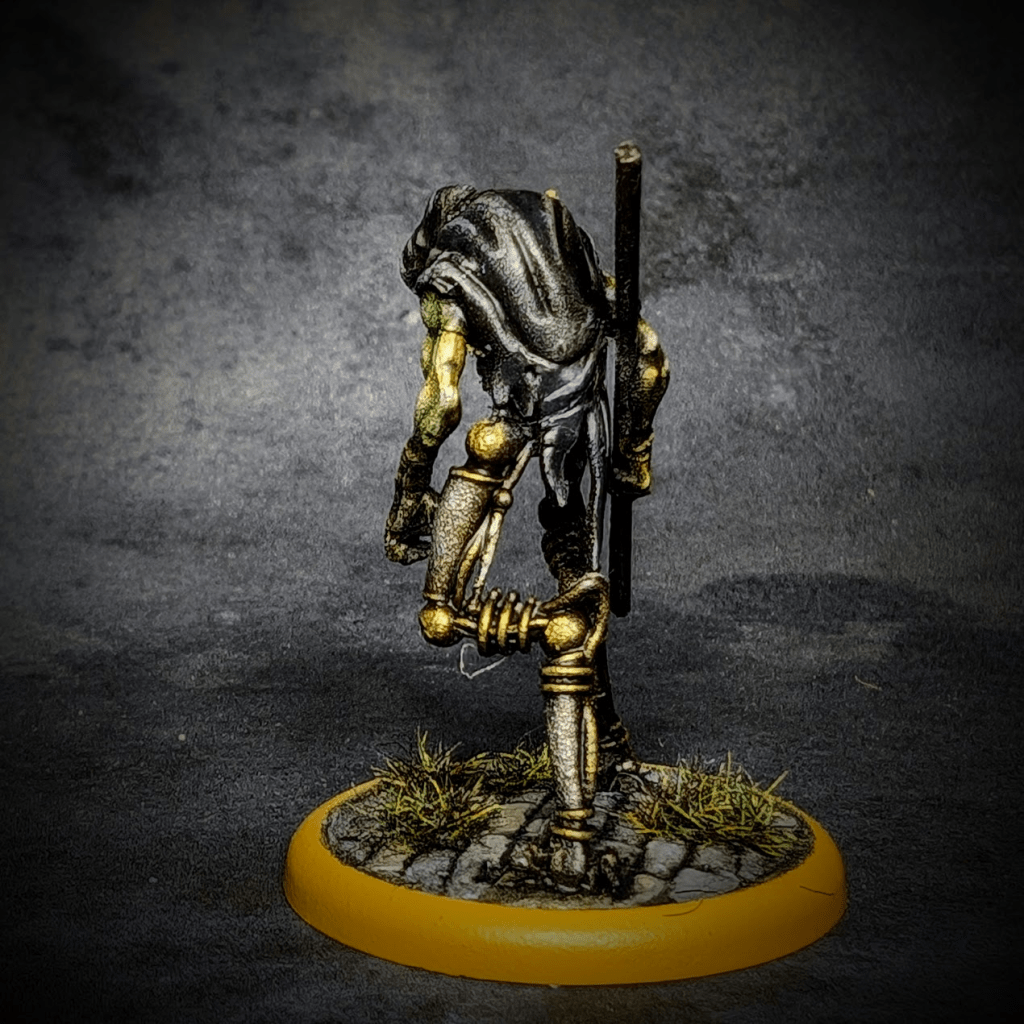
Punk 3 reminds me of a cool old monk, but dead, and toting a trusty metal pole instead of a staff. Really cool legs on this dude, too!
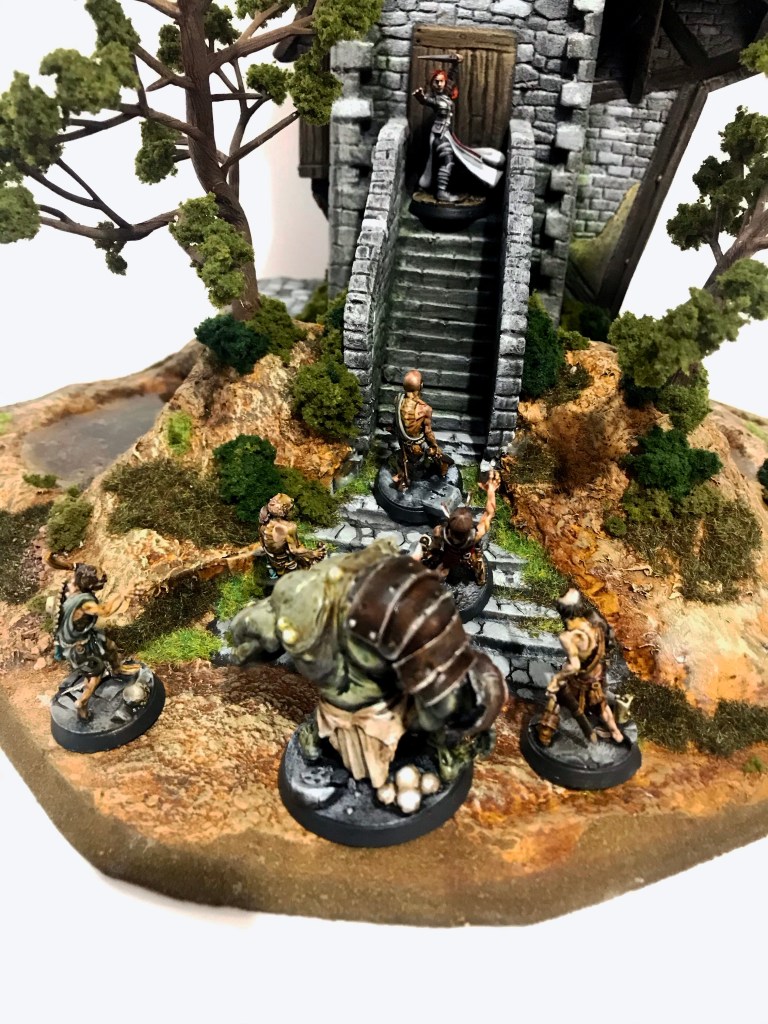
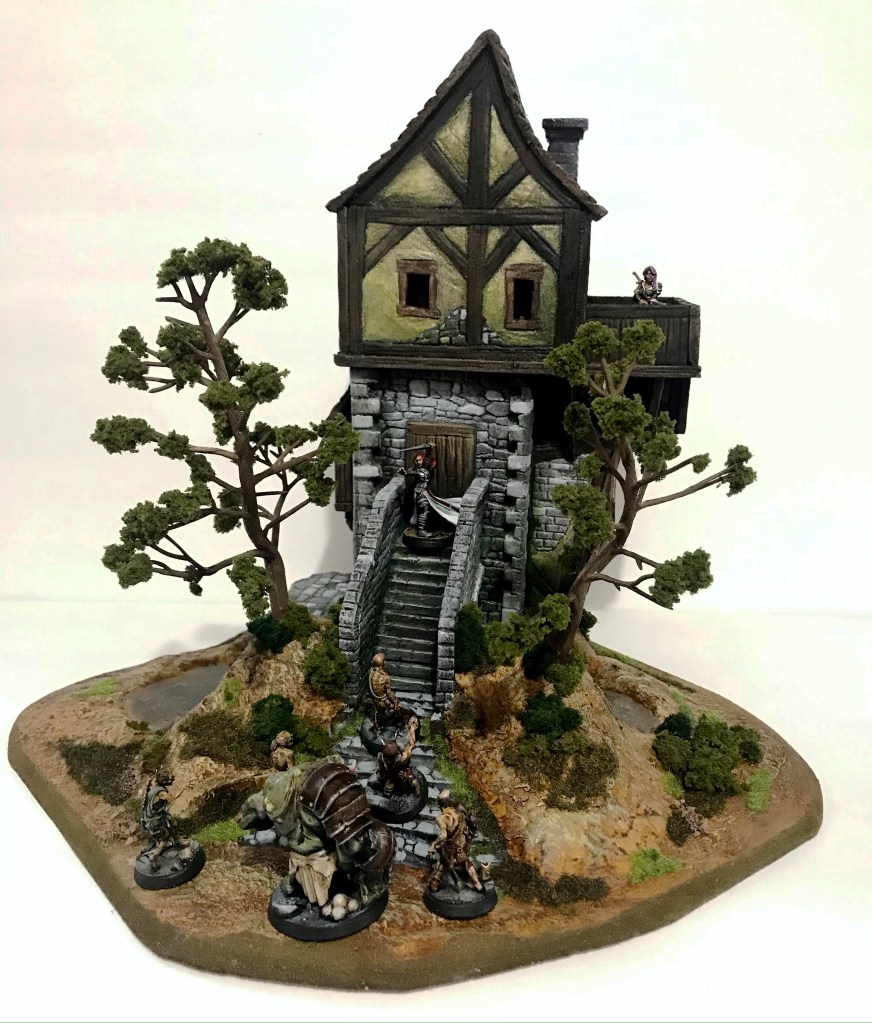
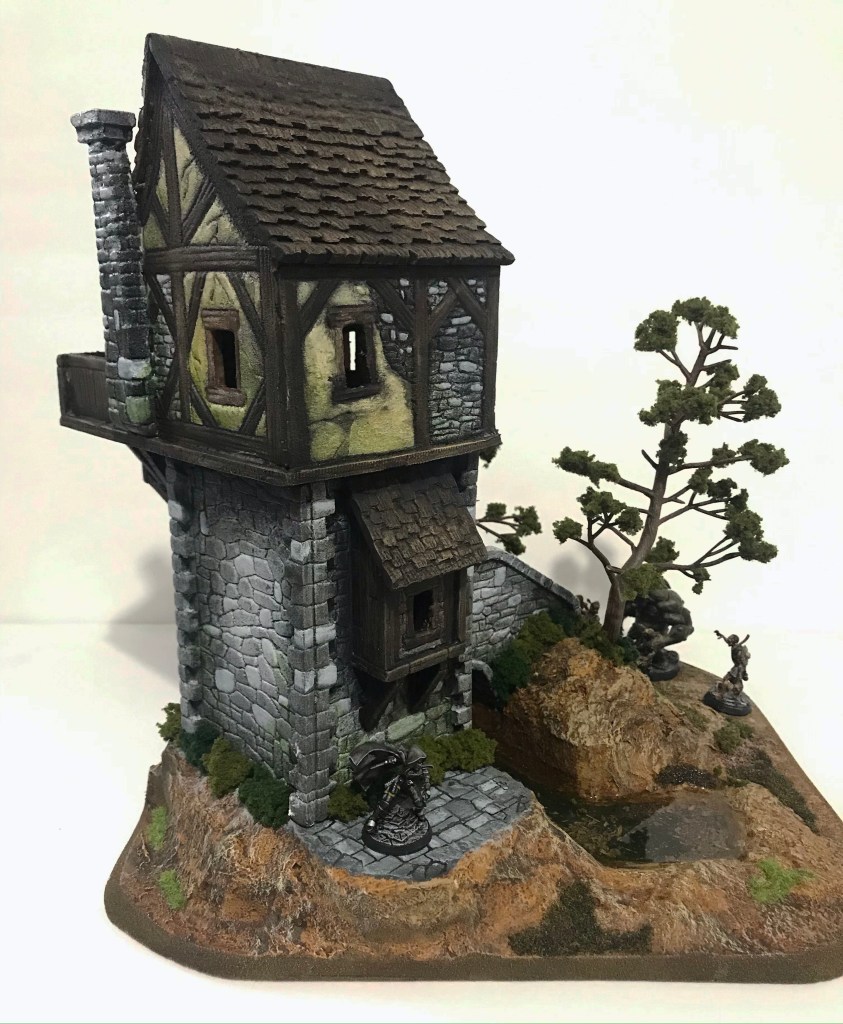
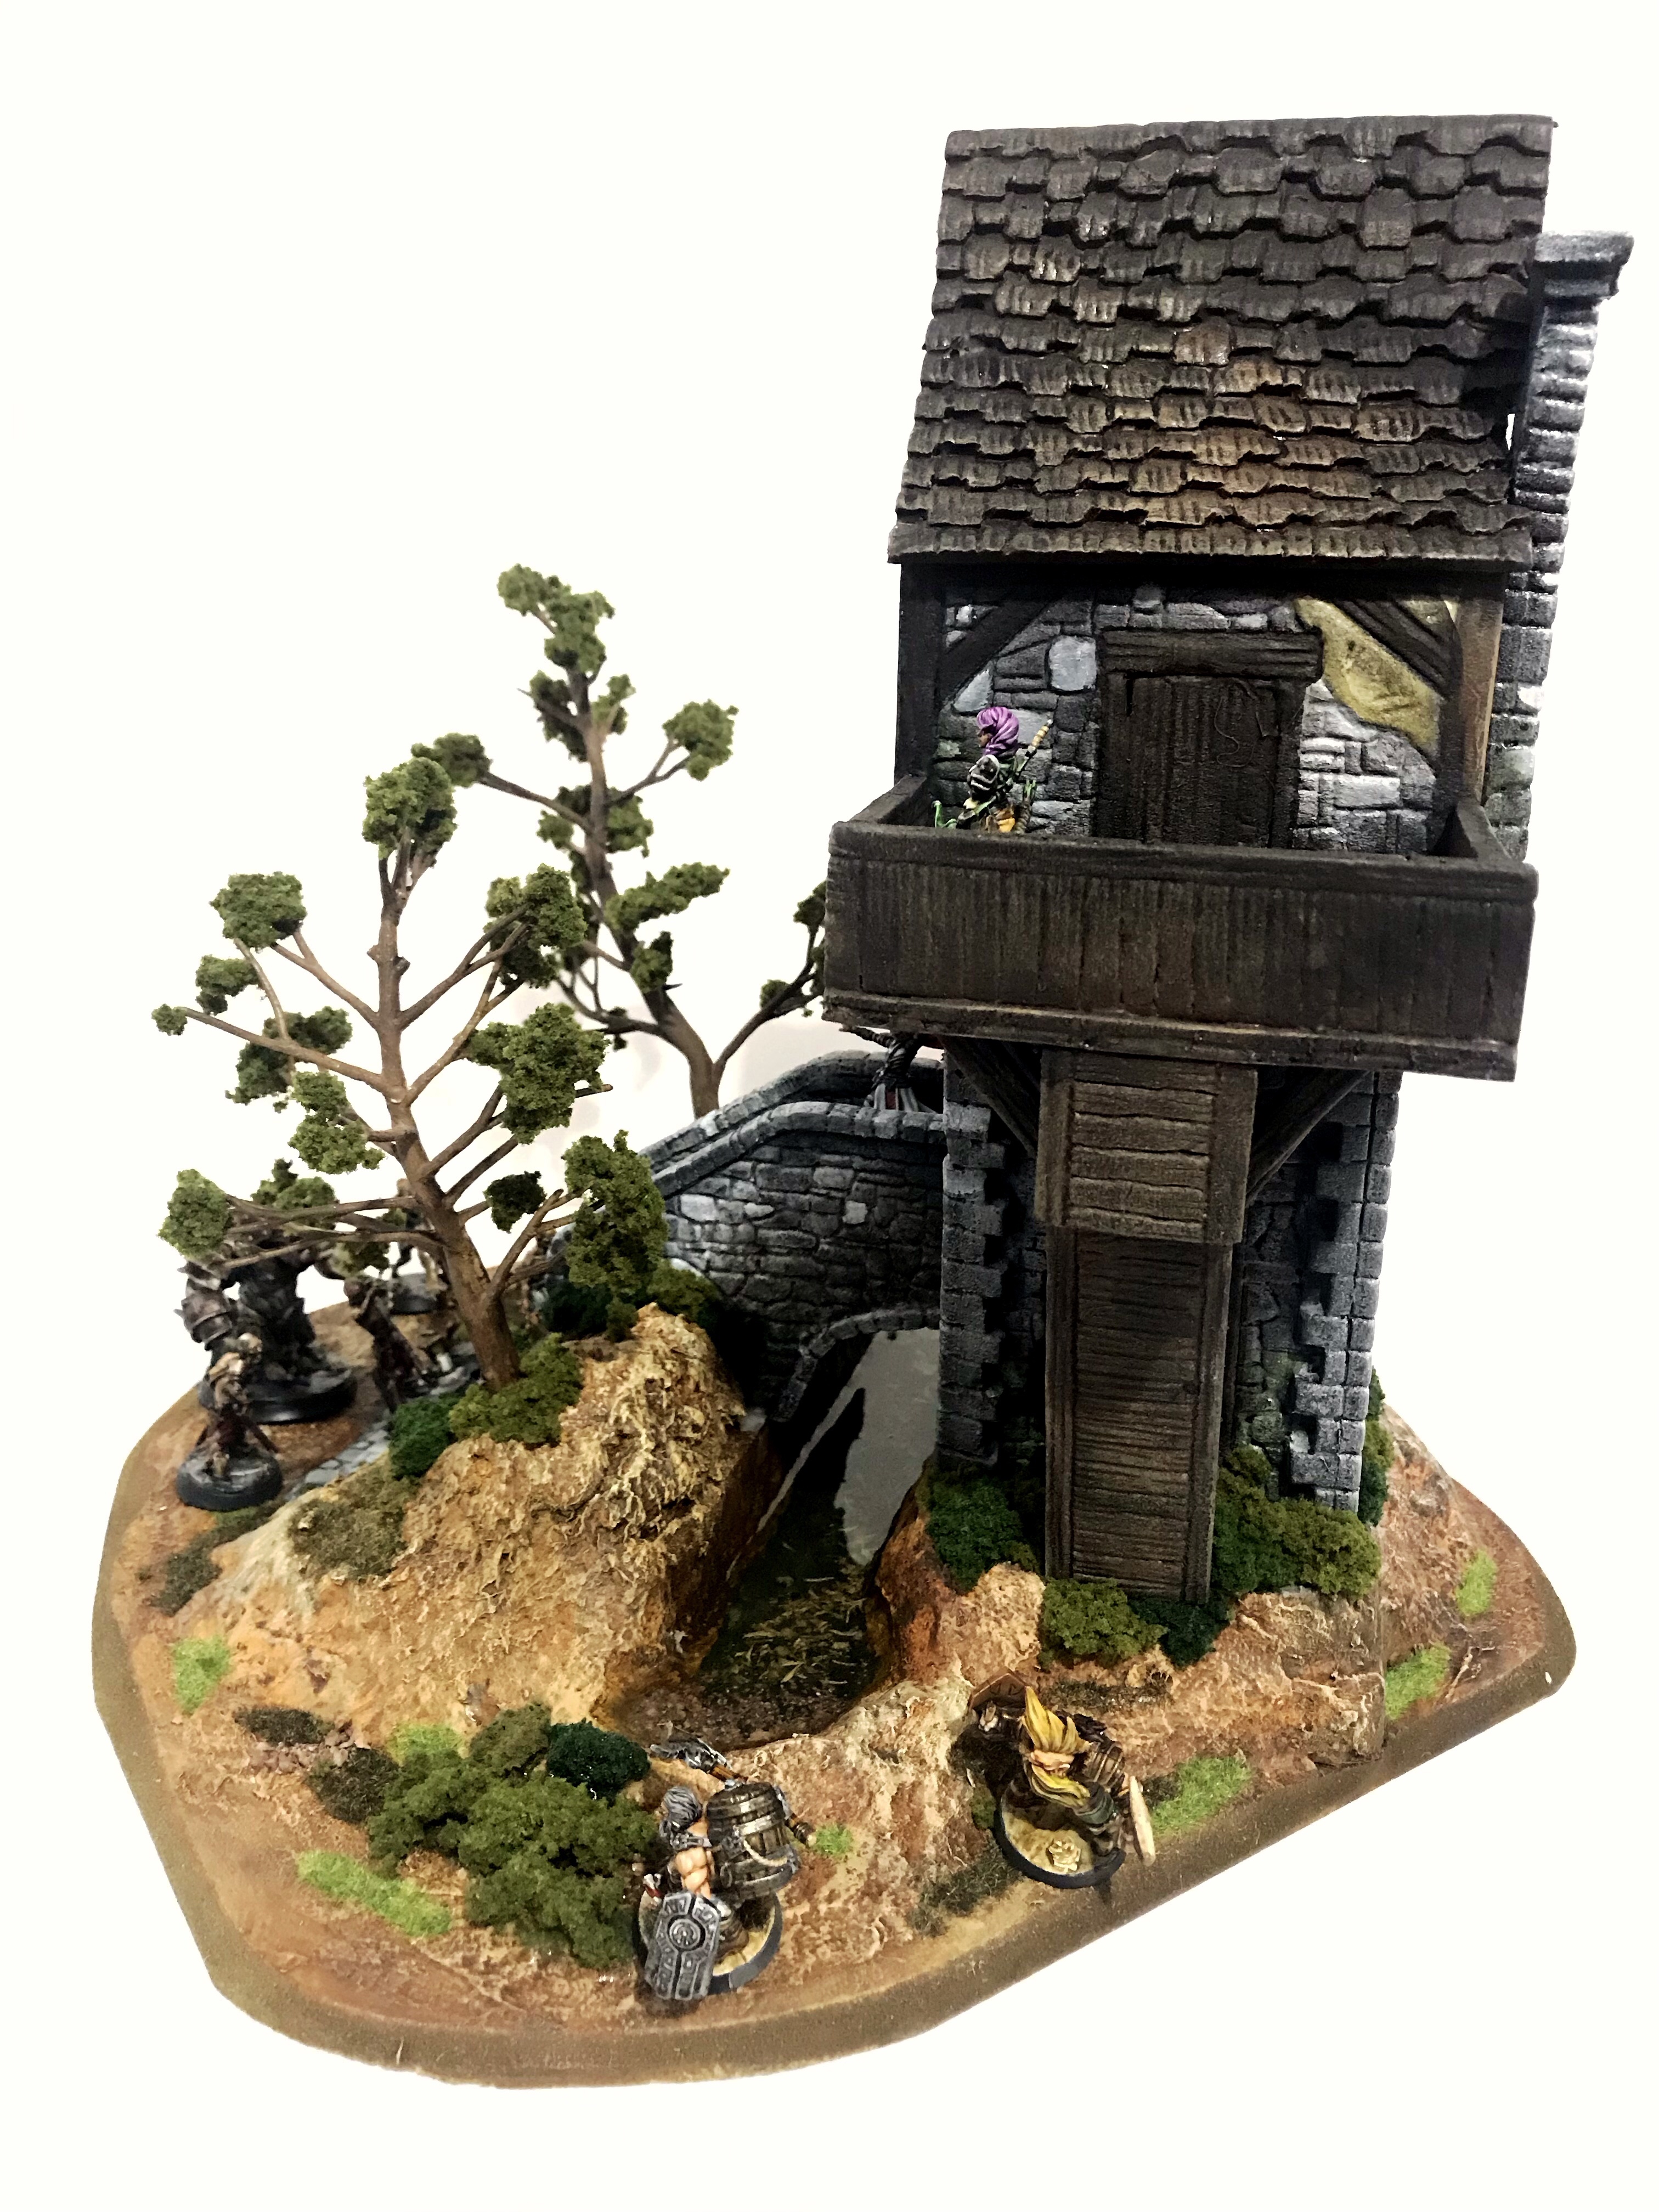
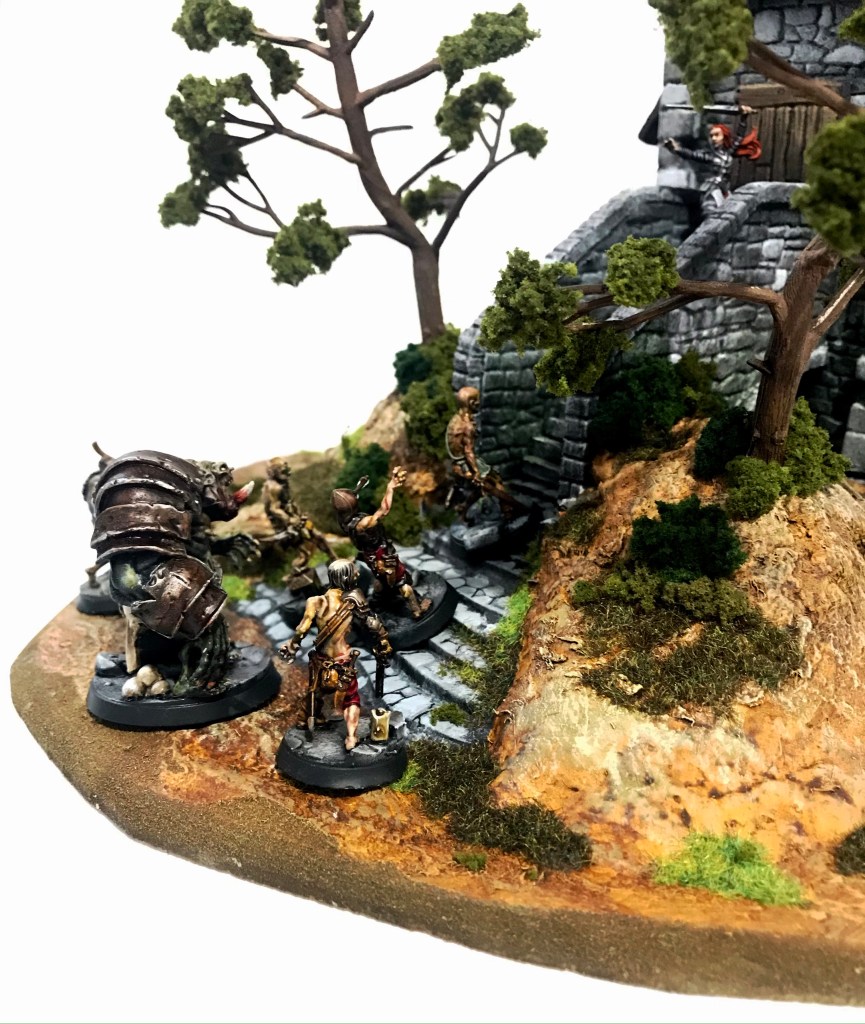
The first building is finally finished, and I could’nt be happier with how it turned out!
After the flock and shrubbery was secure, I added a couple of plastic railroad trees that I was able to twist in extremely twisty ways by soaking them in boiling water.
The rest of the piece was just a matter of concealing joins and gaps with shrubs.
After all of the flock was set, I poured clear resin into the moat for a water effect.
It’s a really fun piece, and will make for a thematic center-point for my games!
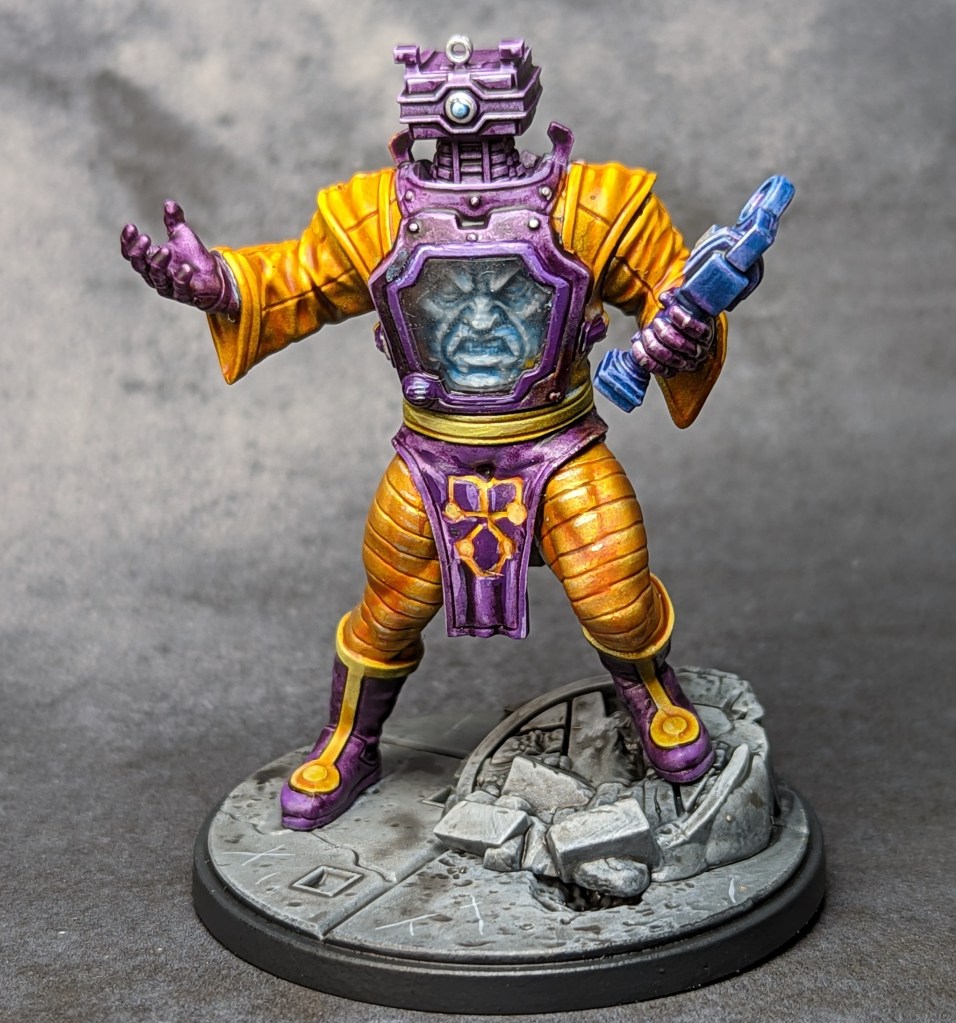
Last week, a purchase I have been wrestling with making arrived on my doorstep. It’s a purchase I have had mixed feelings about for months, but isolation and work stress (I work in the mental health field) from COVID-19 finally won.
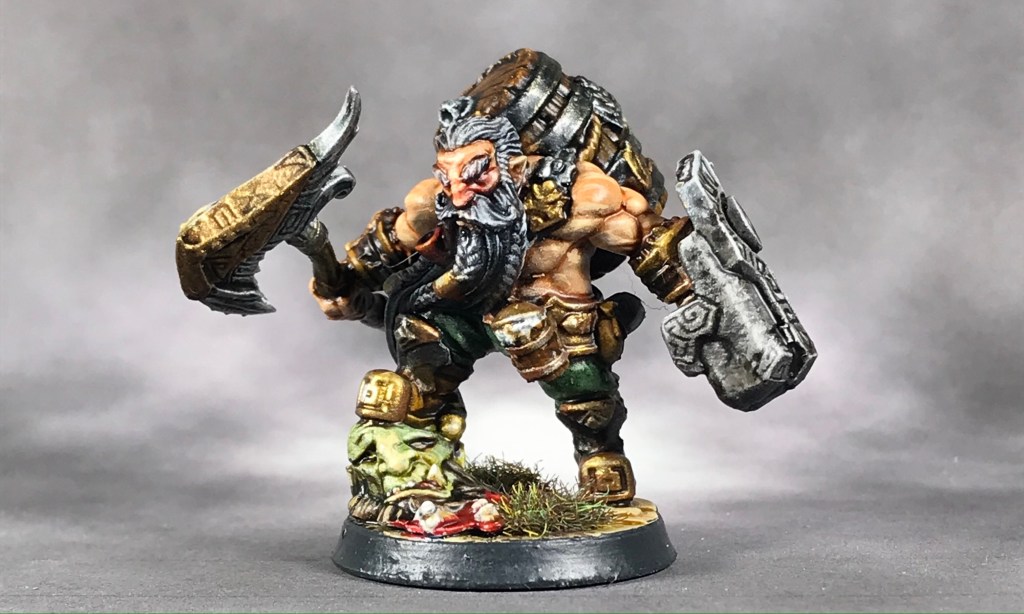
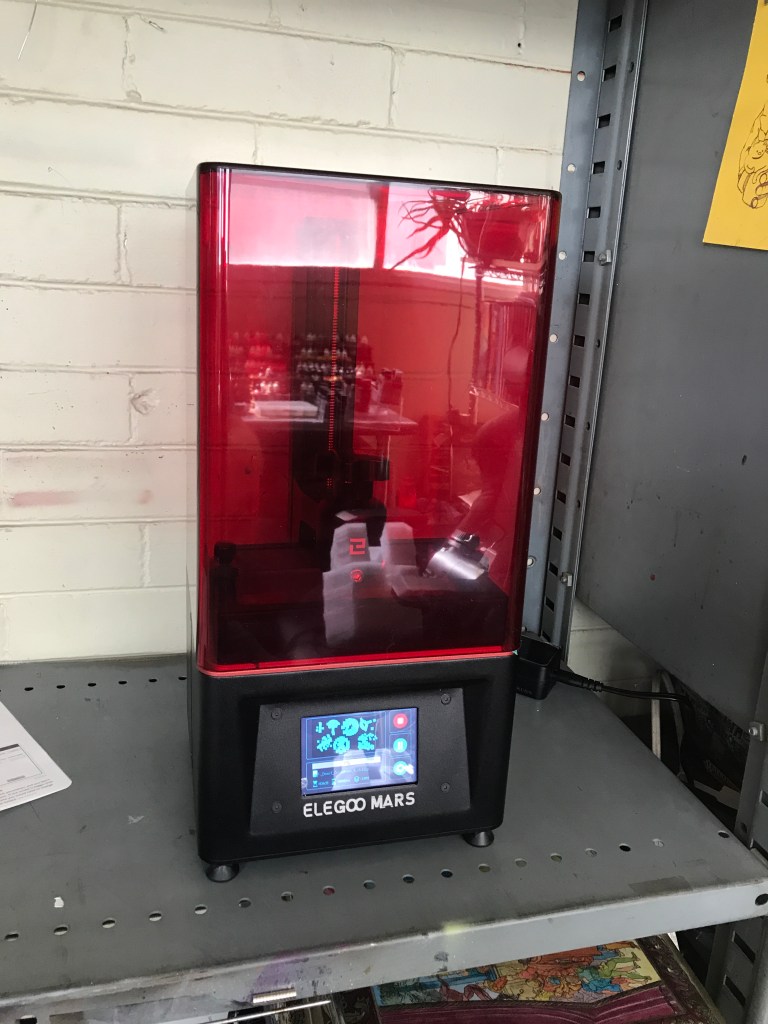
I bought an Elegoo Mars resin printer. That model you see up above was my first print, and the reason why I finally gave in. He was, to be frank, too cool not to have in my collection.
I have been conflicted for a long time on this technology. Initial prints that I had seen from extruded printers didn’t really impress me, and resin, until recently, has been really expensive. Now, you can get a good printer with a liter of resin for under $300.
My other big issue has been what I see as a disruption effect on an industry I care a lot about. Good prints made at home could be the death of small game stores, but after all of the printing trials and fine tuning I had to do to get things going, I don’t think we’re there… yet.
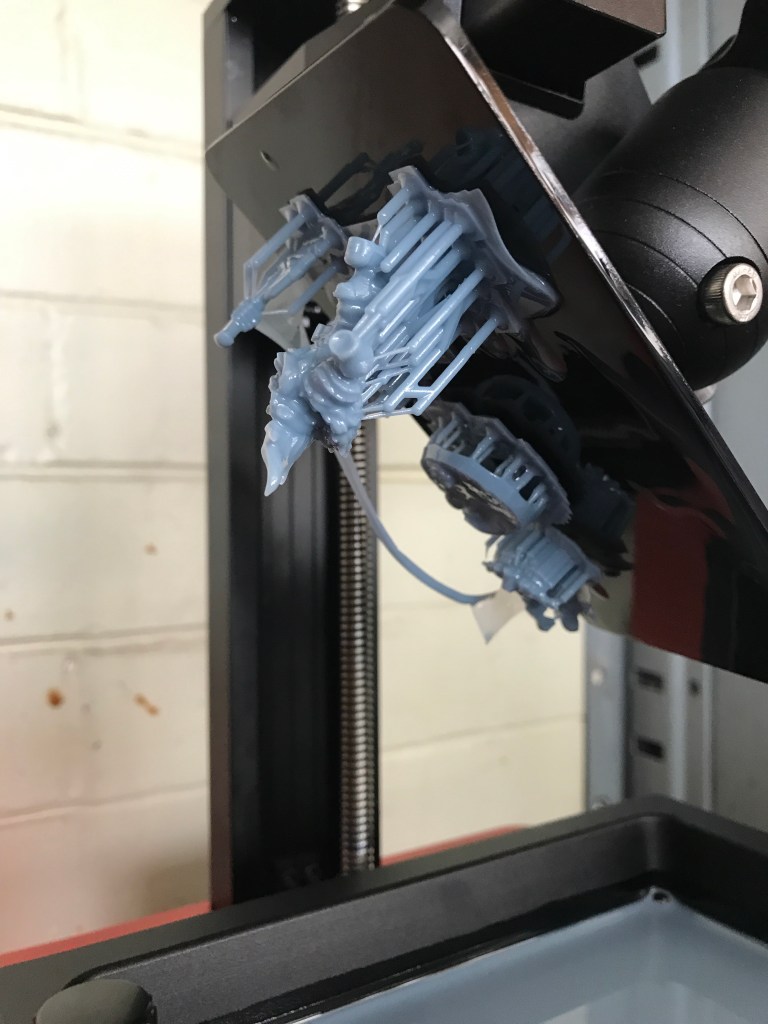
There is a lot you have to learn to make resin printing effective, and mistakes can be costly and messy. I messed up the FEP film almost immediately, and my garage was too cold for things to work right. But I am stubborn as hell, so I dove into research mode, and now I’ve been getting amazing prints without fail for a couple of days.
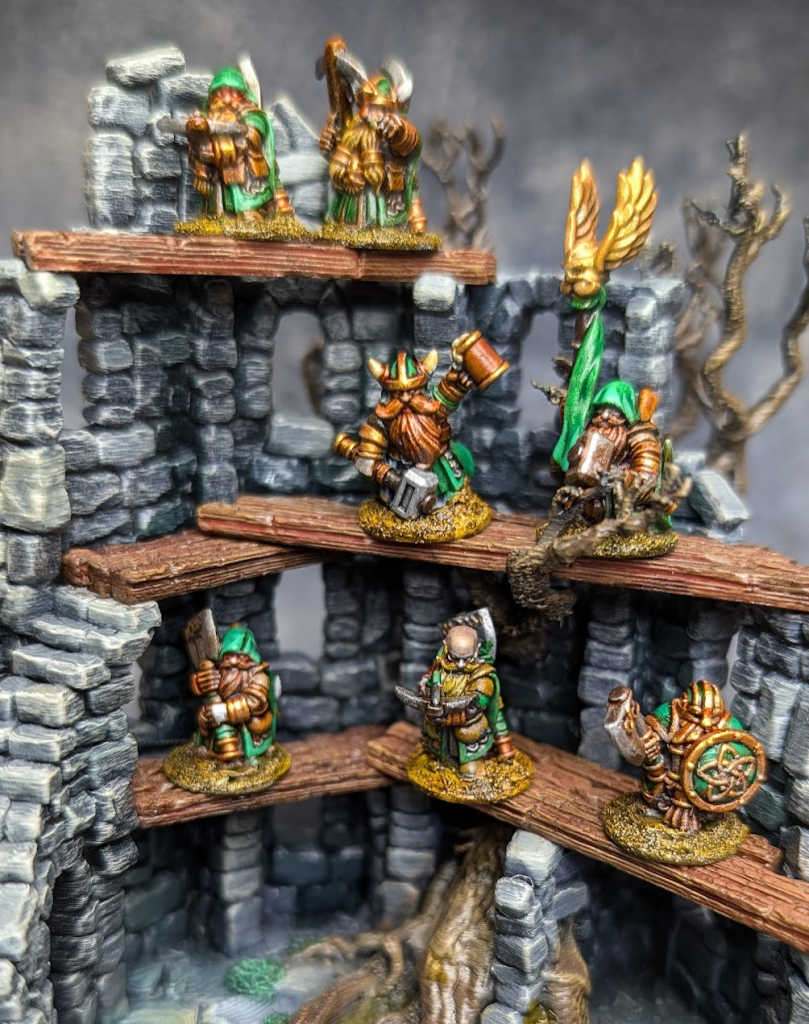
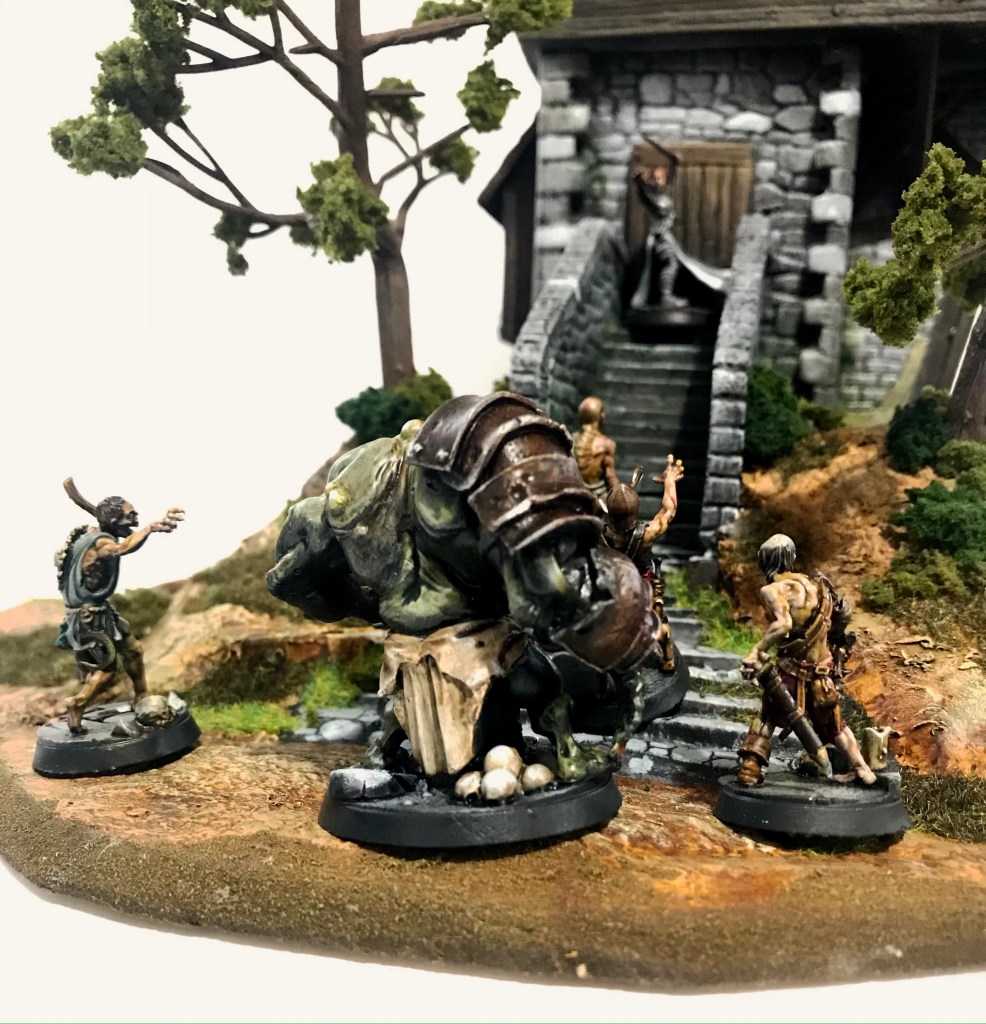
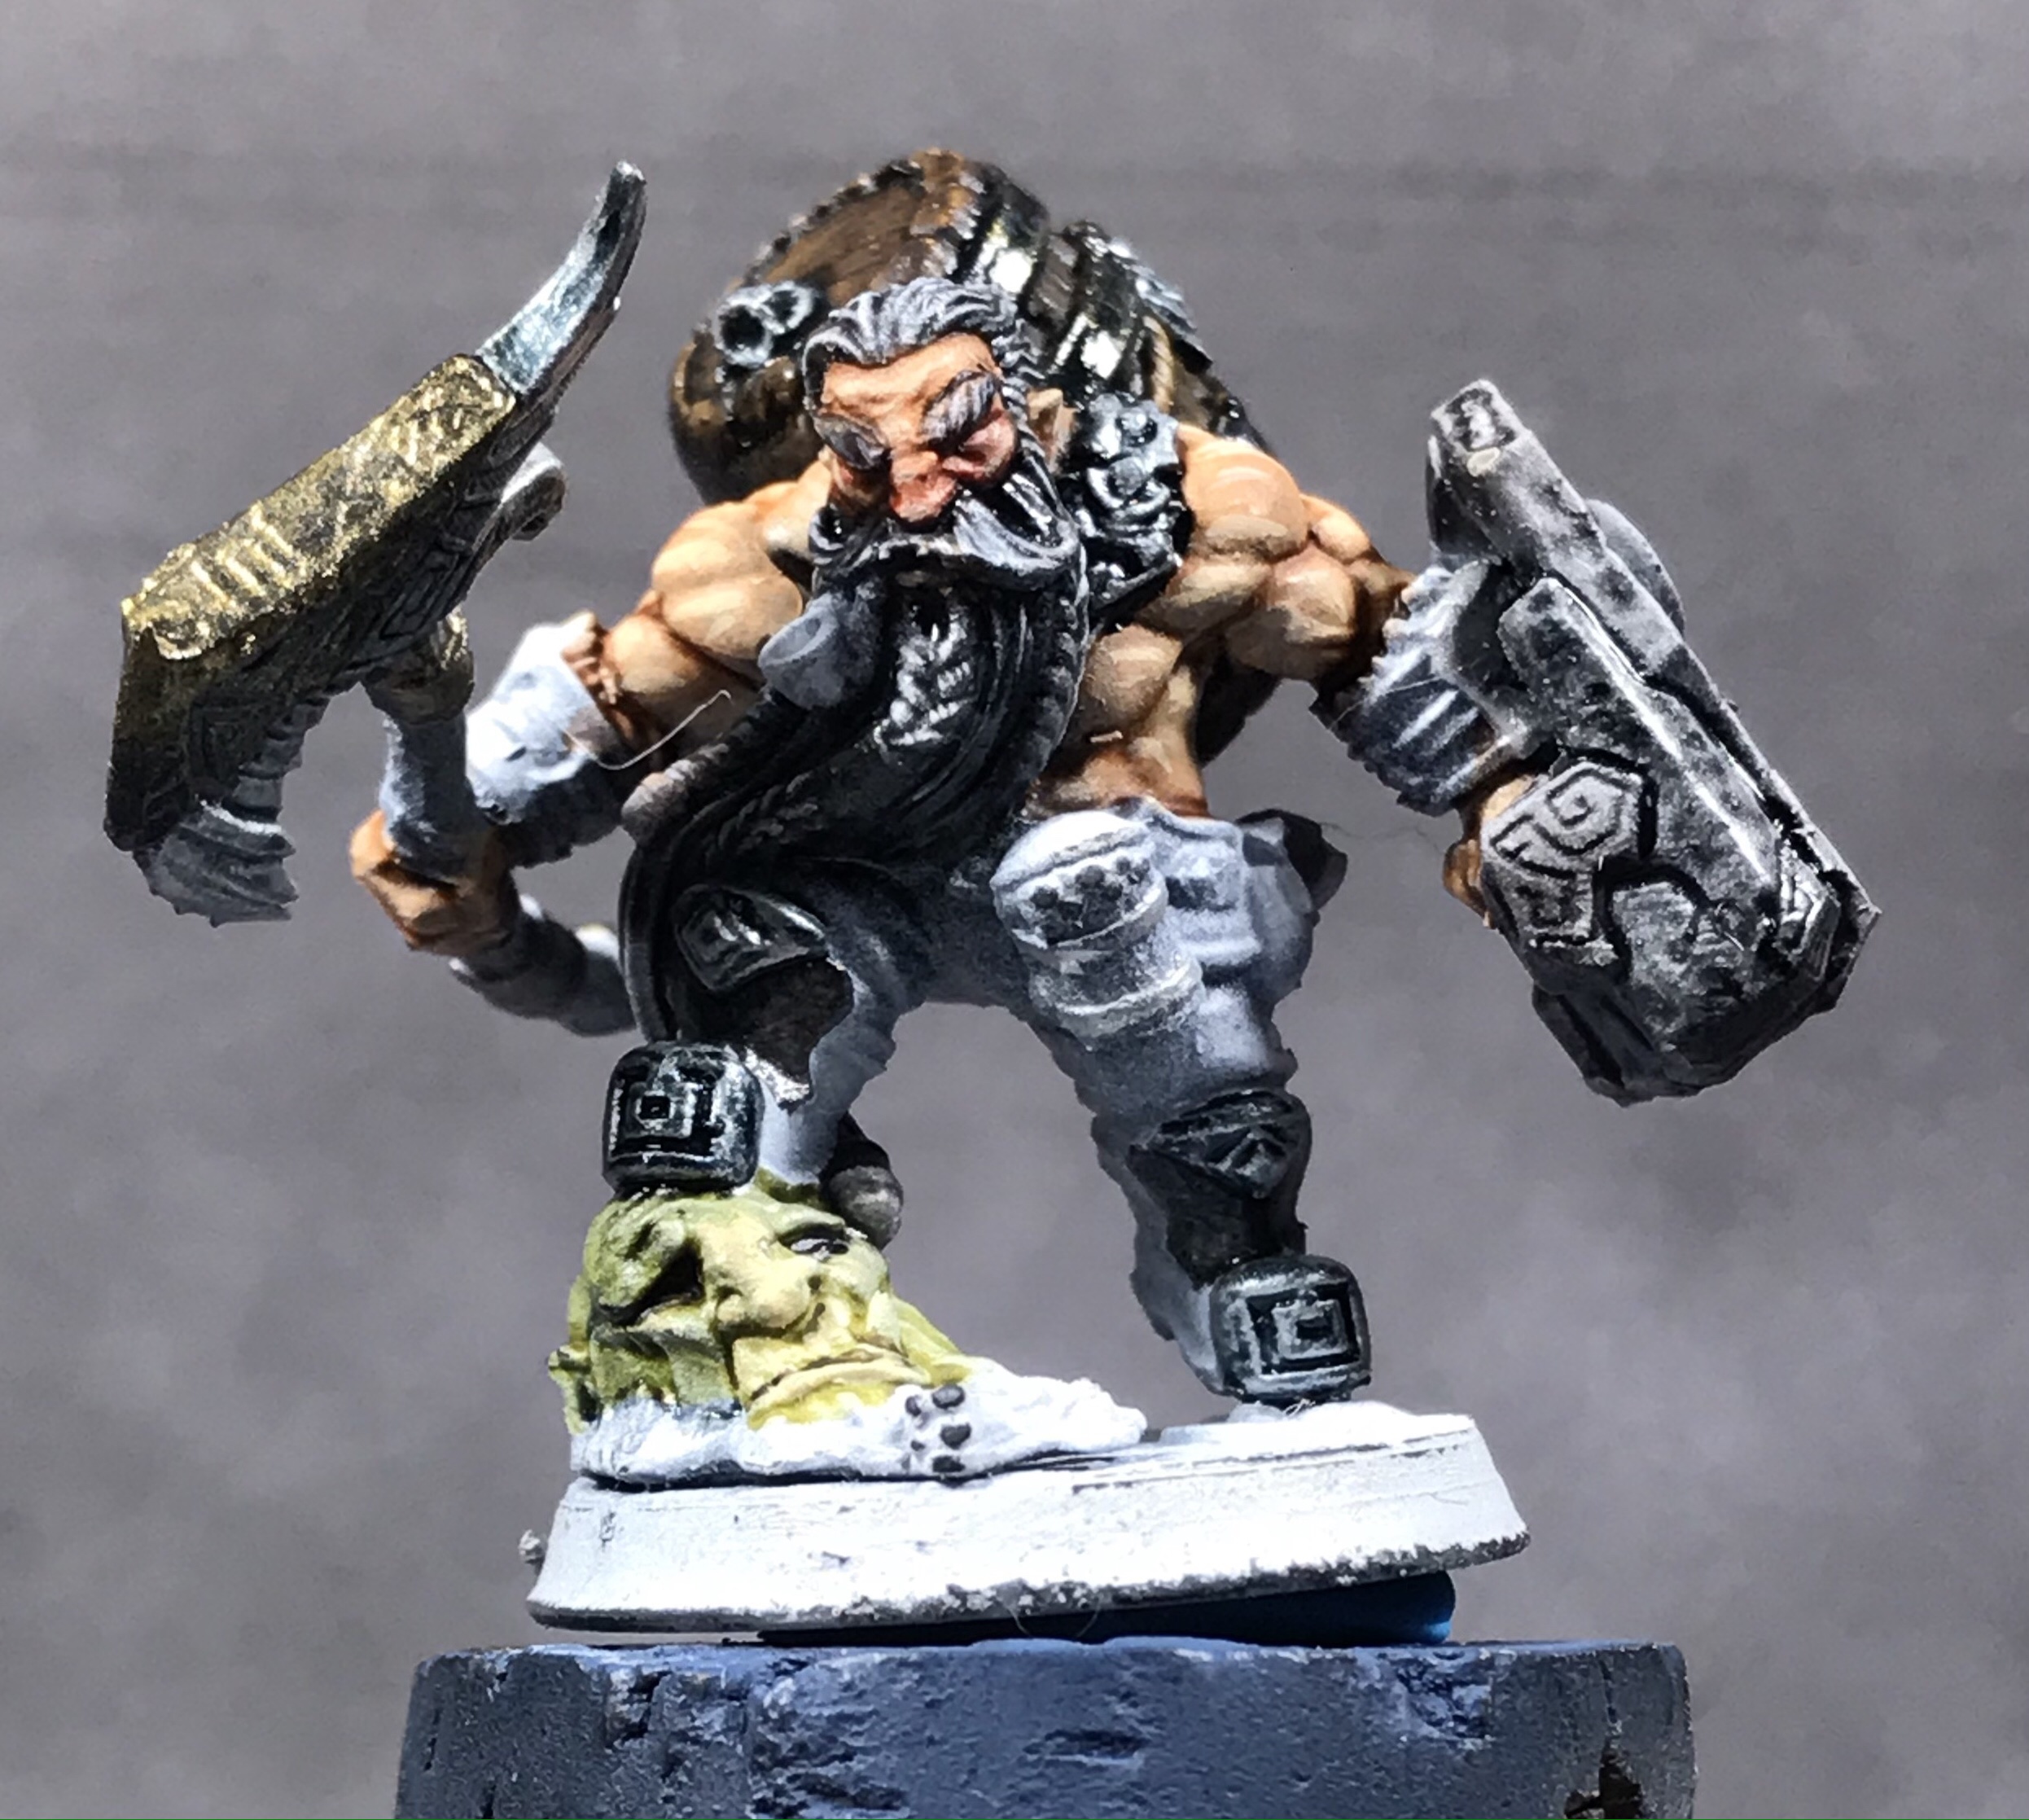
This handsome gent is Gino, and he was one of the awesome models Artisan Guild had available in March. $18 a month, and March had more than half a dozen badass dwarfs, including one mounted on a Griffon. I didn’t really have a choice.
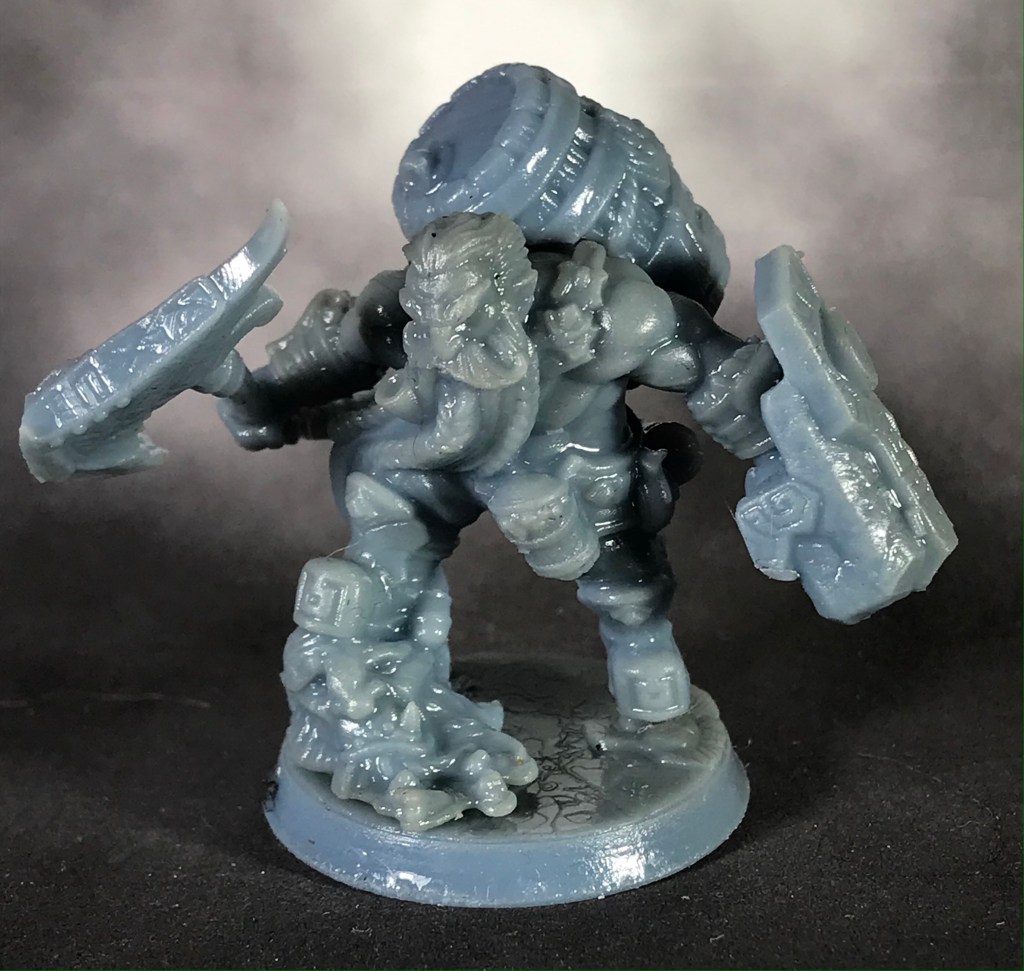
Once I trimmed the supports off, it was time to get Gino primed, and start laying on the paints:
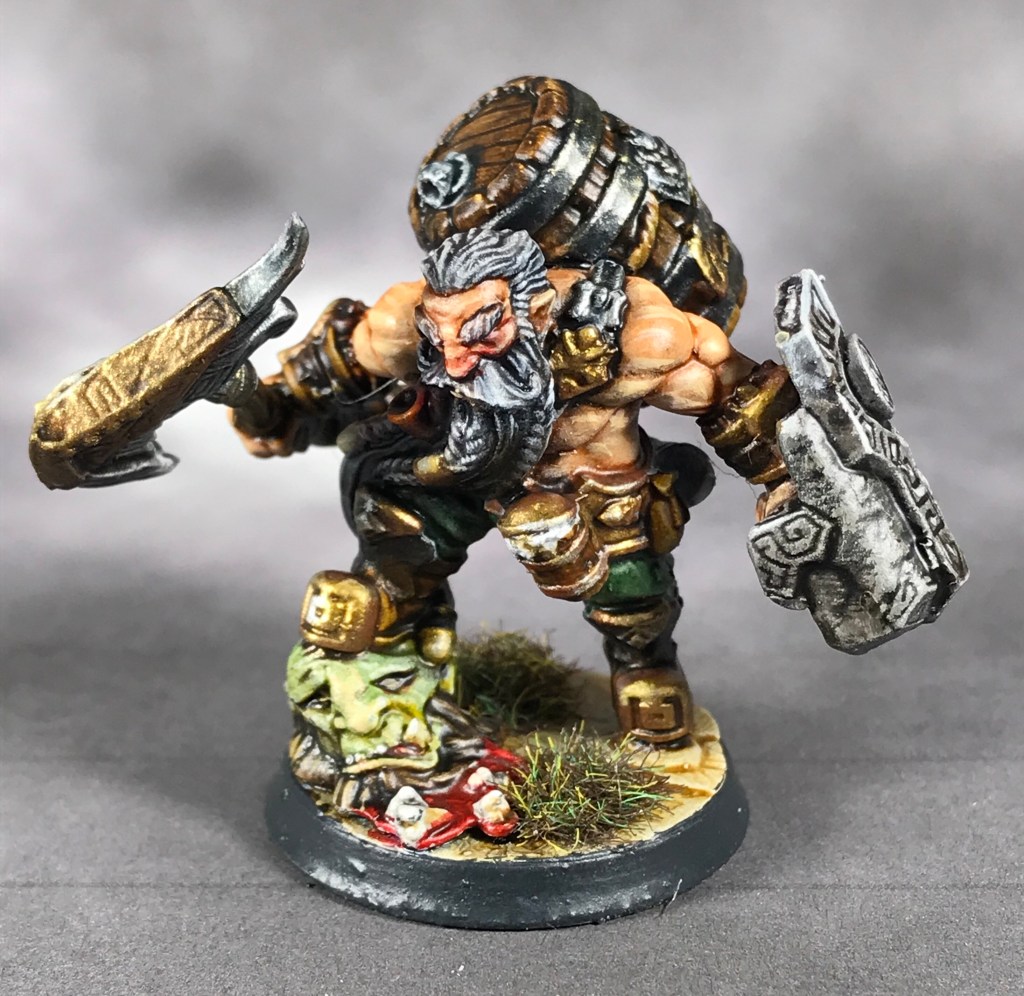
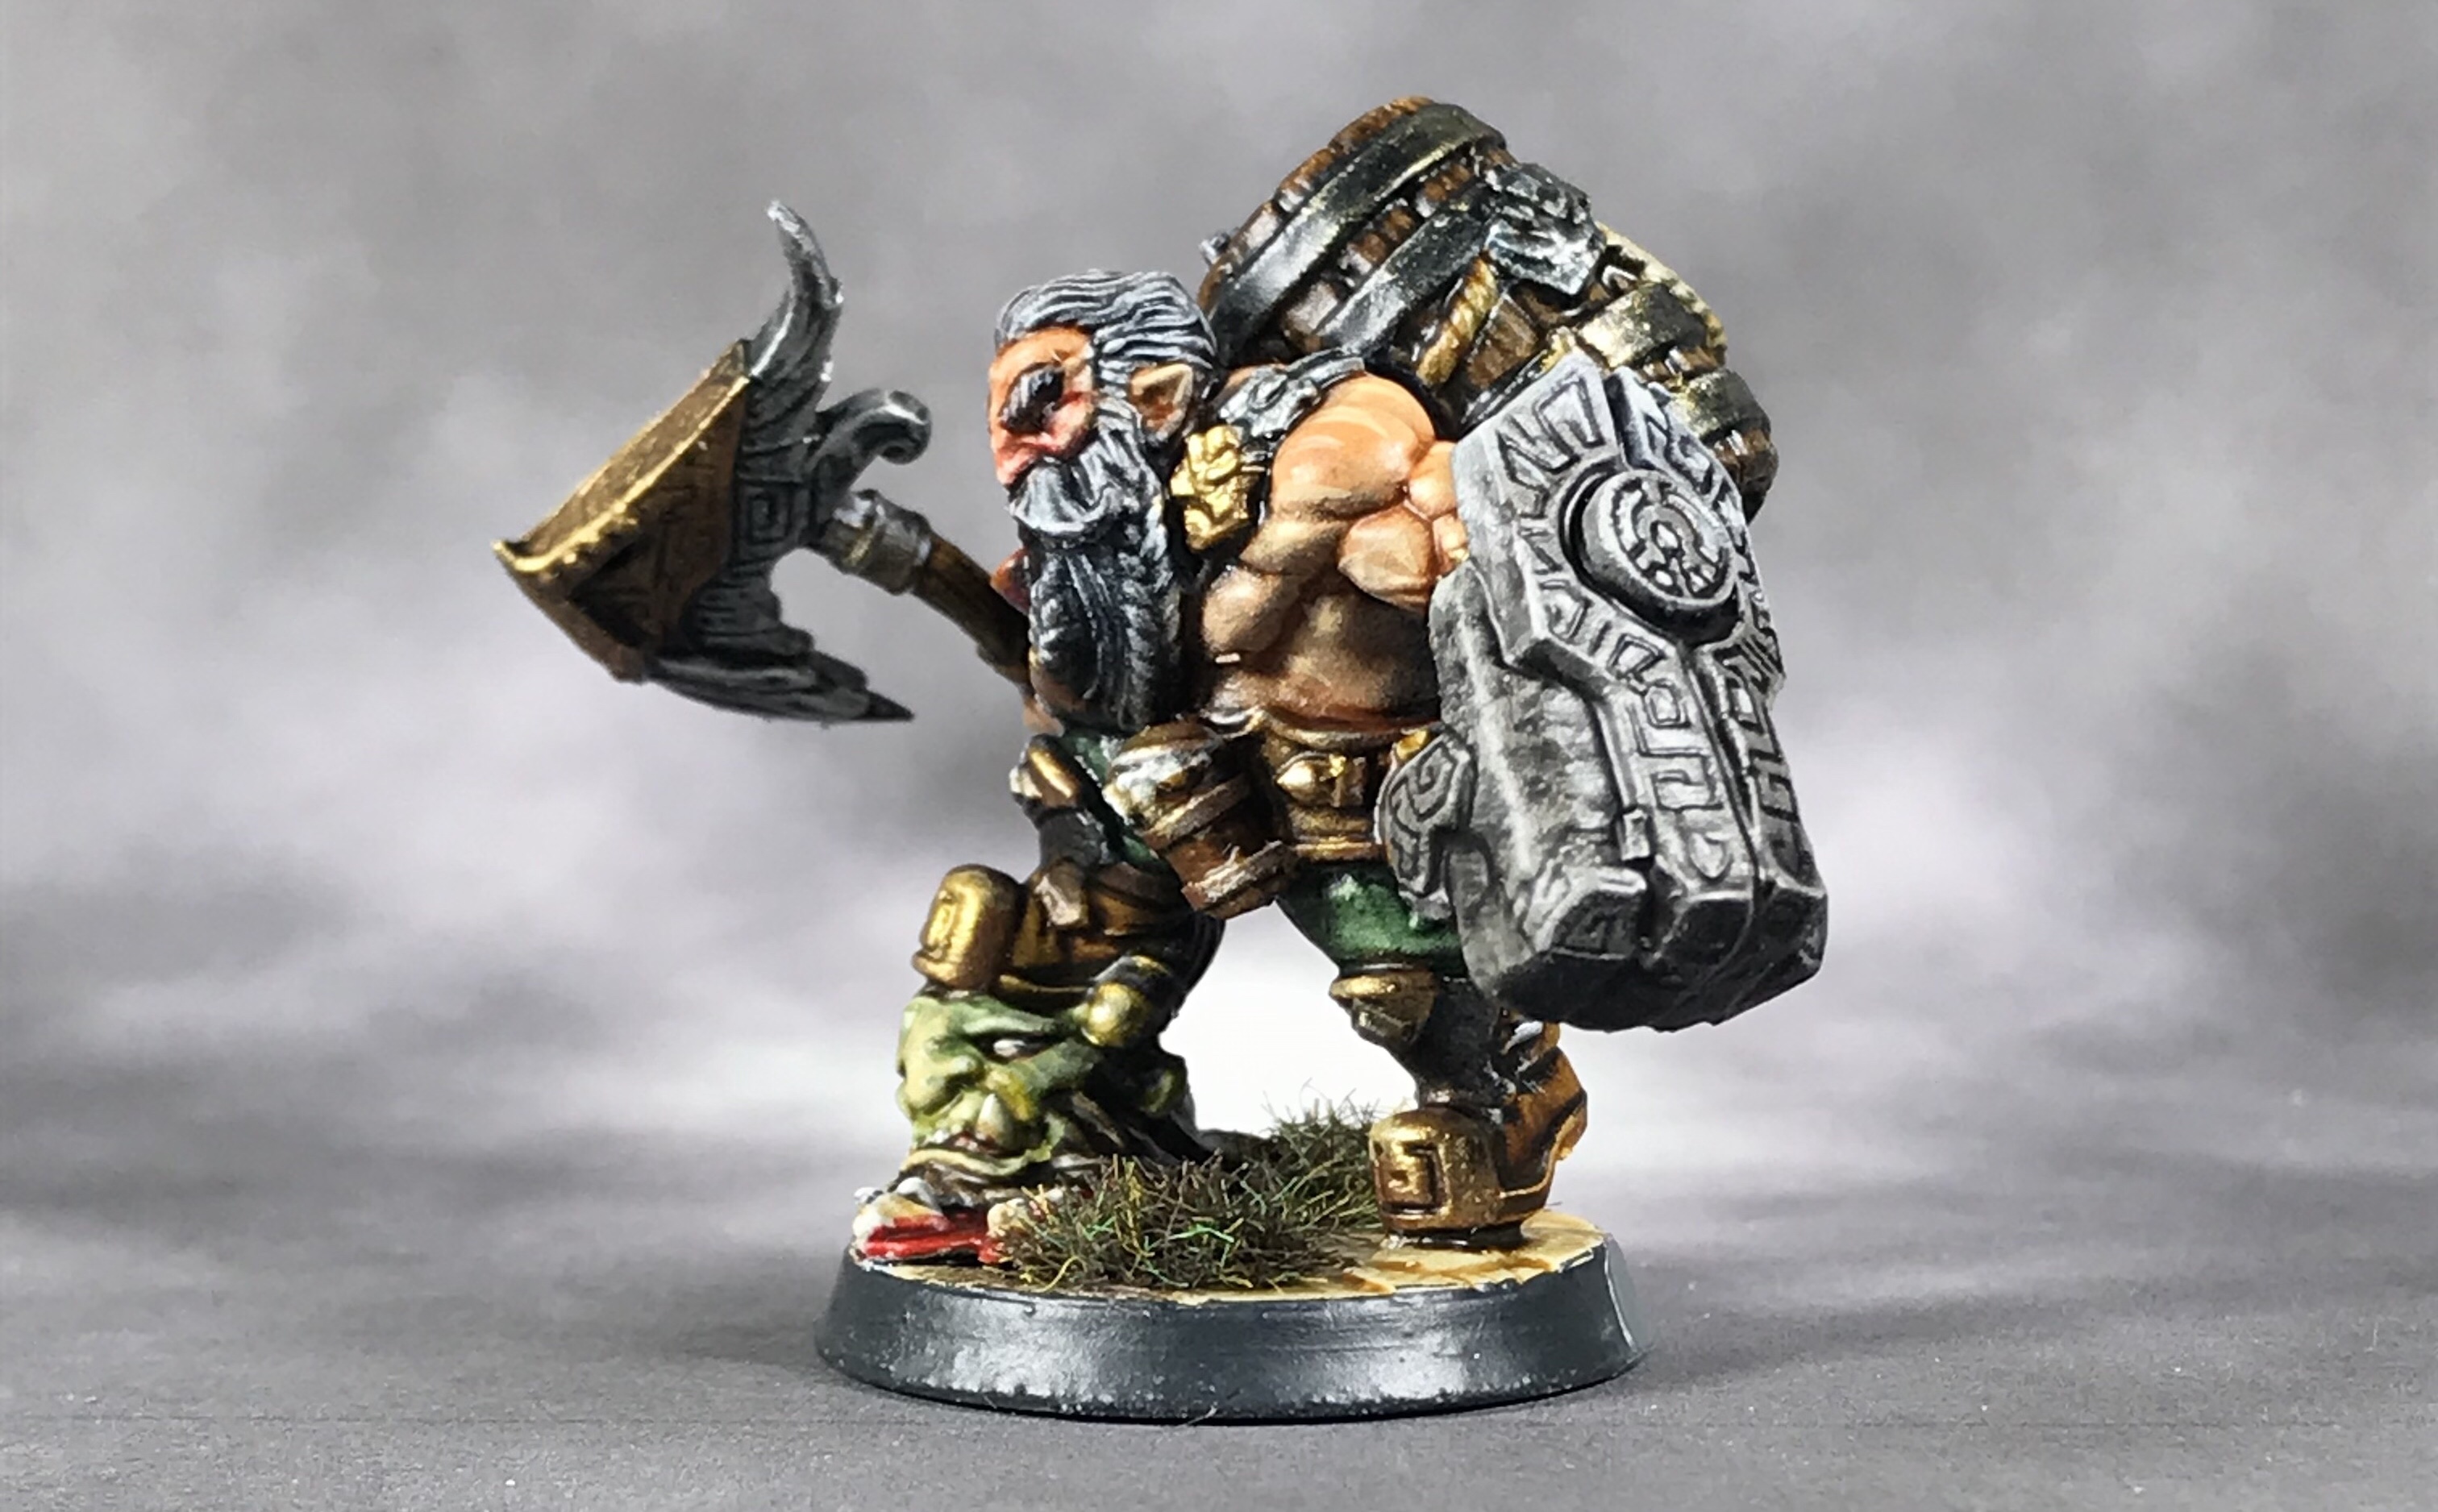
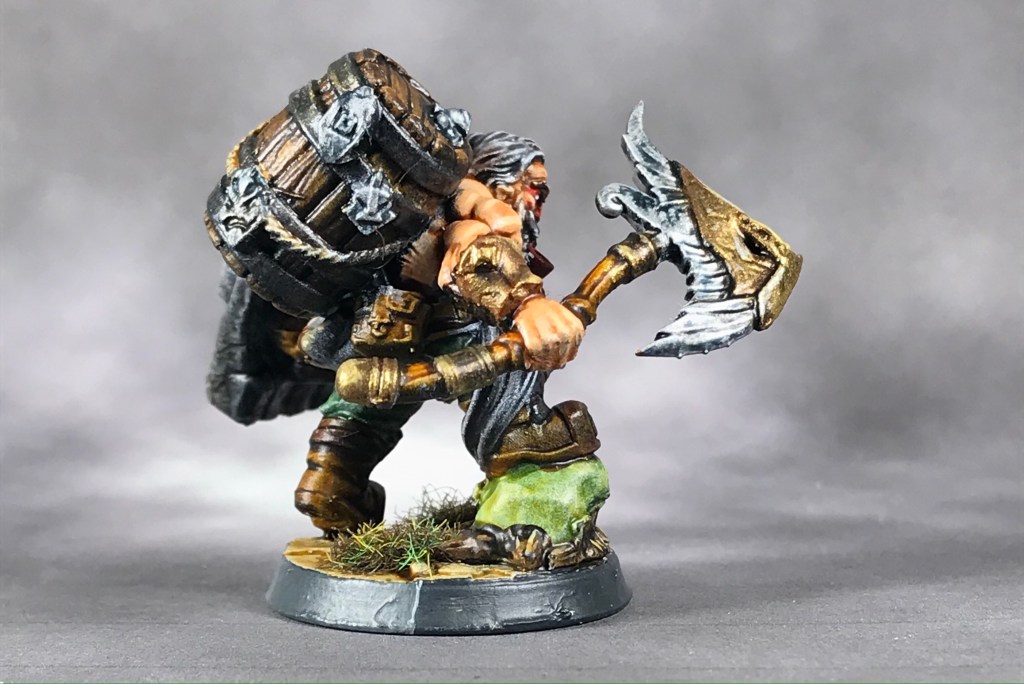
I really had a ton of fun with this model. He’s brawny, puffing on a pipe, and he’s stepping on some poor monster’s head. It wasn’t until I was almost done painting that I realized Gino had knocked a bunch of this dude’s teeth out before chopping off his head. Such a great model, and I think he cost me about .50 cents worth of resin to print out.
The final product is stunning! I’m still working my way through the rest of the offerings for last month, but Gino is ready to kick some ass!