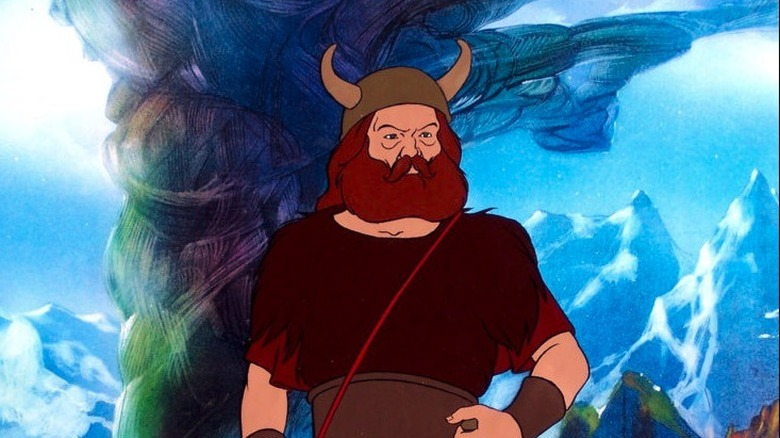
When I was a kid I thought Boromir was the biggest idiot in The Lord of the Rings. Then, the Ralph Bakshi animated movie came out when I was 8, and I was convinced that I was right that entire time the second he walked on screen.
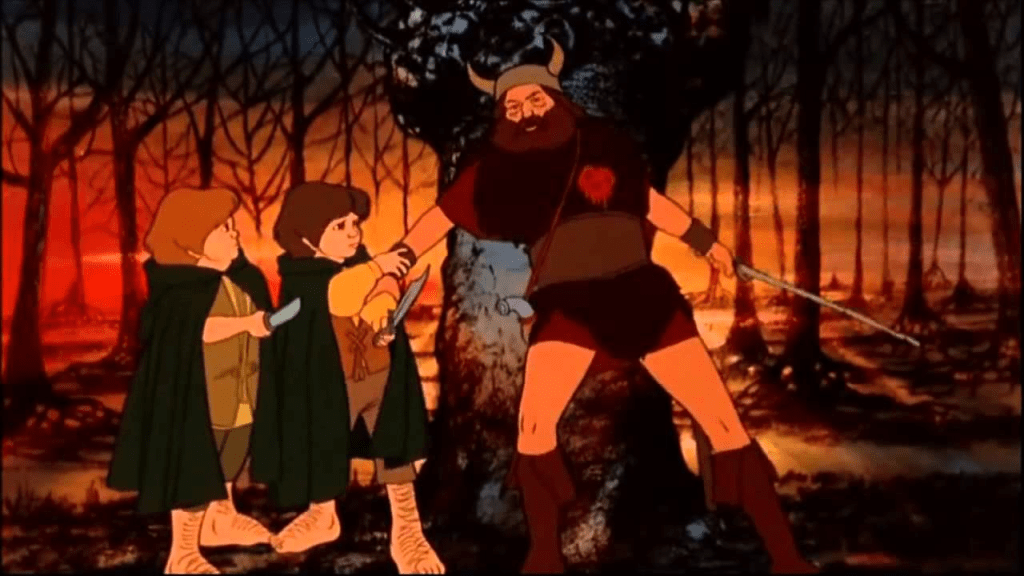
That helmet. That beard. His stupid, hairy, stupidness. But, even though I had read the books during an ill-advised flirtation with viral bronchitis, I wasn’t ready for the bad-assery that Bakshi unleashed with Boromir’s death scene!
He really took a liking to those arrows! Flash forward a few decades, and I was a solid Boromir fan. And then Sean Bean Sean Beaned his way into our collective hearts with a solid performance as Gondor’s favorite-not-perfect-son… what more could we ask for? Miniatures? DID SOMEONE SAY MINIATURES?
Games Workshop blundered its way into the Lord of the Rings license and somehow managed a hat trick that kept in it business long enough to become the champion of miniature game design and fair pricing that we know today! But I didn’t care at the time, being a new dad and too busy painting a billion points of Tau.
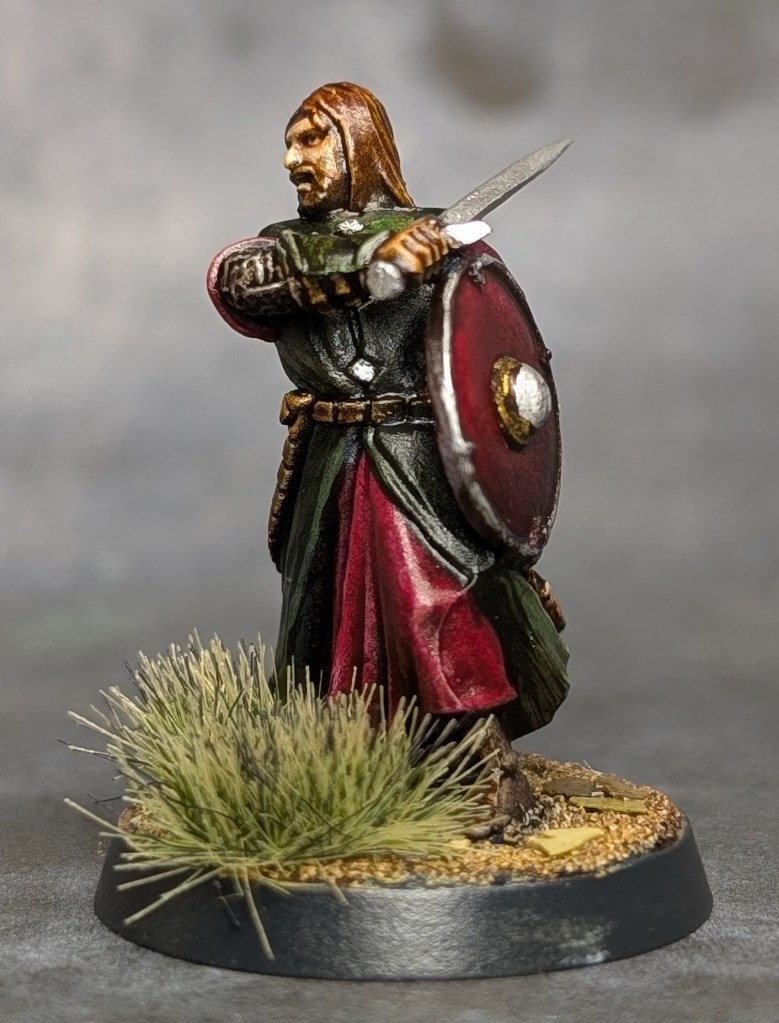
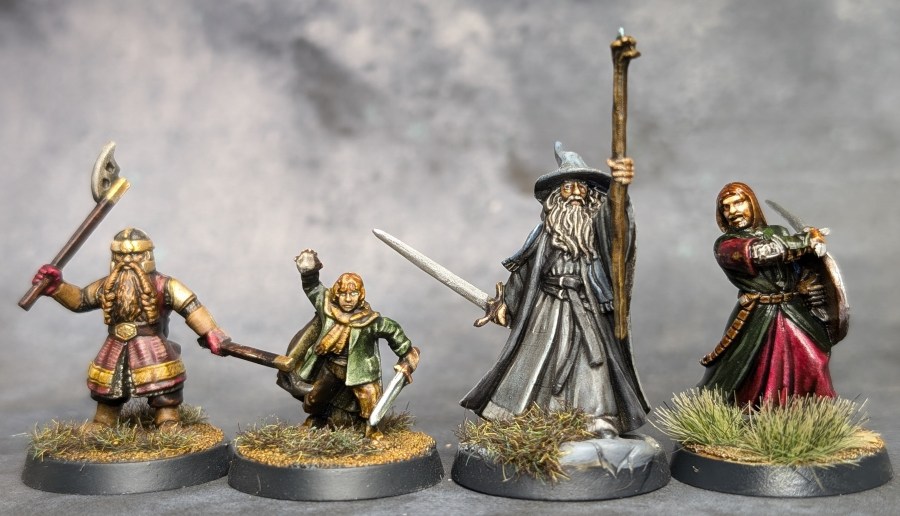
But now? Now I’m playing catch-up. And I’m going to do it with the original Fellowship figures, which are in no way showing their age. Actually, I jest. They’re definitely showing their age, but they’re still pretty sweet!
Somehow the little dude even looks like my favorite walking quiver!
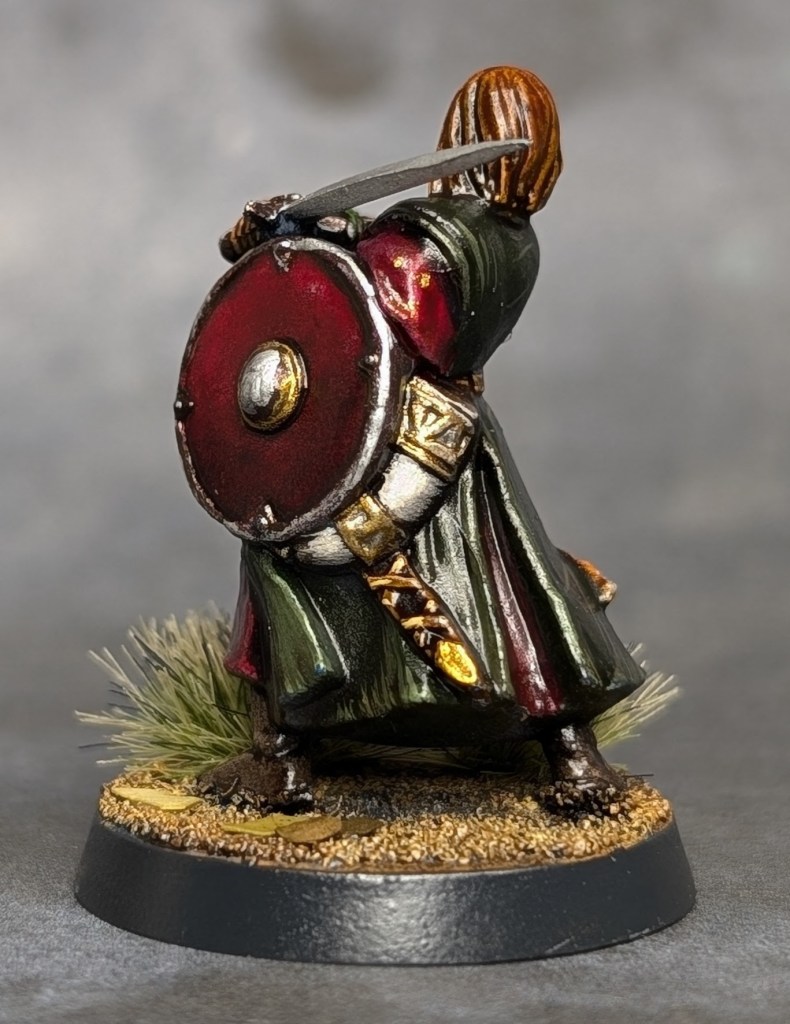
I really wish there was another miniature of Boromir in this costume, there are some fantastic alt sculpts of the rest of the Fellowship out there, but Boromir Arrowshirt only got enough screen time to warrant this one figure. And, well, a Captain of Gondor fig, too, but I want this costume!
Here he is with the rest of the painted figs in the Fellowship:
Hopefully, Gimli will get that plane landed before the Balrog comes!
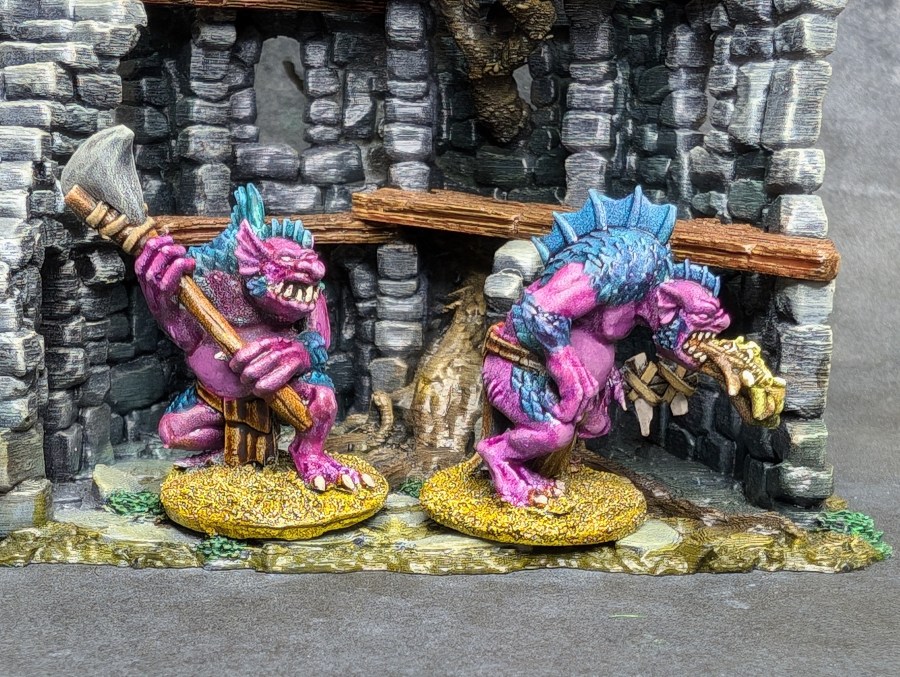
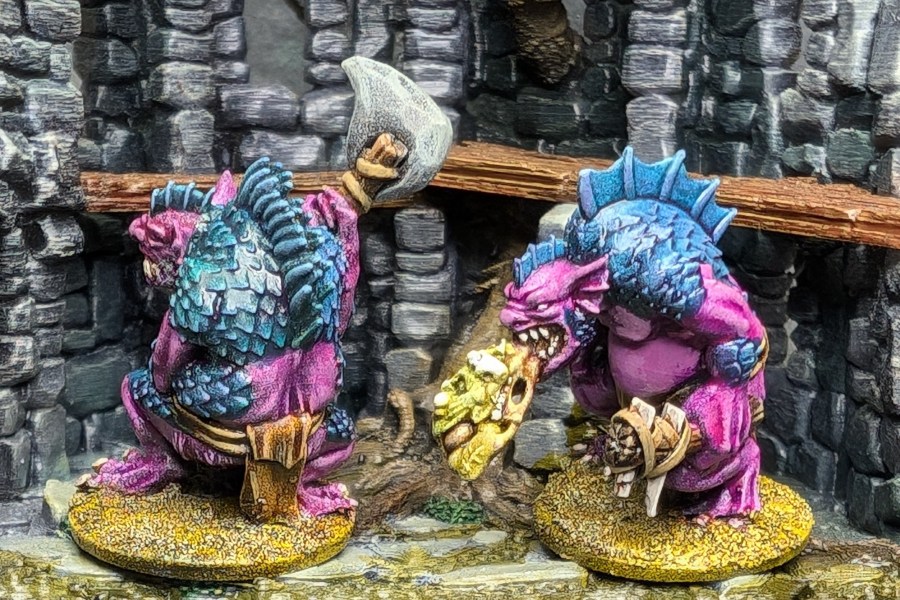
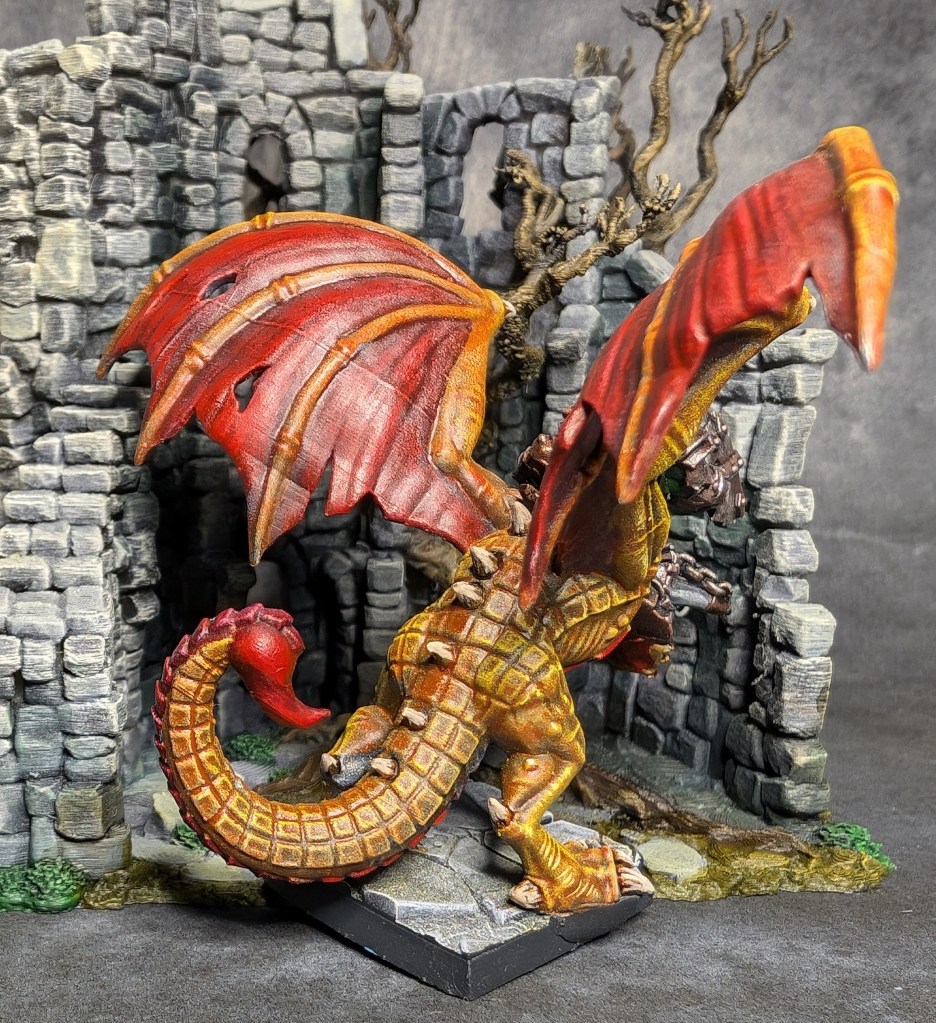
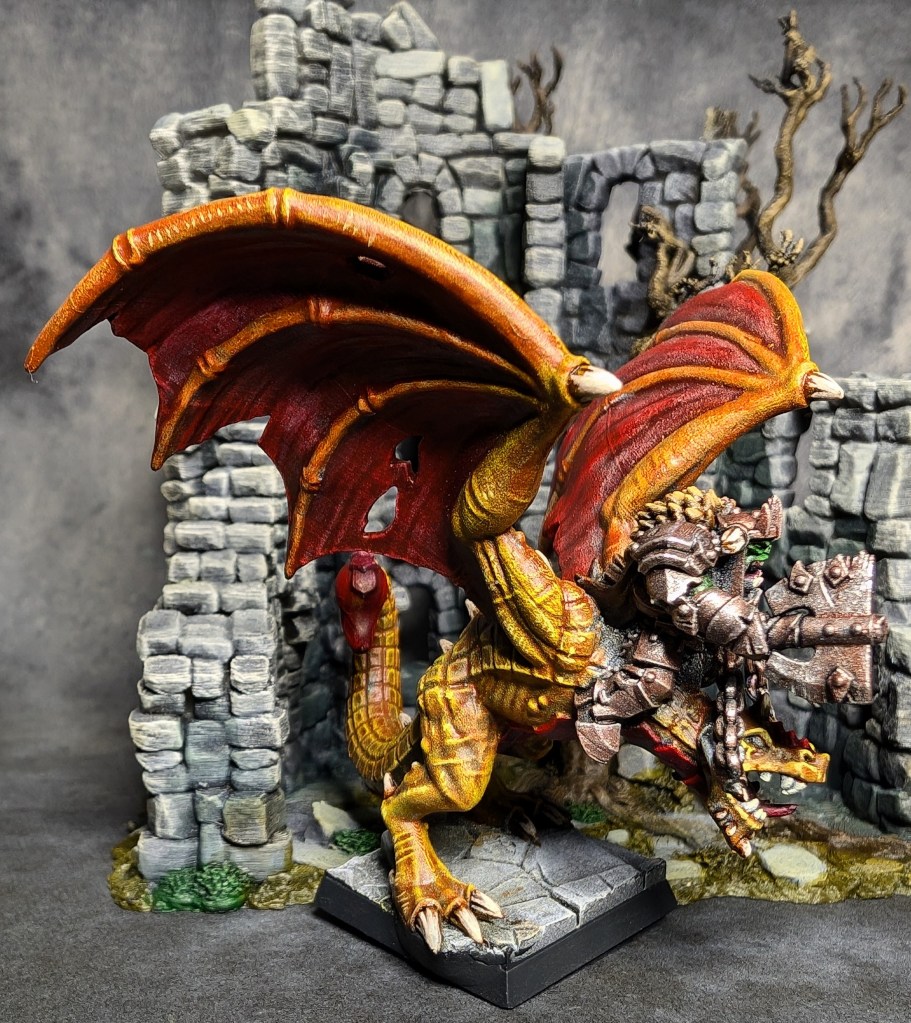
More progress has been made on my 15mm fantasy project, with a couple of thick-skulled gents ready to join my slowly growing horde of greenskins!
For games like Warmaster and Kings of War, these lumbering beauties can be fielded in groups of 3, but for skirmishers like Mordheim one will do!
I’m really impressed with the quality of the sculpts from Forest Dragon miniatures. They still look pretty great scaled up 50%, and I’m getting really excited to see where this army collection is going!
Next up I’m going to have to work on some more character models, and then terrain. Yeah. I need a metric ton of terrain!
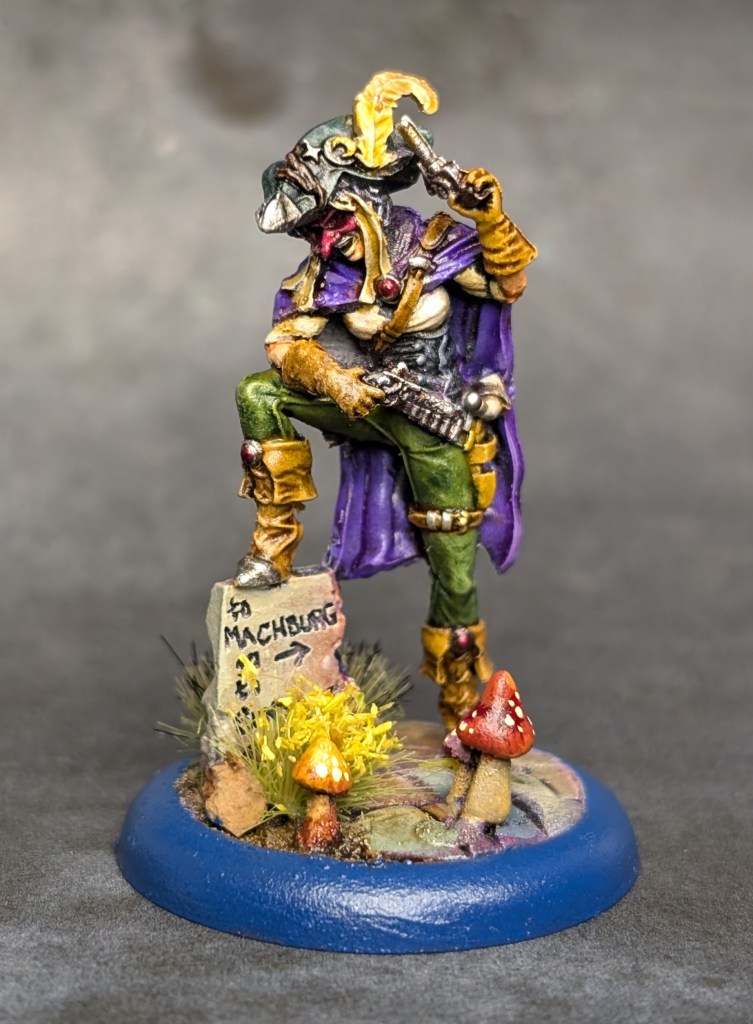
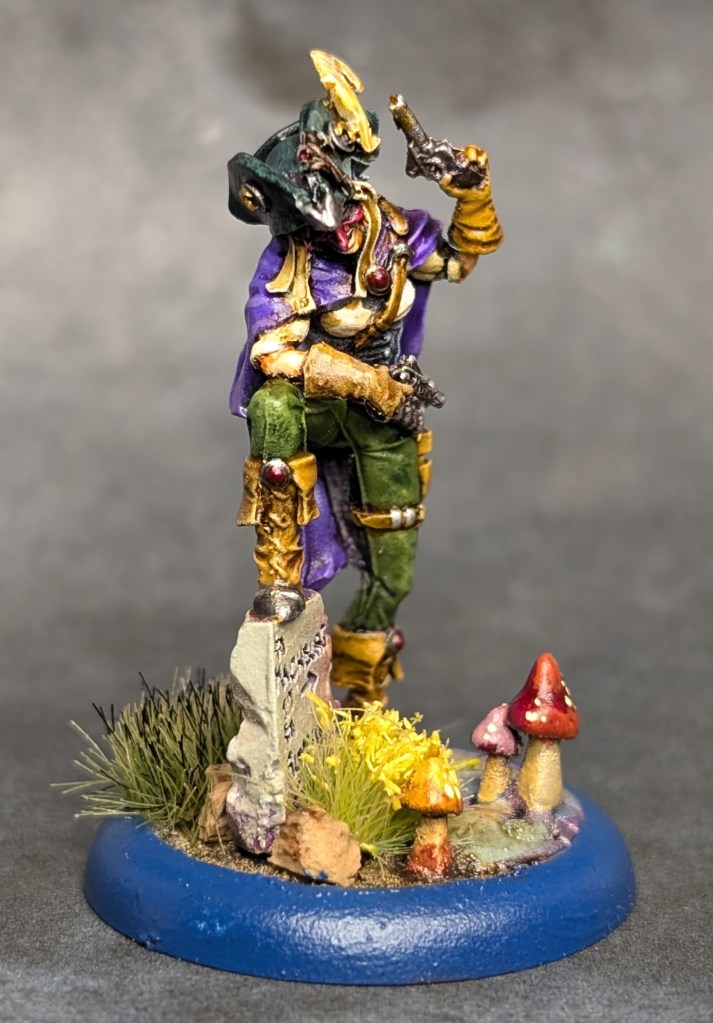
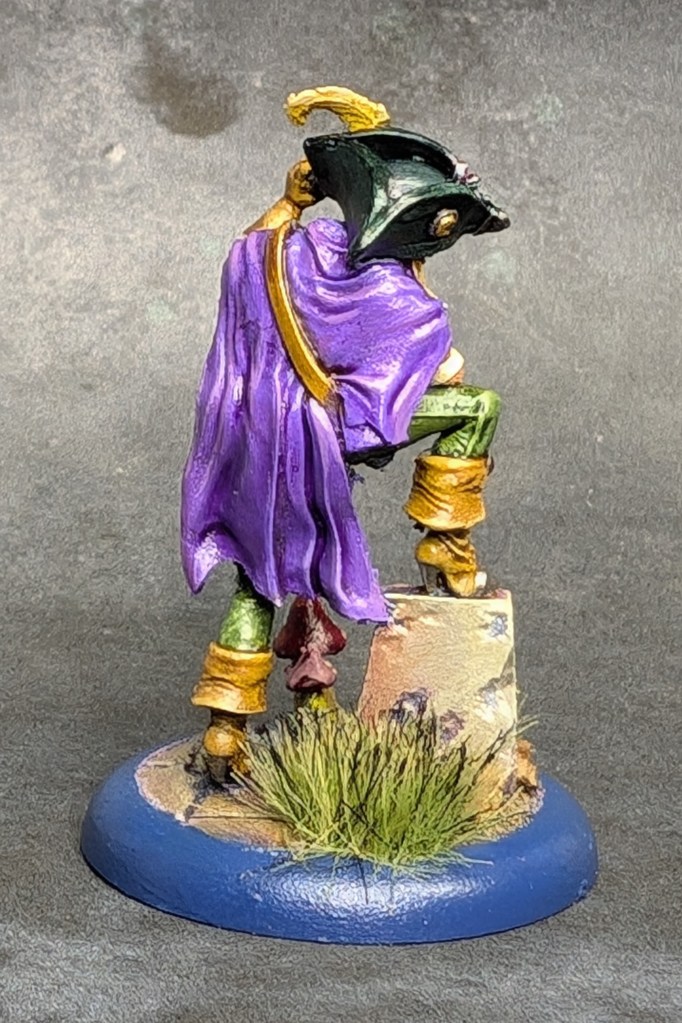
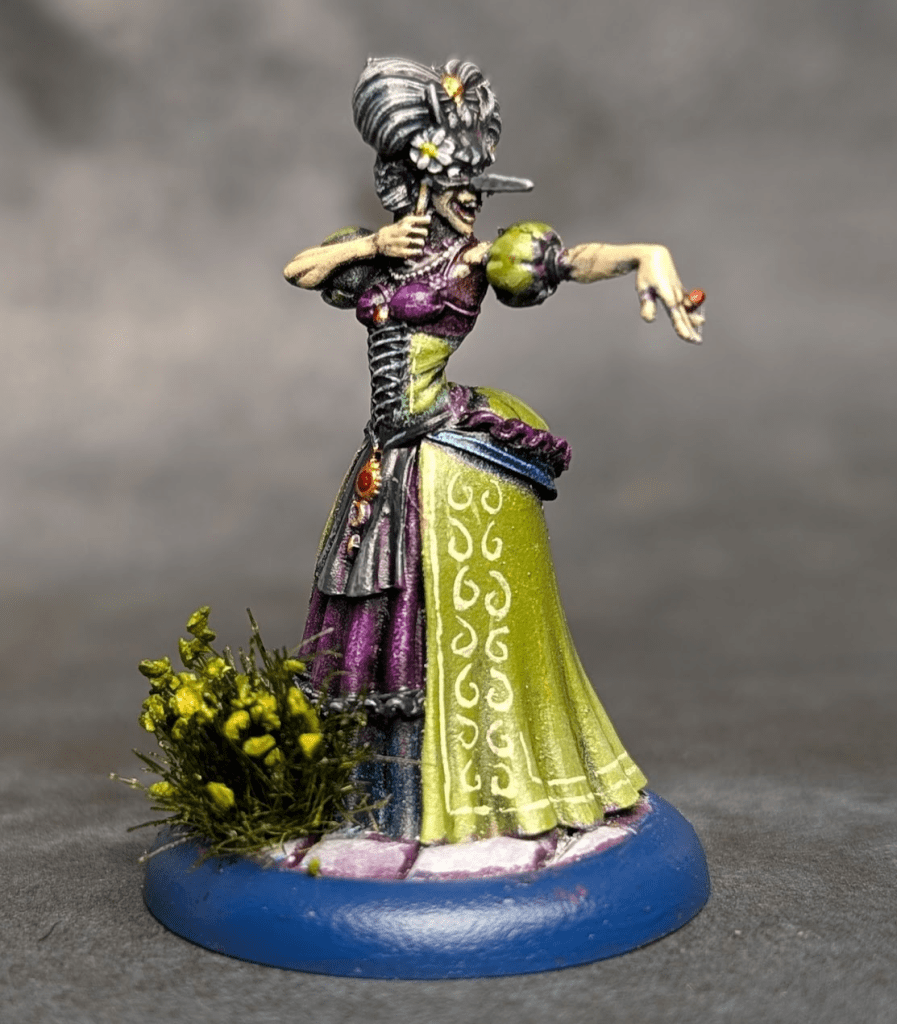
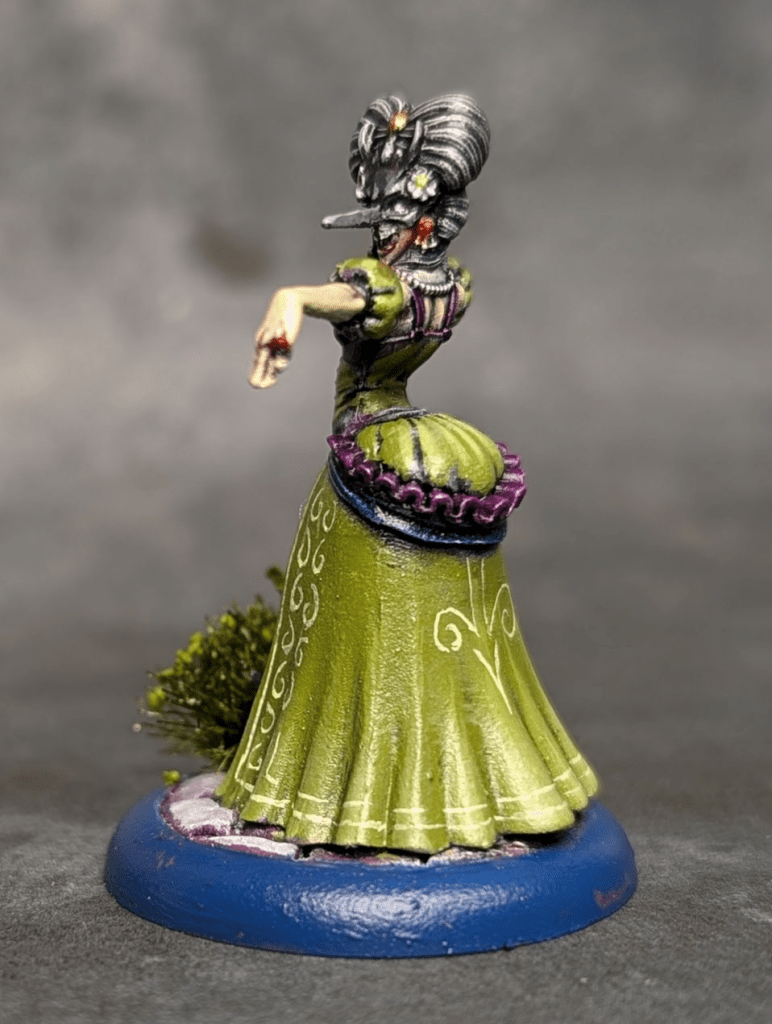
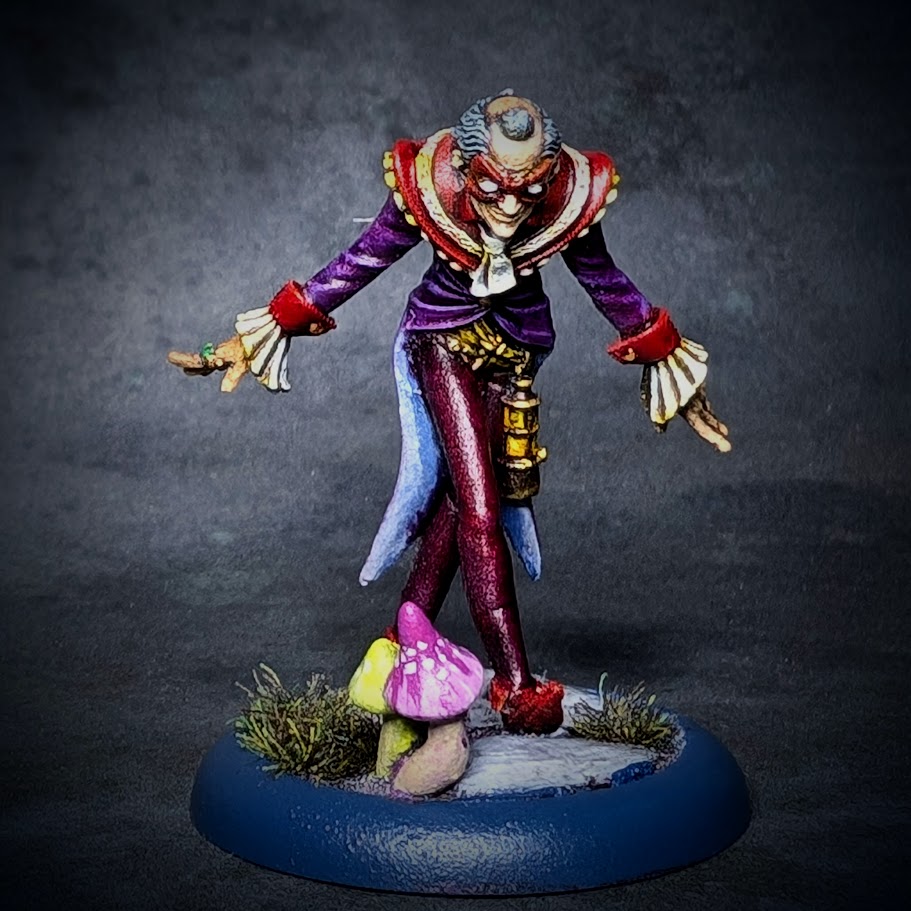
My strategy for finishing up Moonstone miniatures is starting to pay off! It feels good to get an actual set of minis knocked out, now I have one less to paint! Here’s Claudia Duvel from the Masquerade box set:
She’s a fun character, I feel like she’s the muscle that backs up the menace and machinations of the Duchess and Creep!
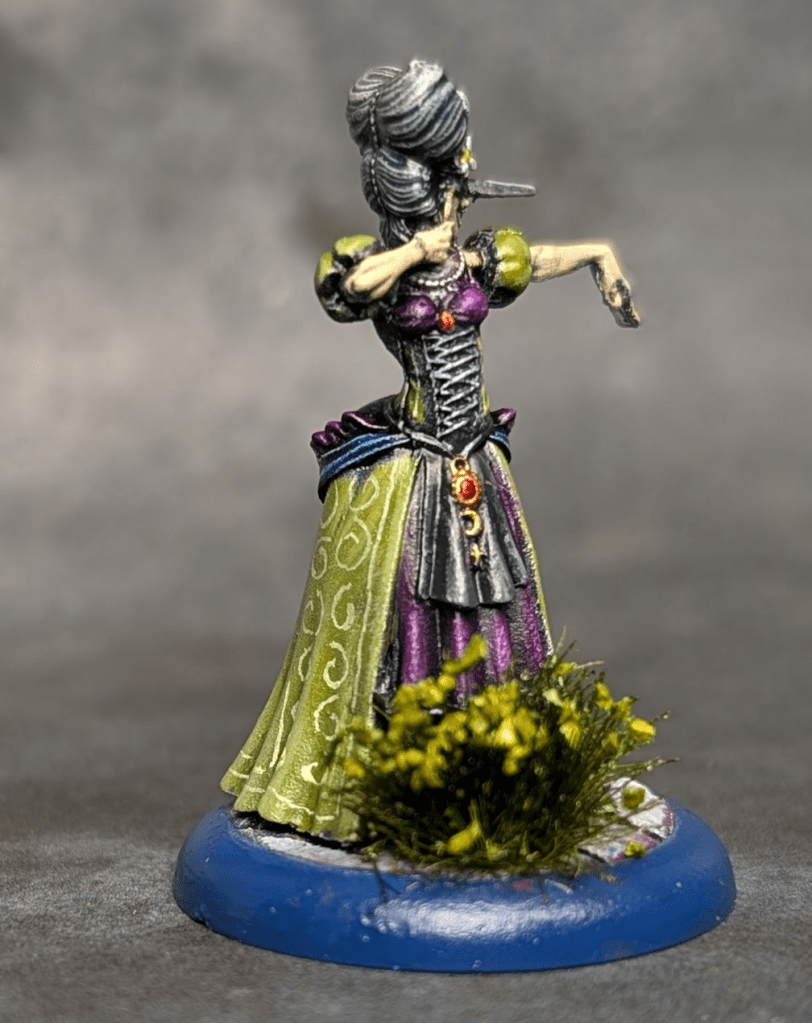
In the Moonstone lore, Claudia is a highwaywoman, but with a heart of gold. She’s known to be a genteel conversationalist, and won’t take riches from her prey at a level that would leave them desitute!
She also refuses to take money or possessions of the working class, which I love. In the lore entry I found on Claudia, she even went so far as to dance with a gentleman who’s wife had been unable to do so since she was suffering from gout!
I absolutely love what a little bit of established lore and fluff can do to make a game setting feel more lived in! With that, The Masquerade is a wrap! On to a farting dog and a quick trip to goblin town!
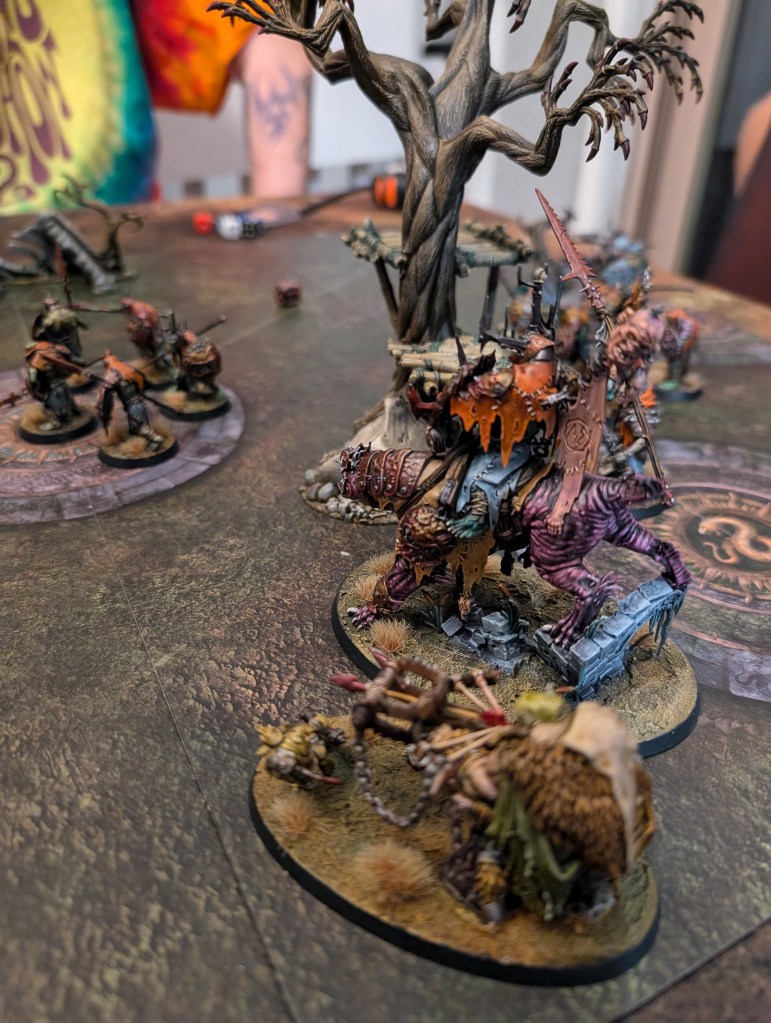
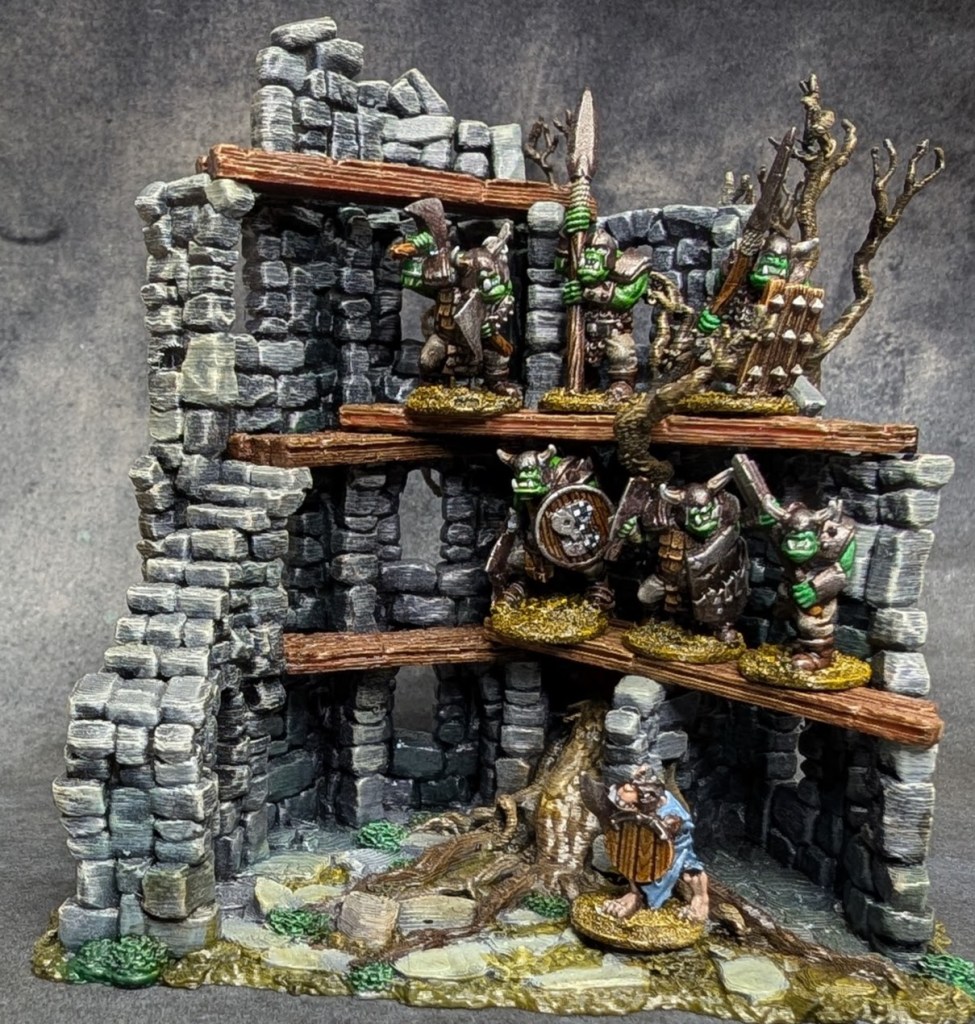
I picked up a long-dormant project over the summer, when my now scattered game group decided to get together for a weekend of Age of Sigmar‘s pretty awesome Spearhead supplement. I had the better part of a Kruleboyz Spearhead already finished, so it was time to get the rest done, which I’ll share in a separate post.
Long story short, we had a blast. My health wasn’t the best, but I still managed to get a game in with my friend Jeff, and we both had an excellent time!
This lead to all of us deciding to work on a Path to Glory league together, with a full campaign and stories to tell about our armies. Our first task is going to be to flesh out those Spearheads to 1,000 points, and for that to work, we’re going to be needing bosses! Or at least I will. Sure, I could use the Spearhead boss, he’s cool enough, but this project deserves something custom!
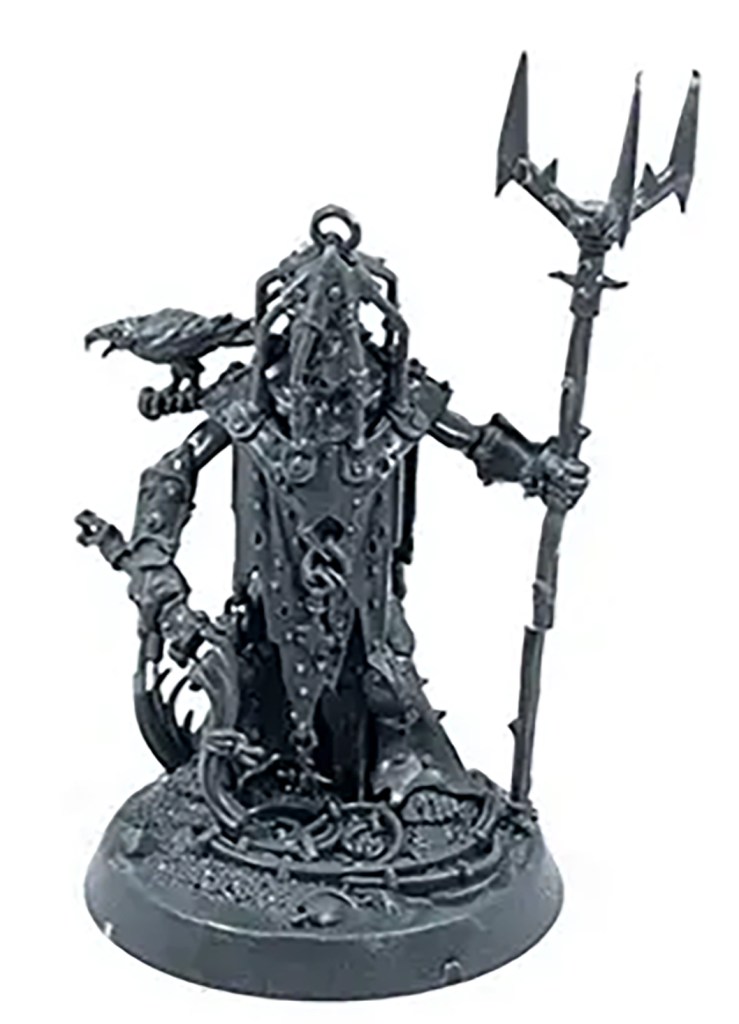
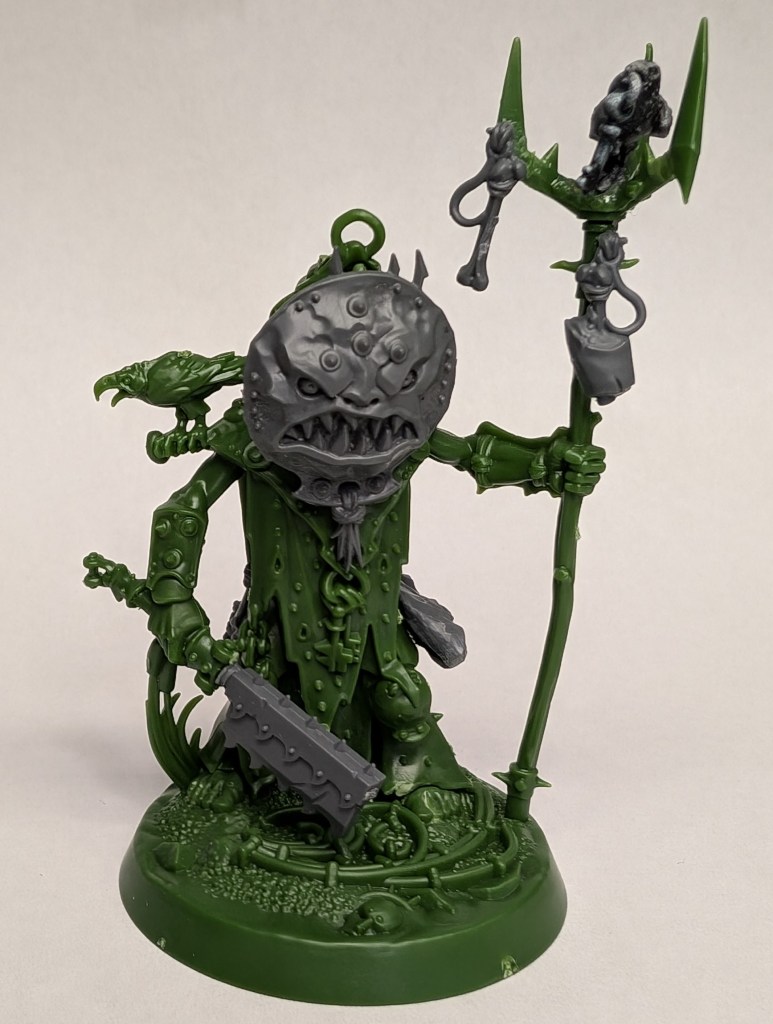
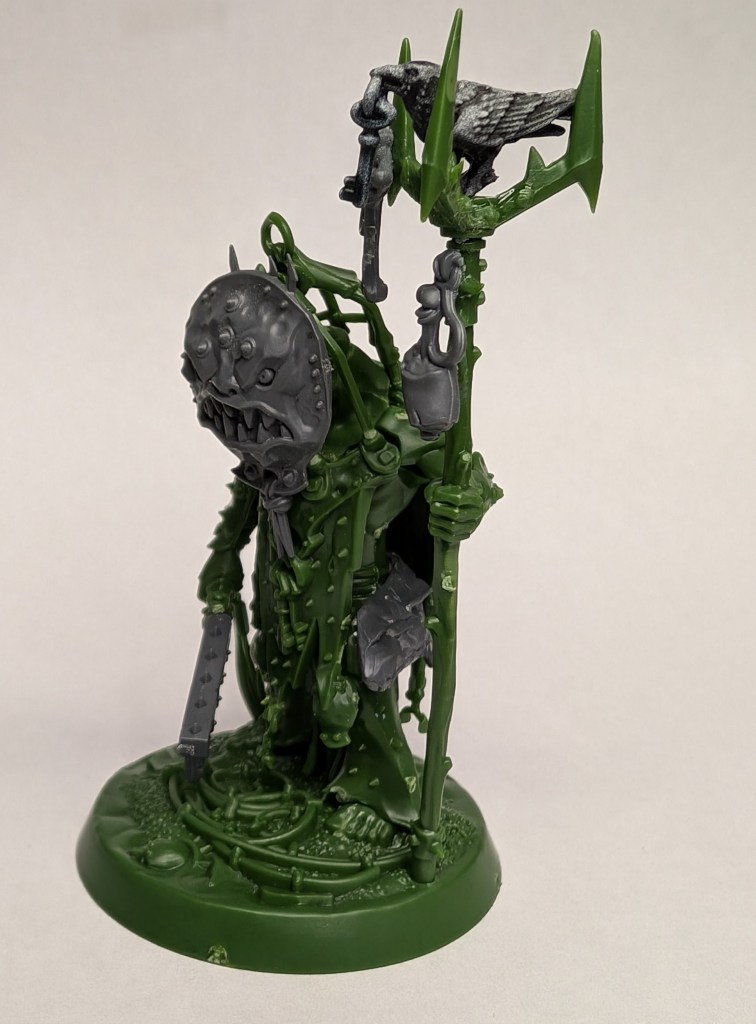
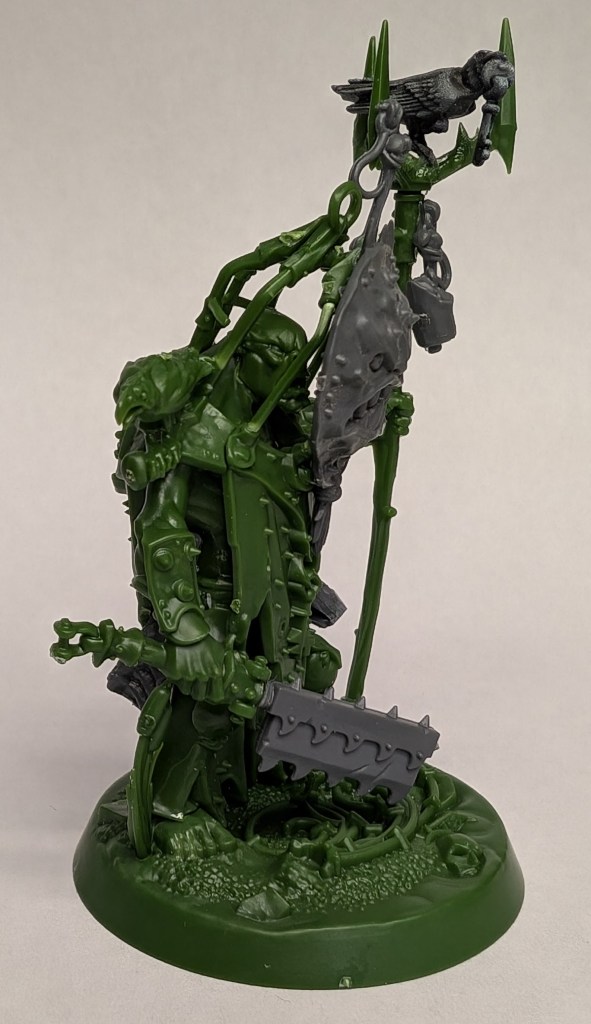
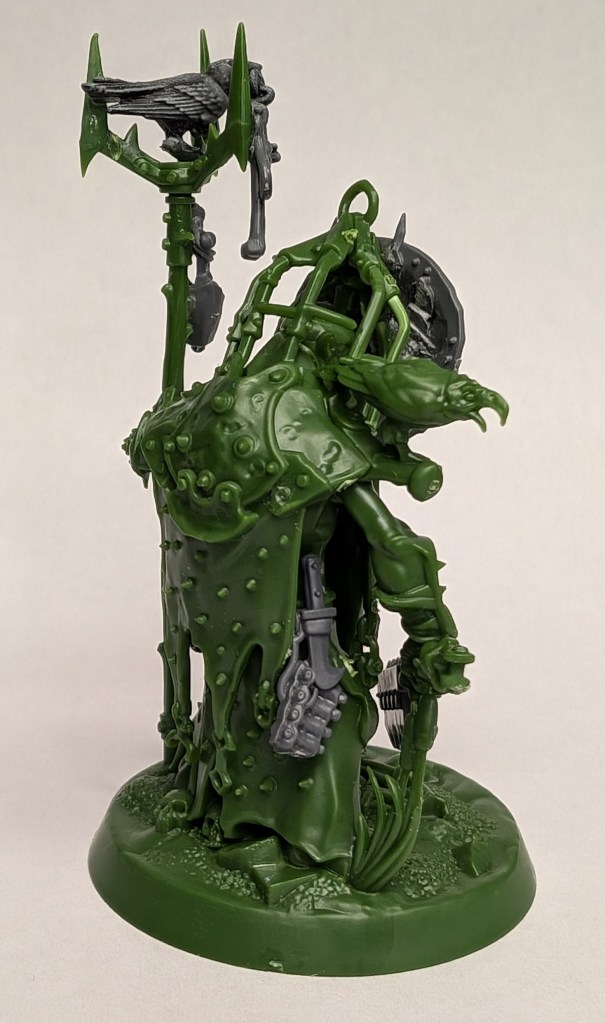
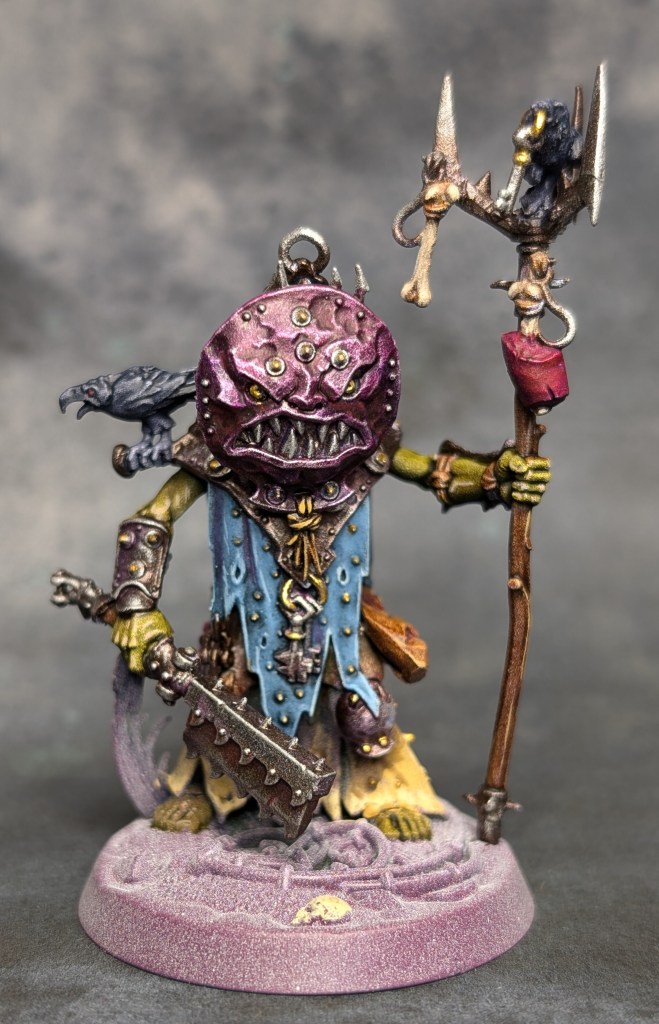
That’s where Grakkskull, da’ King of Crows comes in! I had this amazing Warhammer Underworlds Kruleboy leader, and after figuring out how to get more crows on the figure Grakkskull was born!
First step was coming up with some extras to make him EXTRA. I had just finished putting some Kroot together, so I had some extra meat bits and hooks. Perfect. Also, that cage on this dude’s head gave me some ideas, and I found a crow from my Cursed City box set that set more ideas in motion. Also, that whip needs to be swapped out with something stabbier, so a cleaver from a Khorn jerk should come in handy!
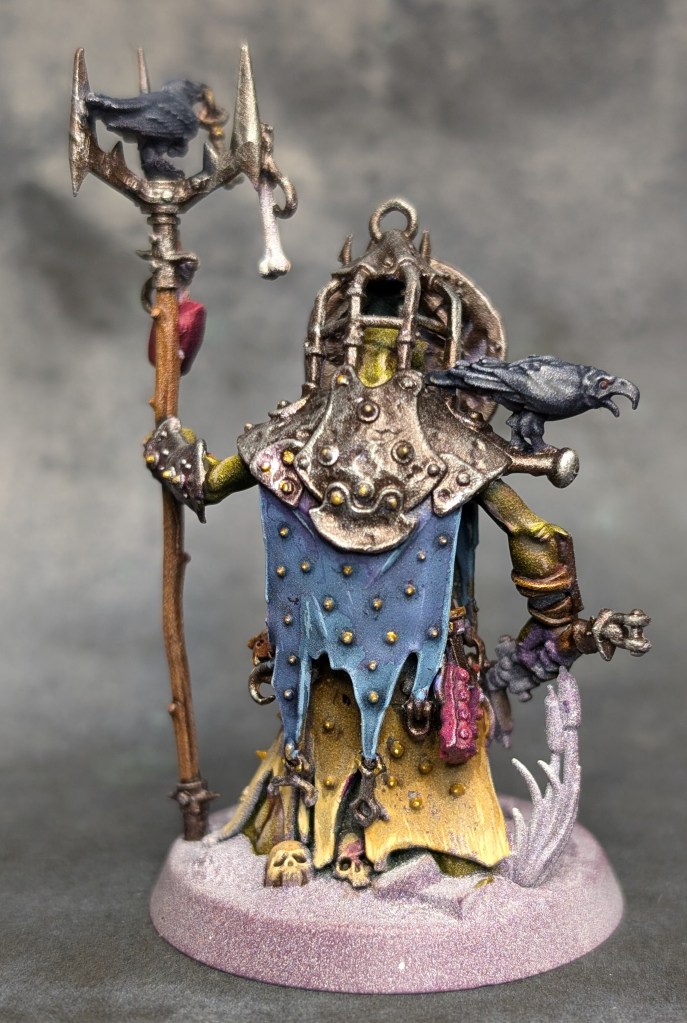
The crow on the trident has a key in its beak, which is one of the motivations behind Grakkskull’s madness. He just wants to find that key and unlock the stupid cage on his head! In the meantime, he had a scare shield welded to the cage so that the gods couldn’t see his schemes and thwart him.
Paint basics have been laid in, next up is detailing and basing! Then his stabgrot, Bootlick, will be joining the mob! Stay tuned for more!
Time for an update on my Moonstone back log, and perhaps the beginning of a fresh strategy to get these done!
In the past, I’ve just put together whatever I had in front of me, and set out painting that backlog without any real strategy. That has led me to feeling like I’ll never finish any of these collections, since there’s simply so many figures, and I’m doing a terrible job of not buying more!
So, I’ll be taking them on by boxed set, and since the last Moonstone mini I finished was the Creep from the Masquerade box, I figured I would follow up with Duchess, and eventually Claudia Duvel. That should at least help me feel like I’m making some progress as I check off each box completed!
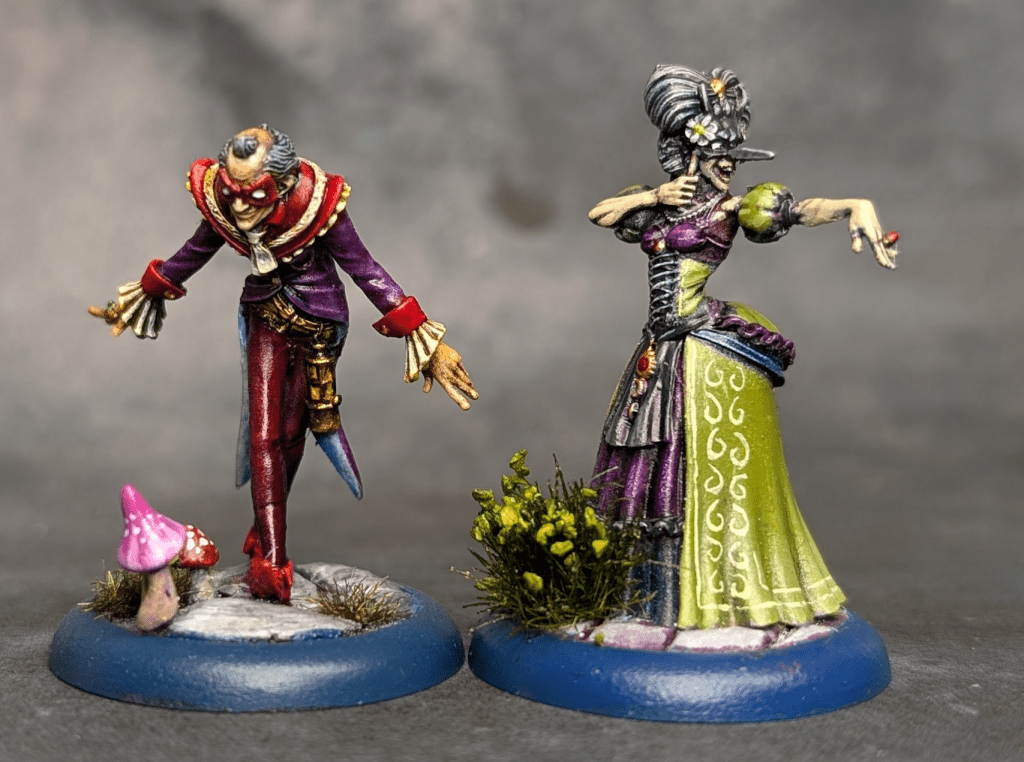
The Duchess is a really fun mini, and challenged me to try some new approaches to color. I wanted to go super bright on everything, but she’s also pretty sinister, so I needed to go bright and sinister, which I’m hoping I pulled off!
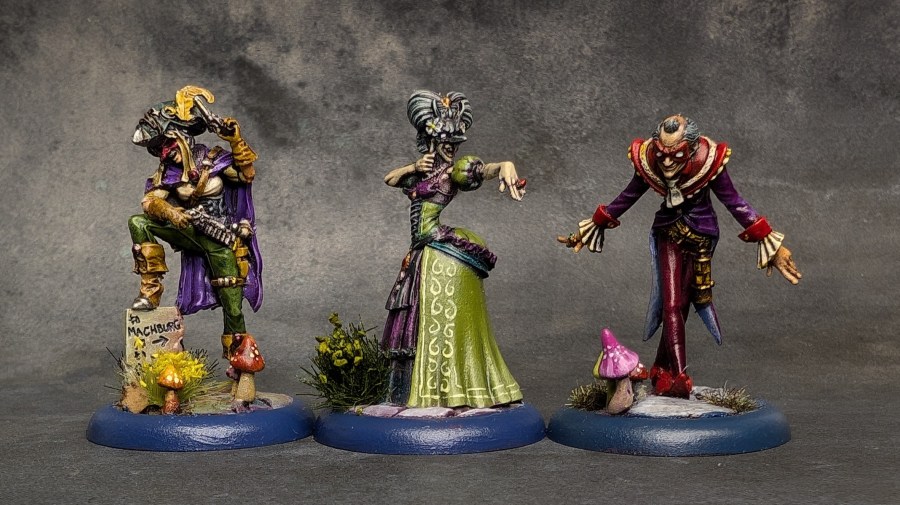
Here she is with Creep, looking like they’re ready to poison some canape at the next Grand Ball! Claudia is already on the paint table, so I should have her up soon!
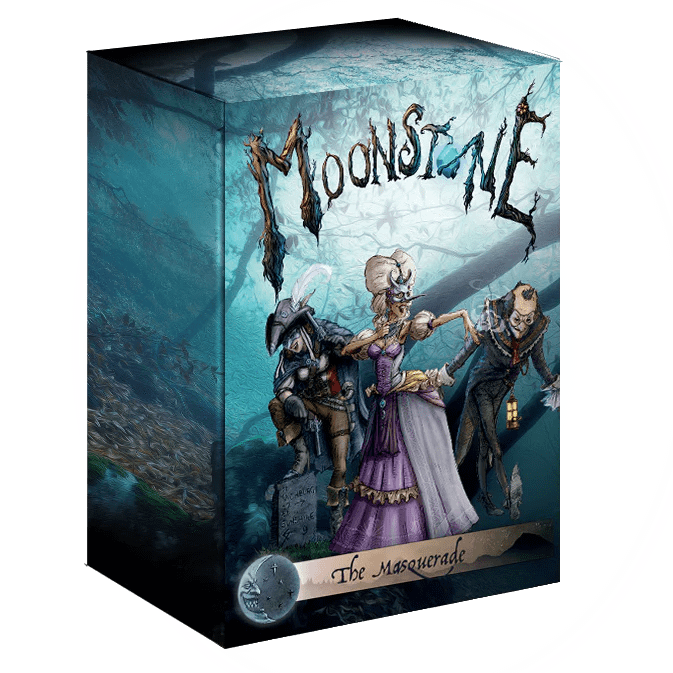
The Masquerade Troop box is available online directly here, but you could be a real champ and order it from your local game store!
More from the lab from the 15mm Fantasy project! I’ve been feeling a bit green lately, so I figured I would mark the occasion with a little greenskin action. And when I say little, I mean really little…
As I mentioned in a previous post, 15mm has become my Goldilocks scale for miniatures. Stuff just prints up lovely, and there’s a ton of options out there from some independent miniature companies.
This particular Green Menace started out as a subscription set of STL files I got from Forest Dragon Miniatures, but my doctor says I need to avoid printing with resin, so I have been ordering the rest of the army from a company on Etsy that does a pretty nice job!
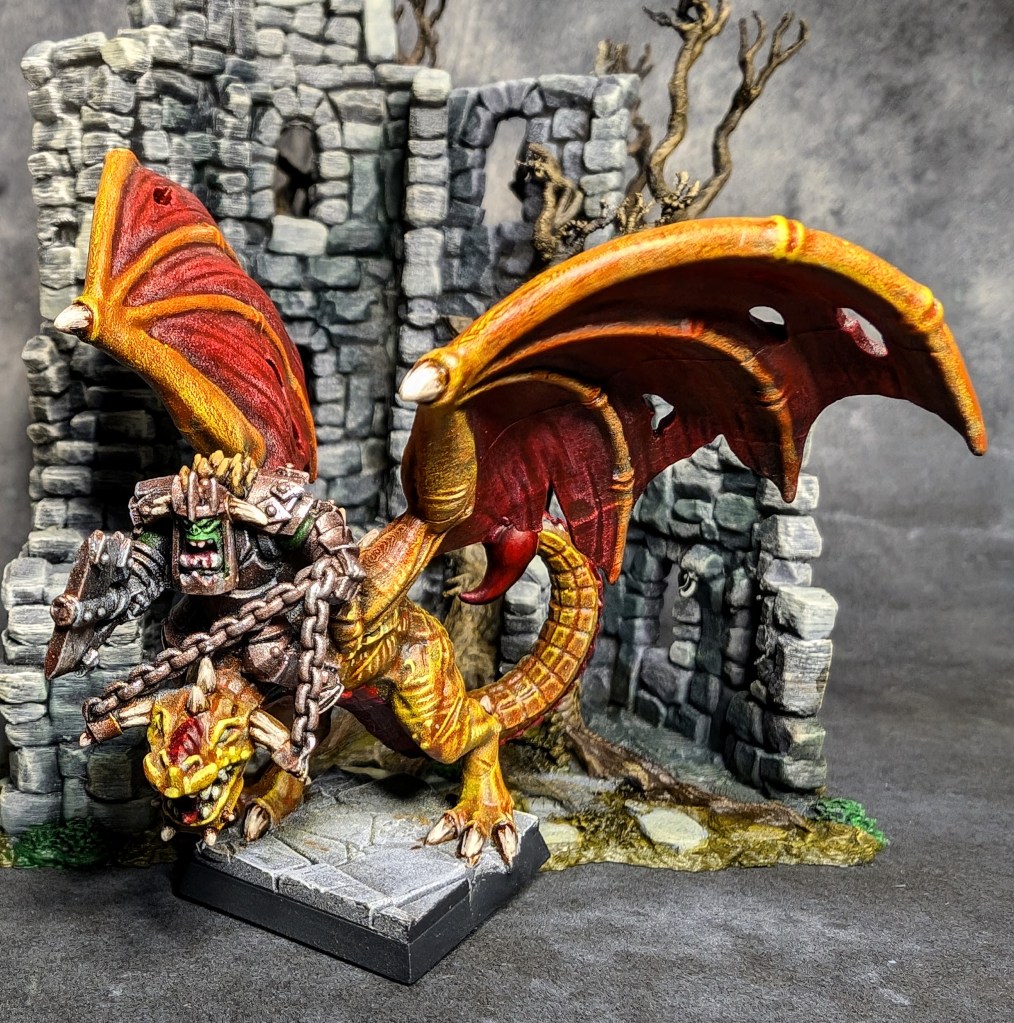
The first finished fig is an Orc Warboss on a Wyvern, and I seriously love this mini! There’s a print defect on the wing, but he’s pretty small and it’s hardly noticeable:
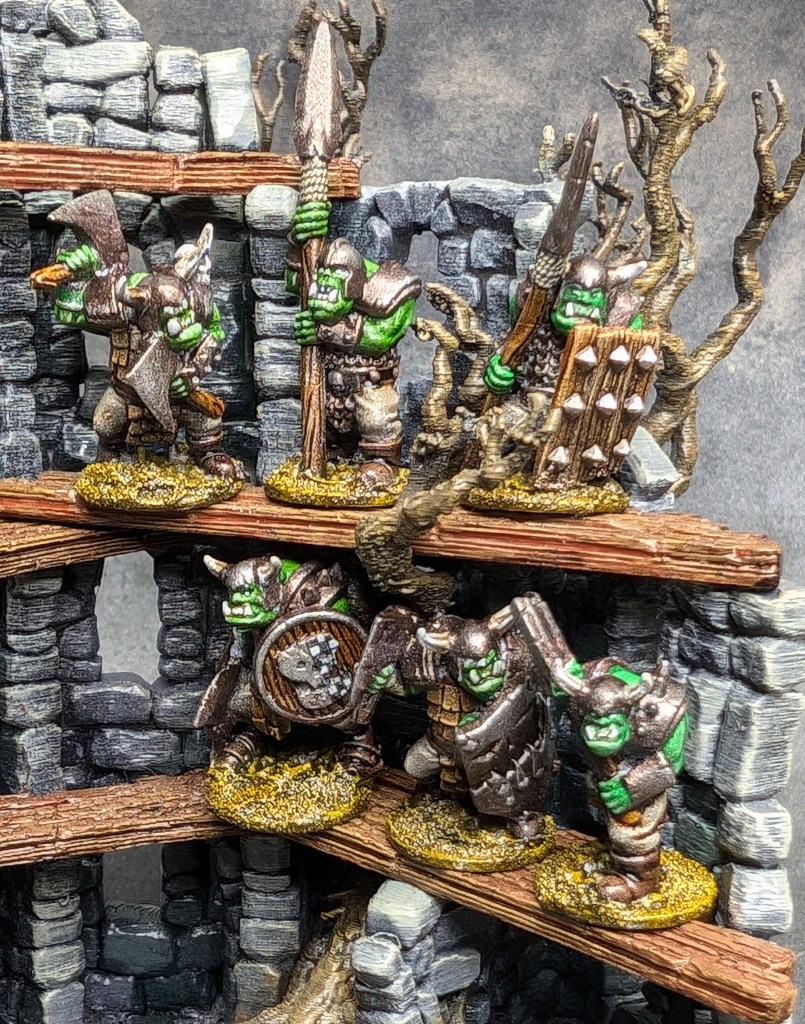
I also finished up a small group of grunts, which were mounted to #10 washers for bases. Those work out to about 1/2″ wide, which allows a pretty solid balance between functionality and display needs. I originally had 3/4″ washers on there, but that made the miniatures hard to place on terrain!
I plan on using these guys for skirmish games, and there’s a travel board in the works that will have some pretty sweet terrain packed into it! More to come soon! (pay no attention to the ratboi in the basement!)
Sadly, I knew I was pretty much doomed the second I laid eyes on my fist Moonstone miniature a few years back. There is a irreverent streak that runs about a mile wide in the sculpts, and everything about them just screams for me to paint them. Paint them ALL.
Creep isn’t the first Moonstone mini that I painted, but he’ll be the first I’m posting here. He’s part of the Human Dominion range, and exudes a really fun menace. I can’t wait to paint more, hahaha!
Moonstone minis are made of a fine cast resin, and hold detail pretty well. There is a fare amount of flash on some models, and others hardly any, which I find typical of resin models. It’s easy to lose track of the details when painting, especially when your eyes are starting to fail like mine are. I found keeping the Moonstone website open to the mini I’m painting helps make sure I’m not missing something!
I printed the mushrooms on my Saturn, and went with some bold fluorescents on them to bring out the bright colors on the mini. It’s a fantasy world, it’s okay to go big and bright!
Next up for my Moonstone collection will be Doug the Flatulent, who is a farting pug with a goblin on his back. Yes, it’s that amazing!
The Kings of War project I started last year is one of those giant undertakings that I really struggle with. I’m not much of a horde painter when it comes to miniatures, I would much rather paint up a dozen minis and focus on skirmish games, but there is something about the enthusiasm of my local KoW group that is a little infectious.
I have a couple of good, solid core groups put together, and my command minis have arrived from Durgin Paint Forge in Italy, so I have some great character options for my Vanguard detachments.
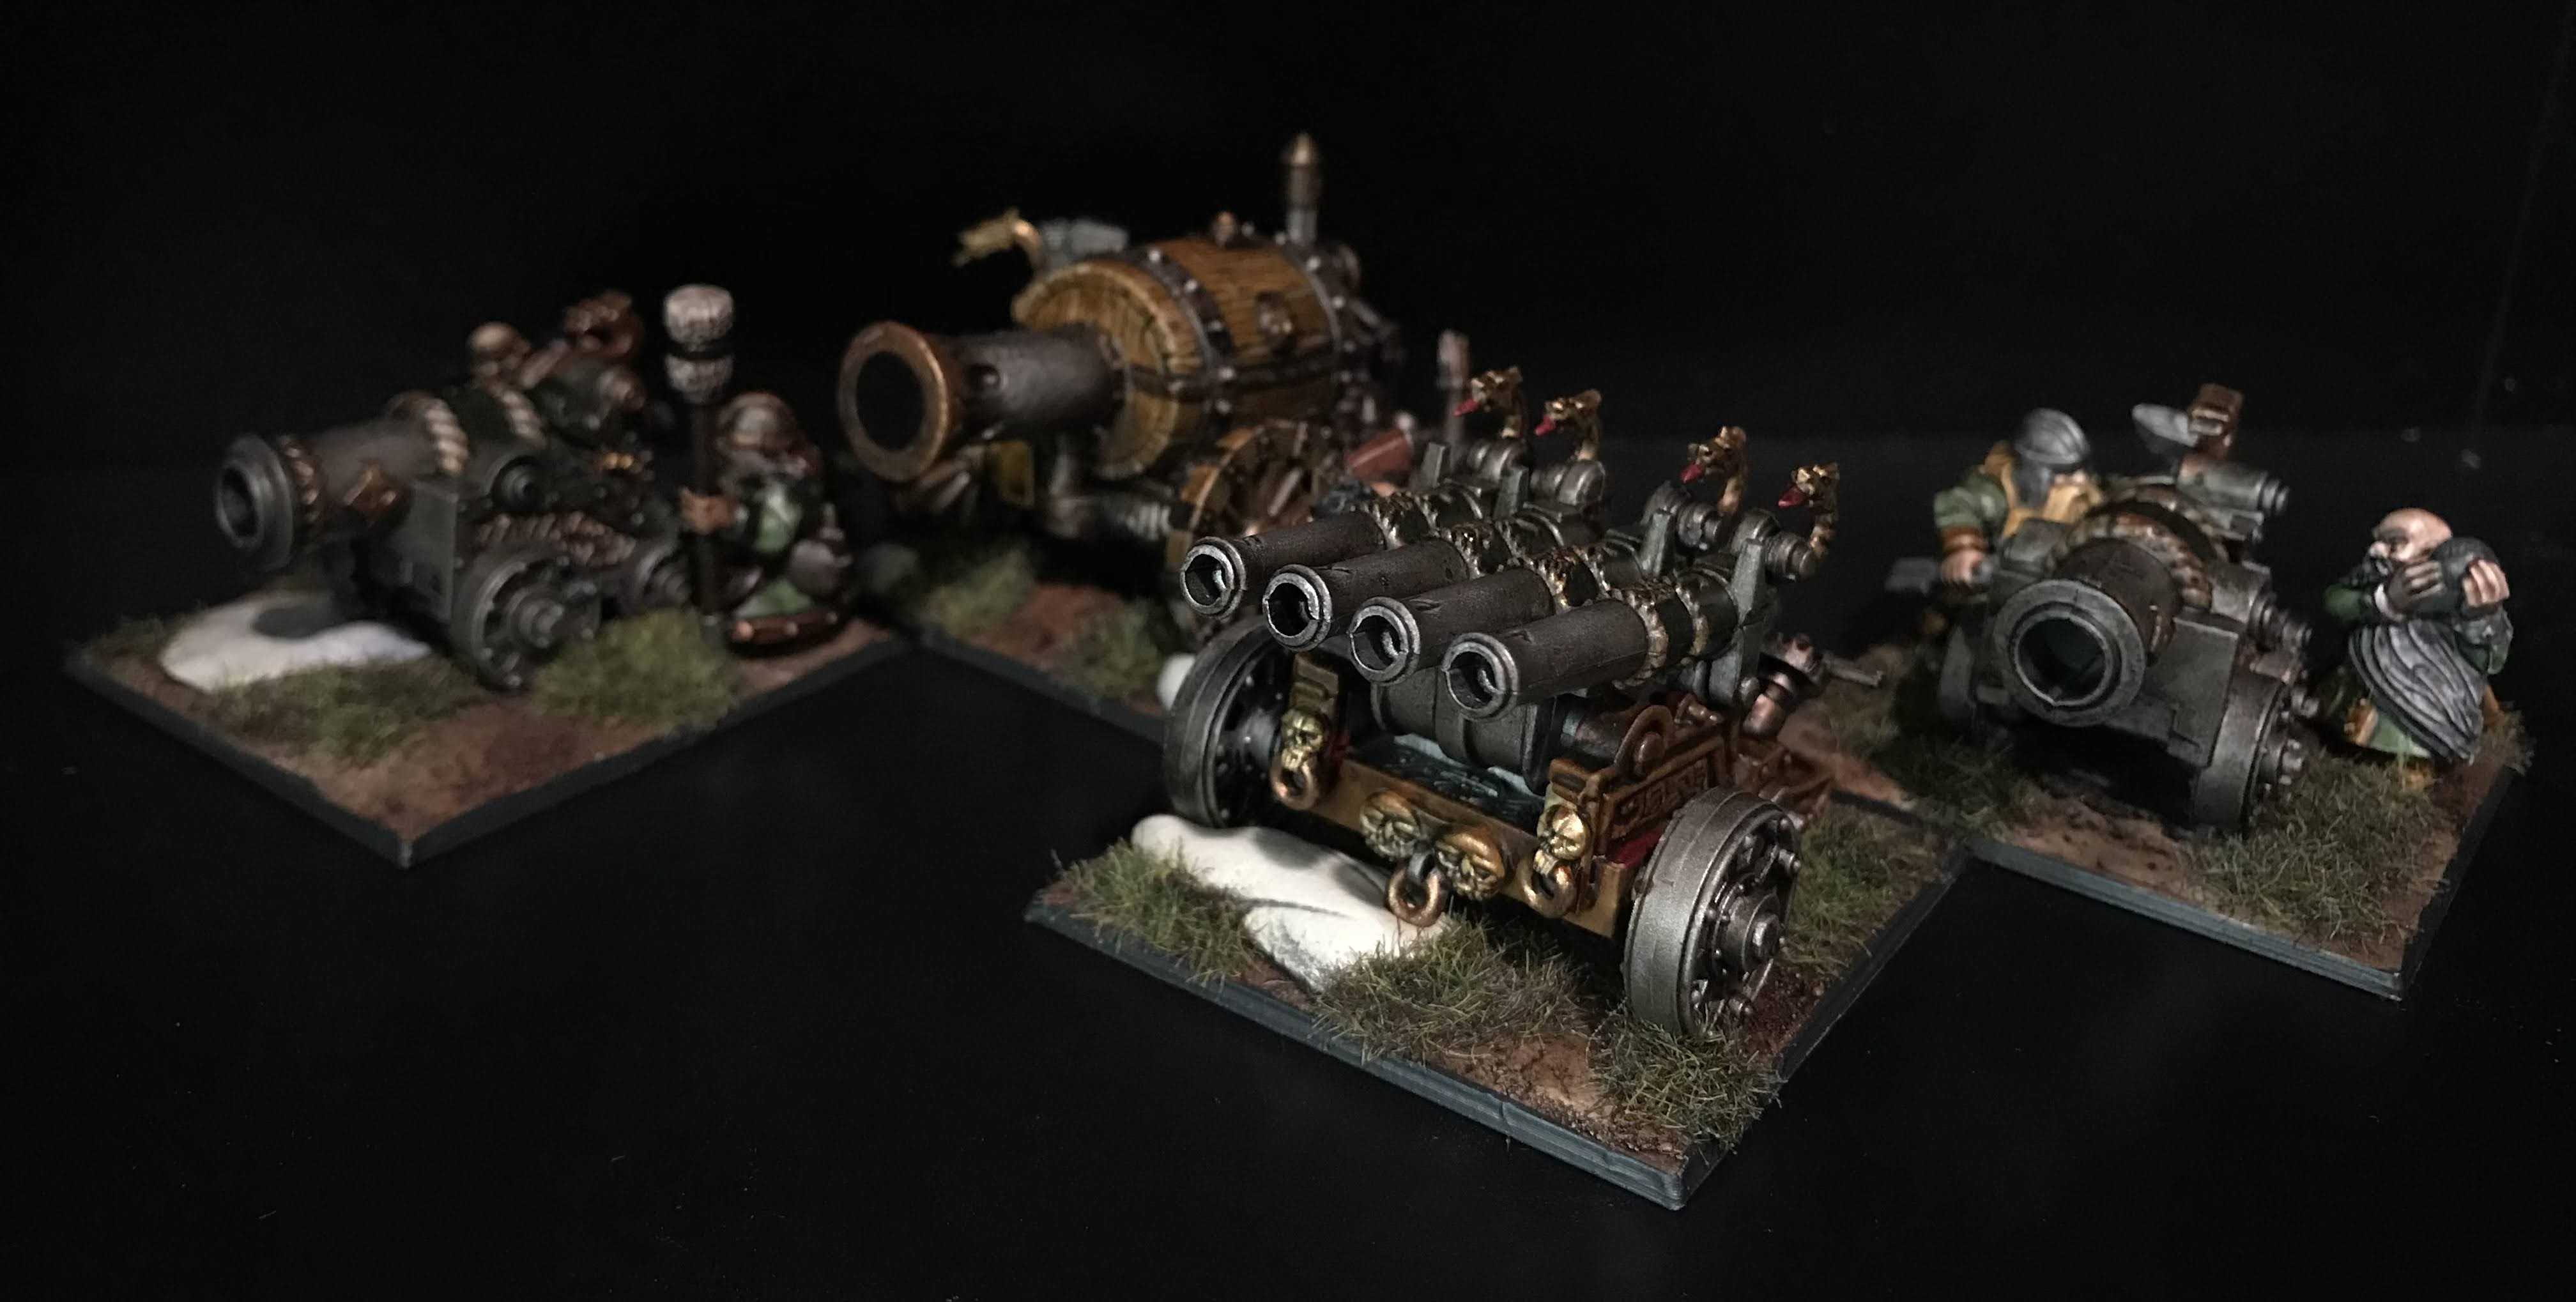
What we need now is some artillery. Big, brash cannons and terrible engines of war. With Dwarves, you need a bit, too. Or just stay home.
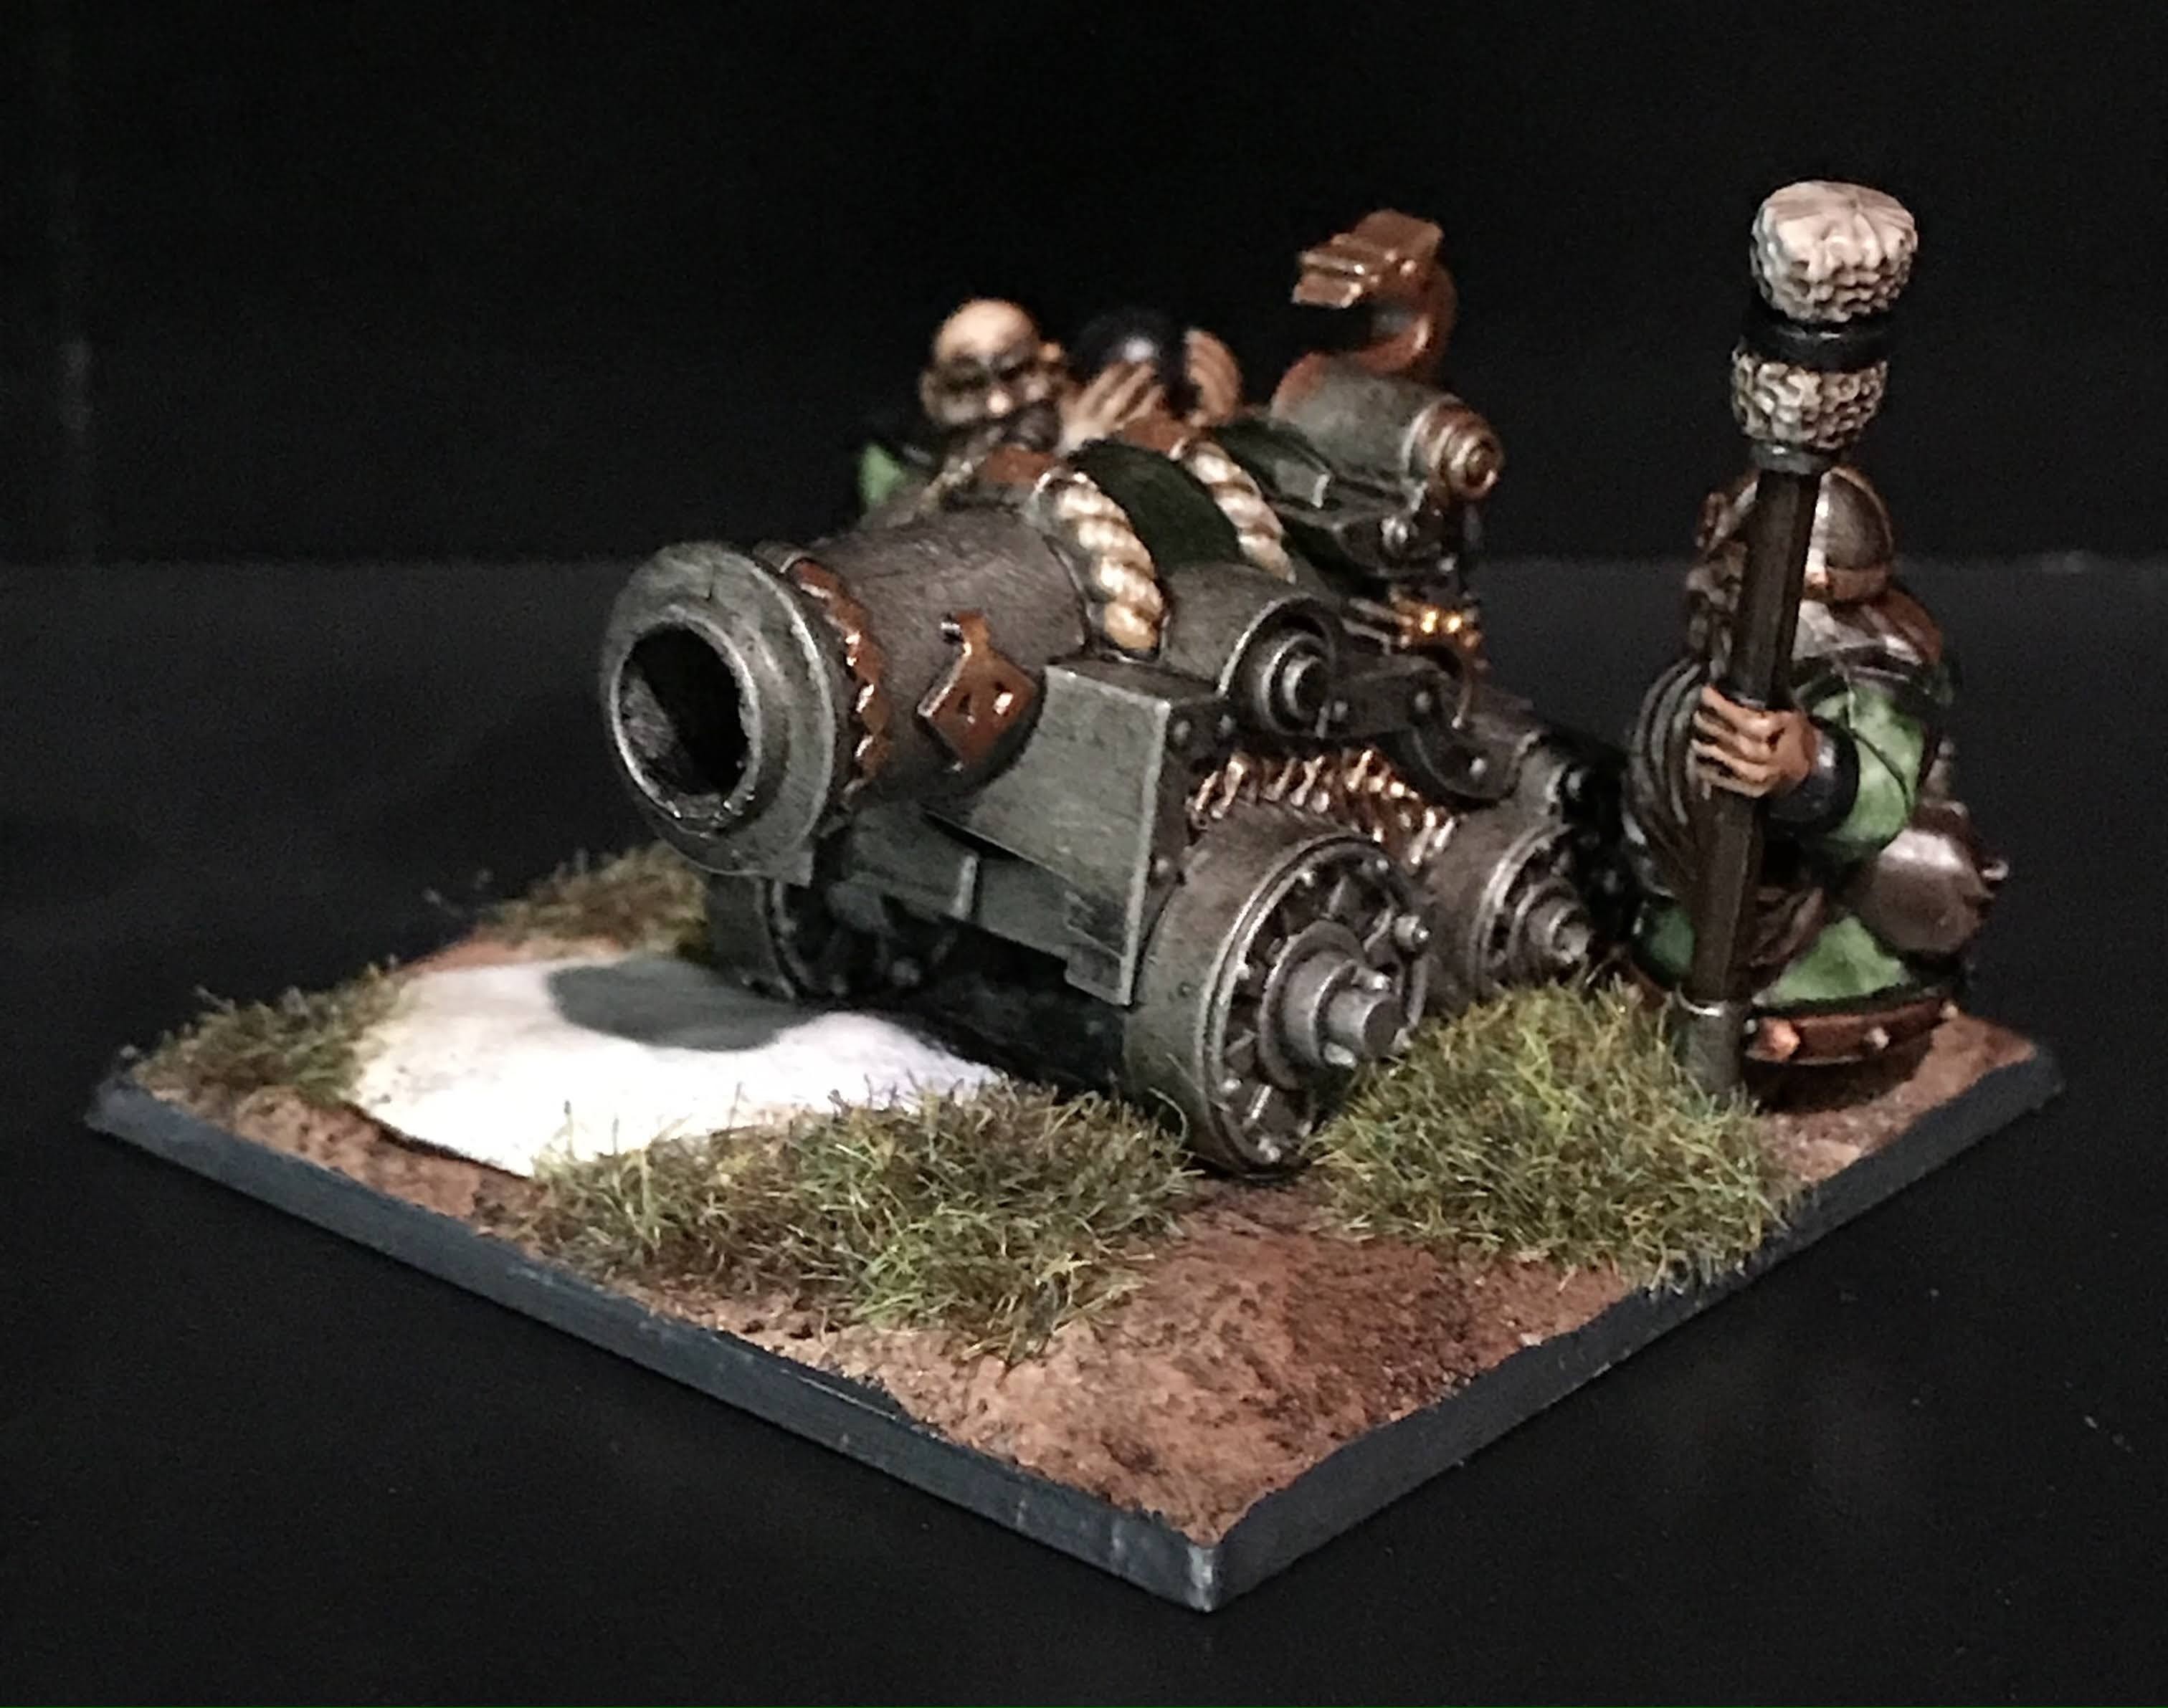
The first two cannons are plastic hold-overs from a box of Dwarves I picked up from a friend. A couple of quick multi-bases later, and these standard cannons are ready for action!
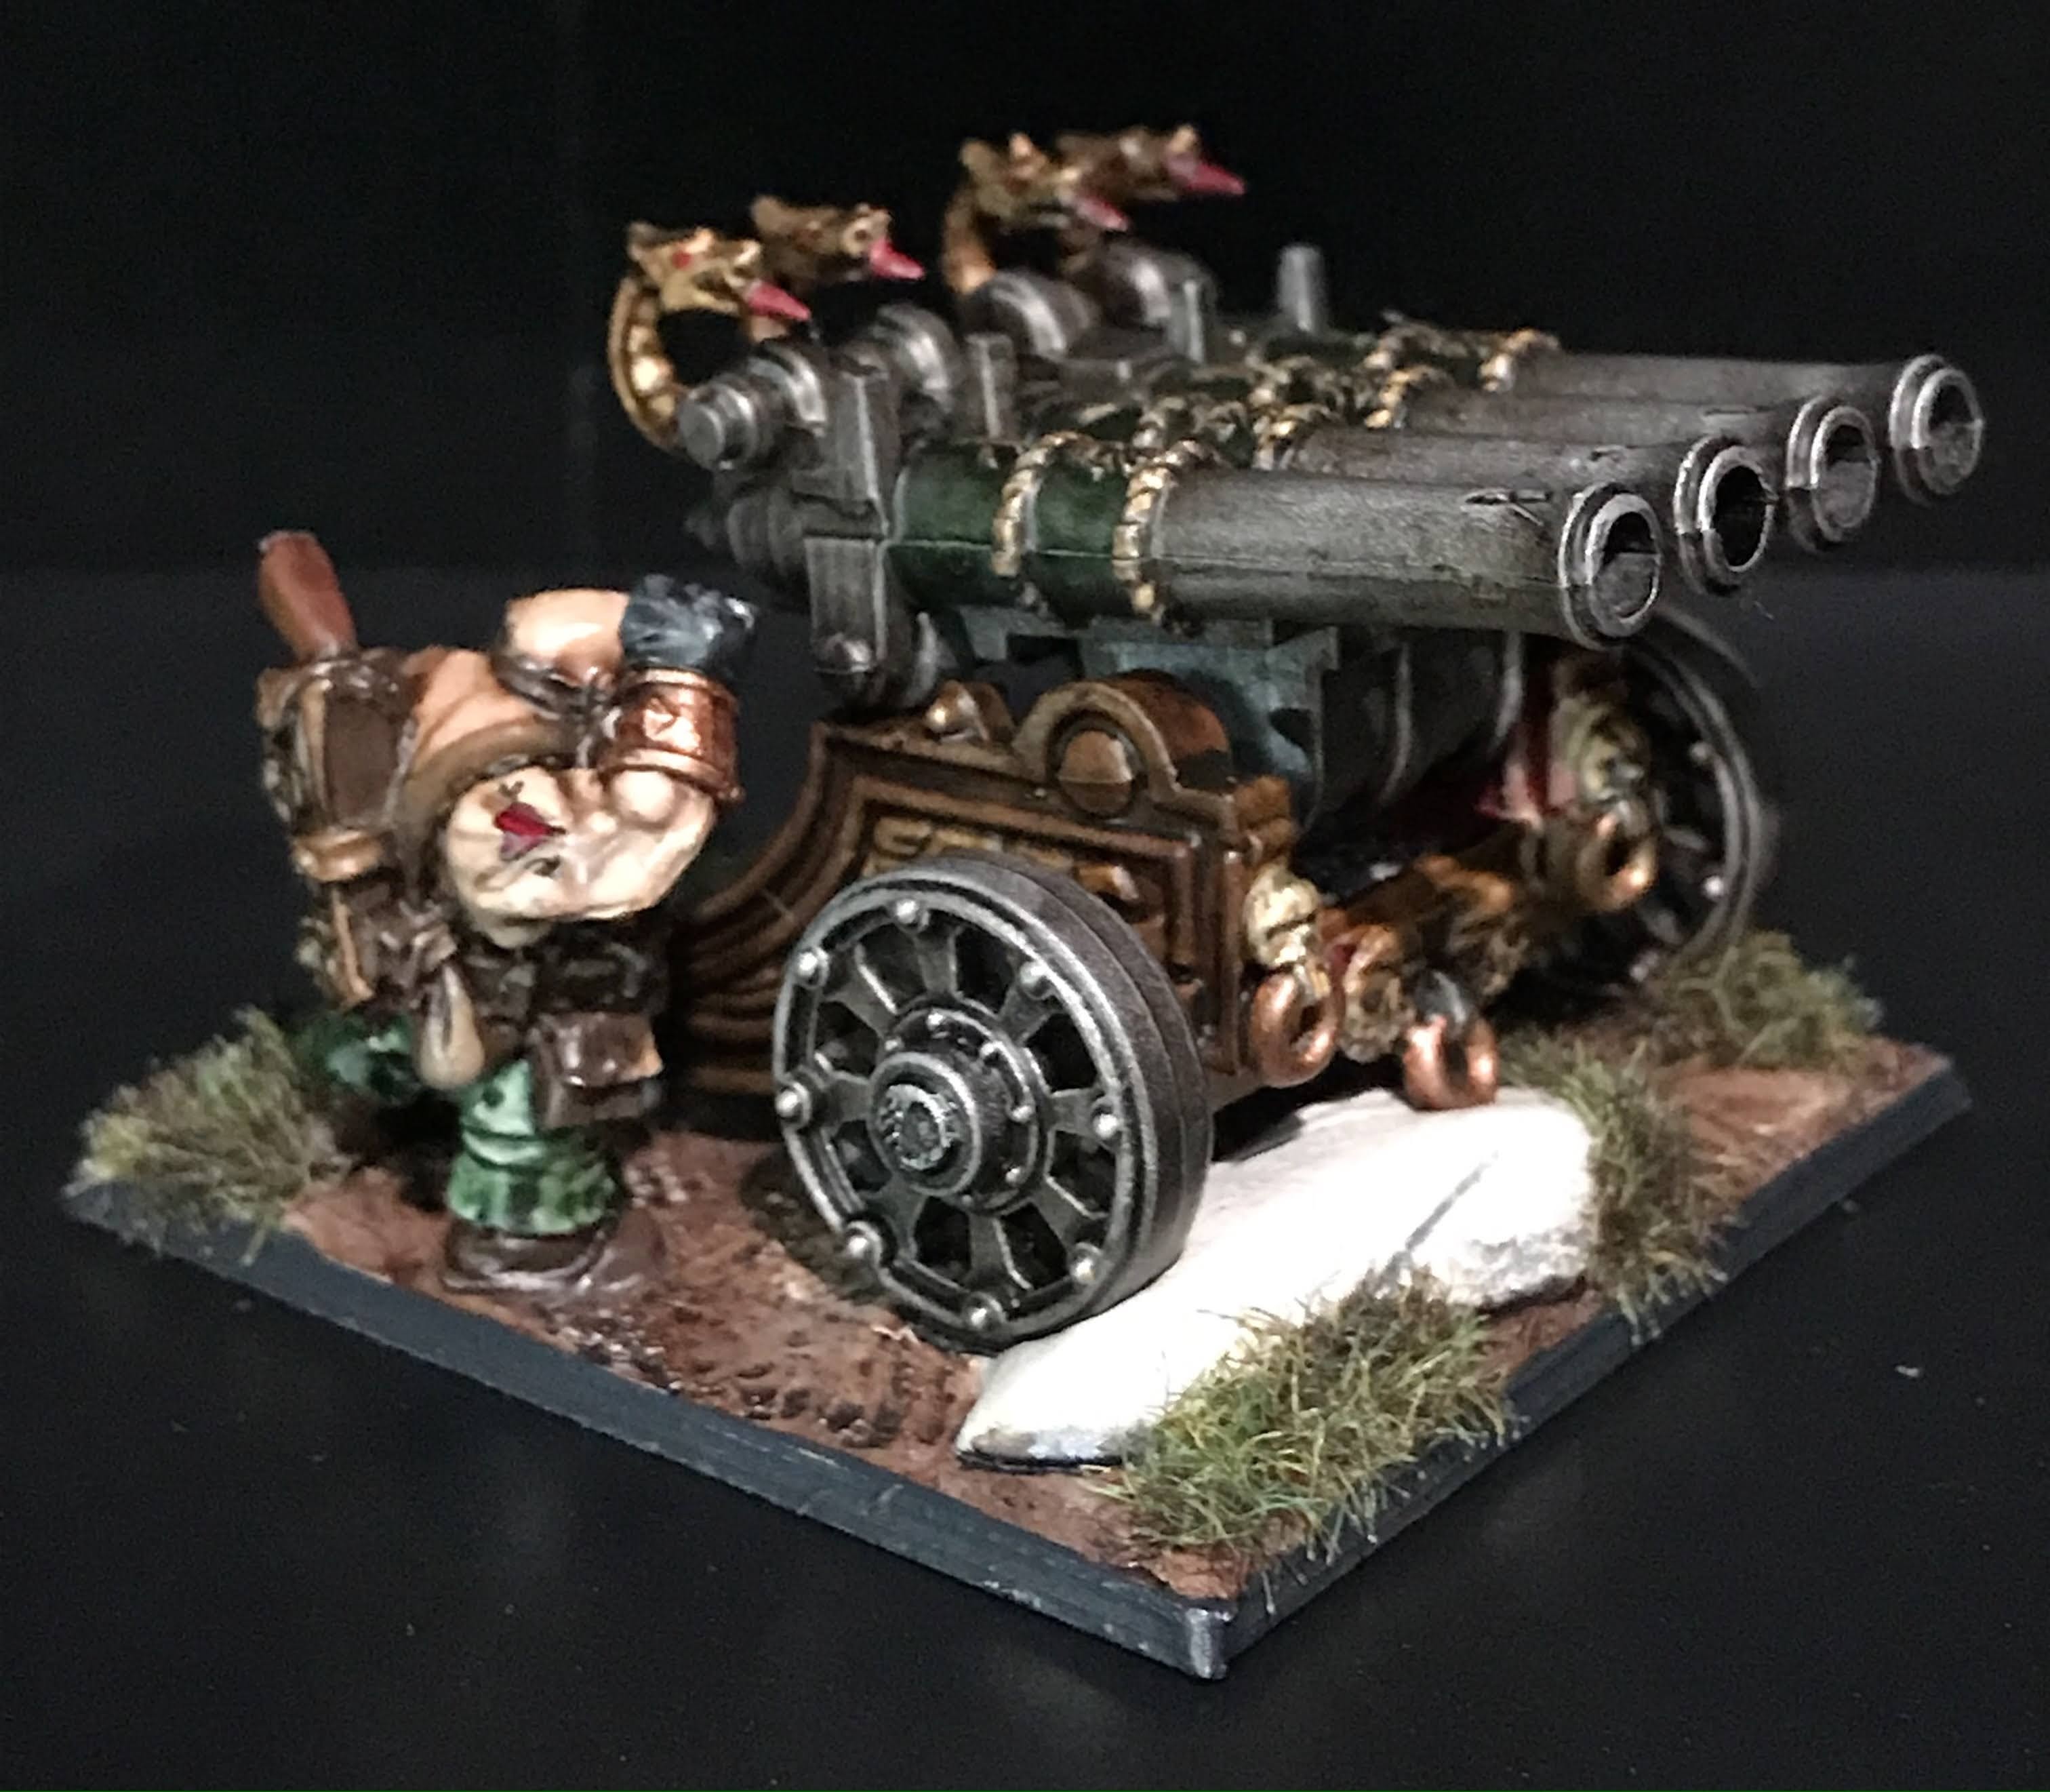
The organ gun is also a plastic kit, but it looks cool and actually has a stat line in KoW, so that’s even better!
The Flame Belcher is the only vintage mini in this group, and it dates back at least 20 years or more from the classic Games Workshop Dwarves line. And, don’t you know it, there is a stat line for this one, too!
It’s going to be a lot of fun seeing these models back in action! Now all we need to do is get this pandemic under control, and let the heavens rain fire! At least the heavens in my games.
This last month has probably been the worst hobby month I’ve had in a really long time. I haven’t been really productive, and have been really distractible by some pretty silly things. Also, those things make perfect sense, too: surviving a pandemic responsibly means finding ways to connect with people without being physically in person, which means the audio group chat in my World of Warcraft sessions has been really alluring.
Downside, though- I suck at video games, and I would rather get my paints going again than spend a lot of hours leveling another character through WoW. So, back to the workbench!
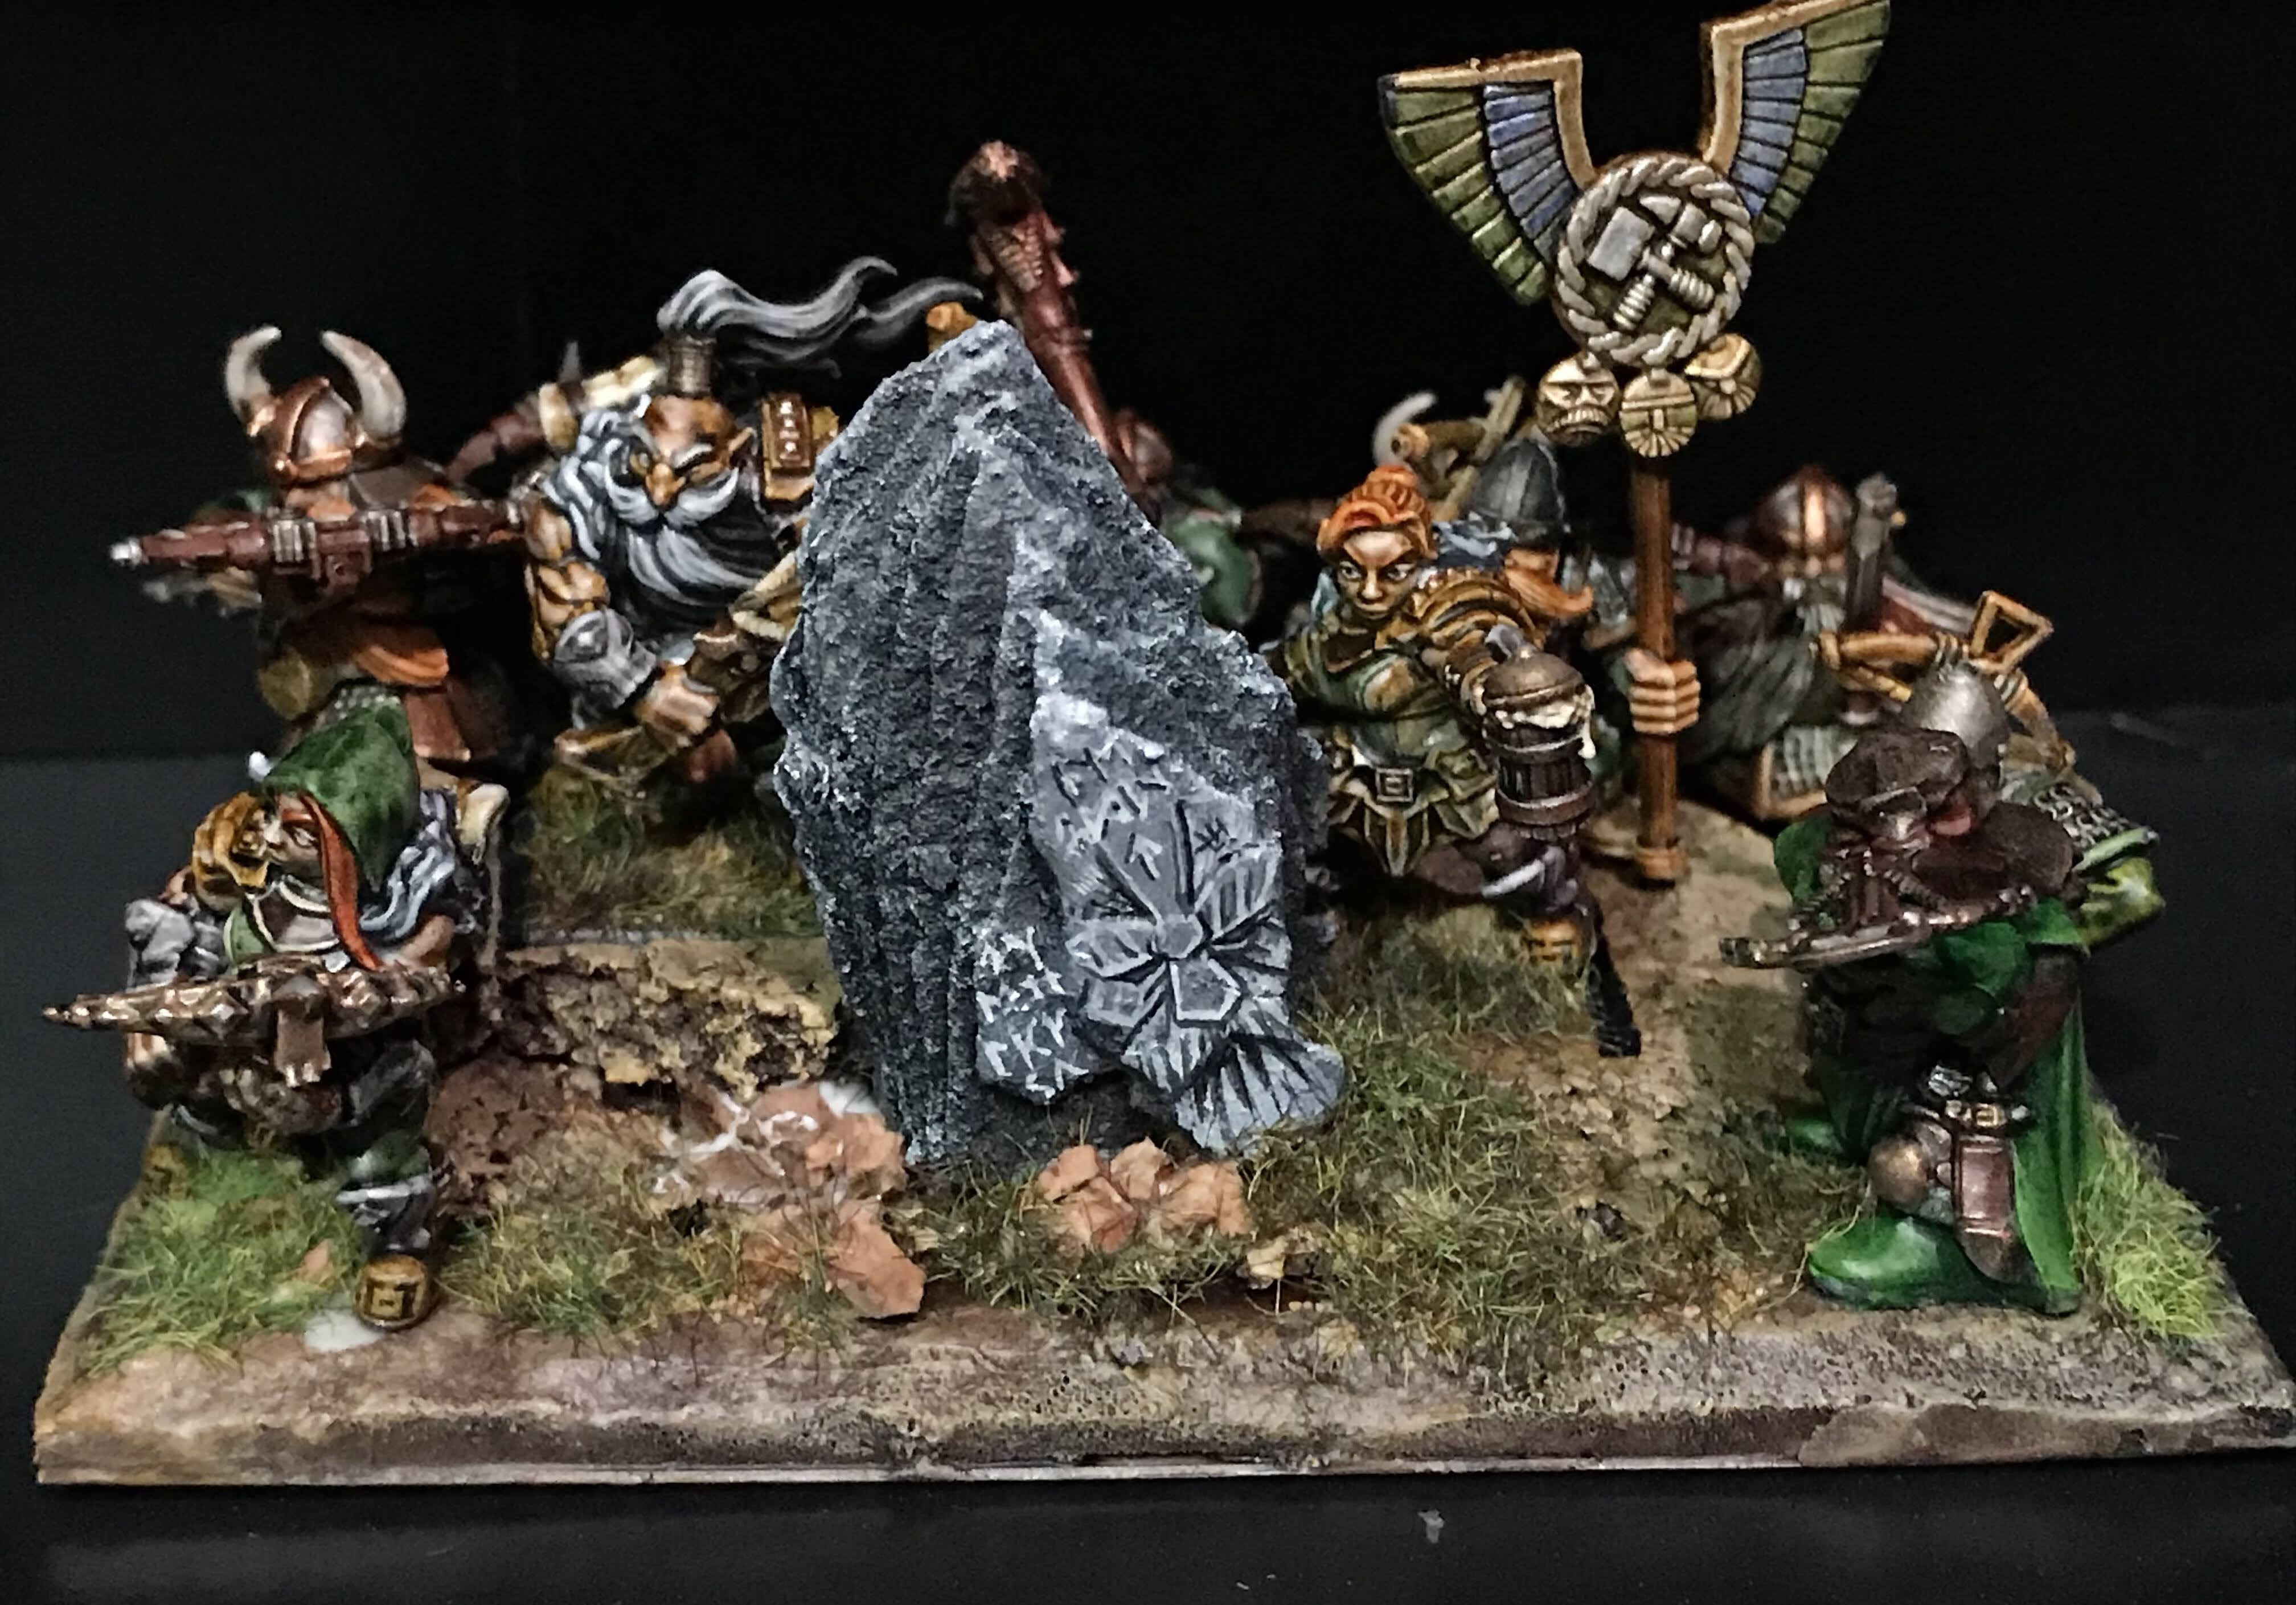
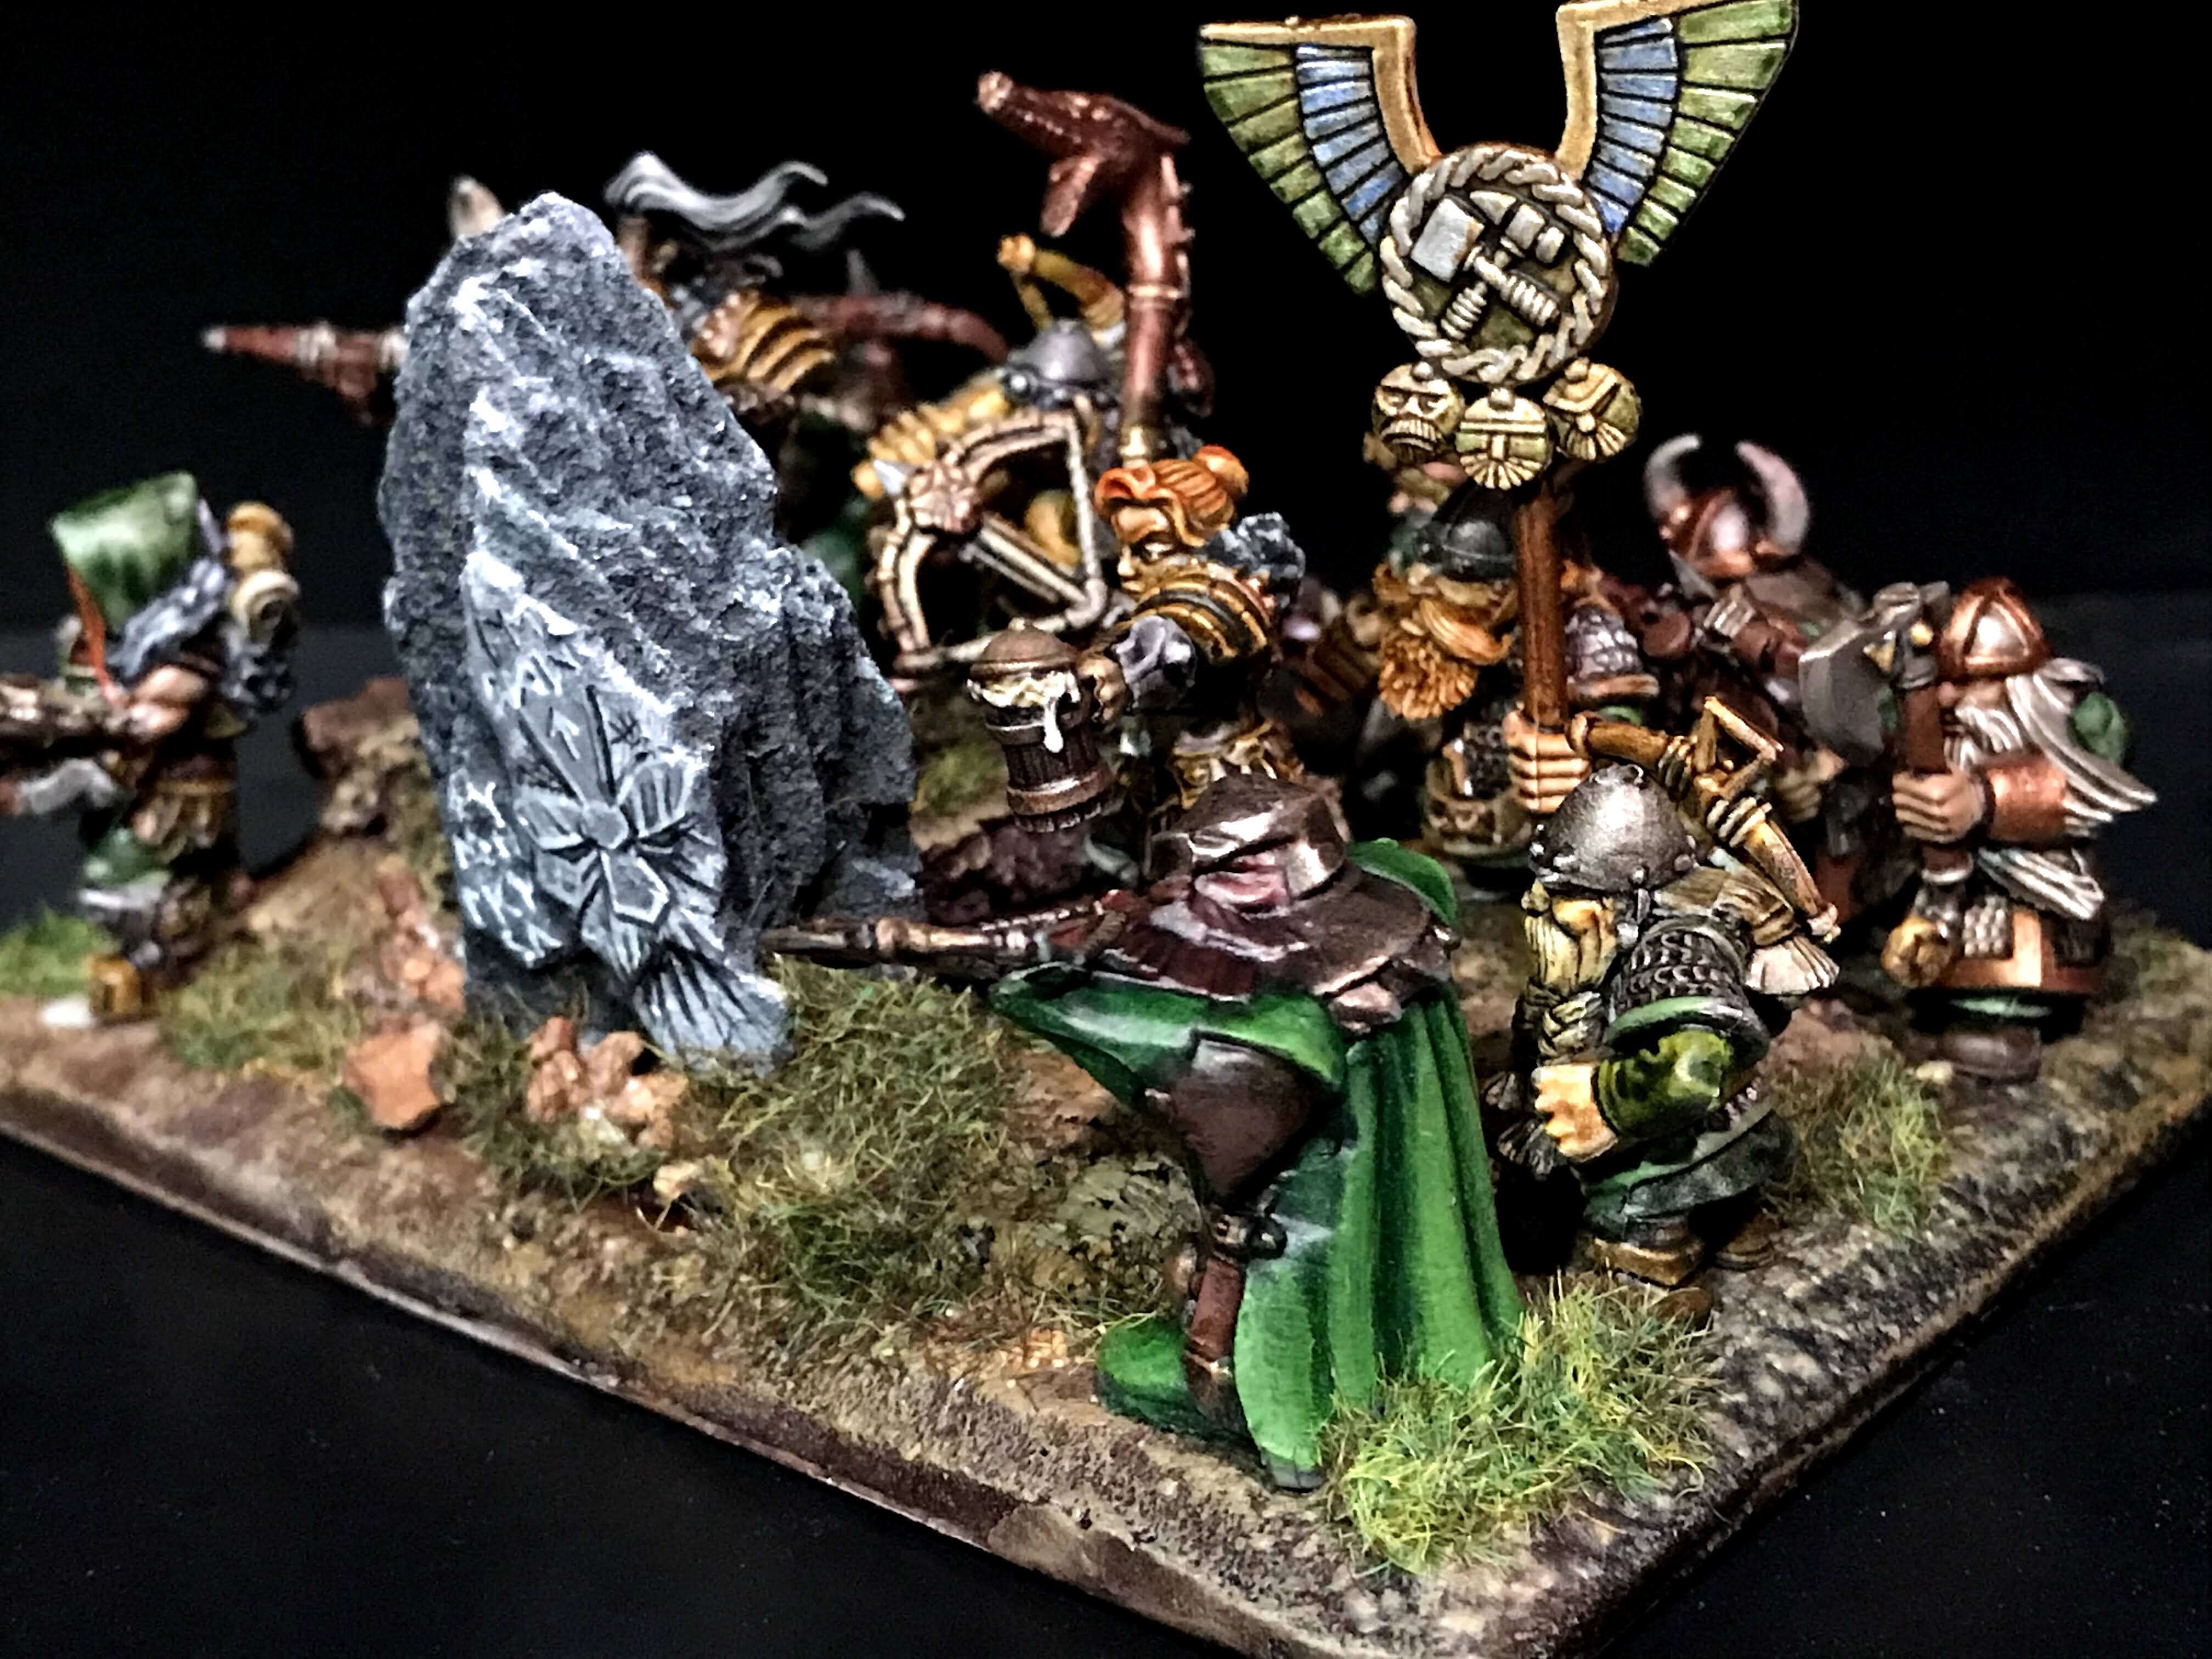
Let’s get some badassery going with a regiment of Dwarf Rangers. This group of hearty warriors is made up of a mix of Mantic, Games Workshop, and Artisan Guild models, with the Artisan Guild figures having built-in magnetic bases so that I can pop them off the multi-base for some sweet Vanguard action!
The Runestone up front is landscape bark from the front yard, which I carved flat on the bottom, painted grey, then hand painted the runes and the dwarf face onto. It adds a pretty cool thematic element, and helps hide the base recesses for my removable figs.
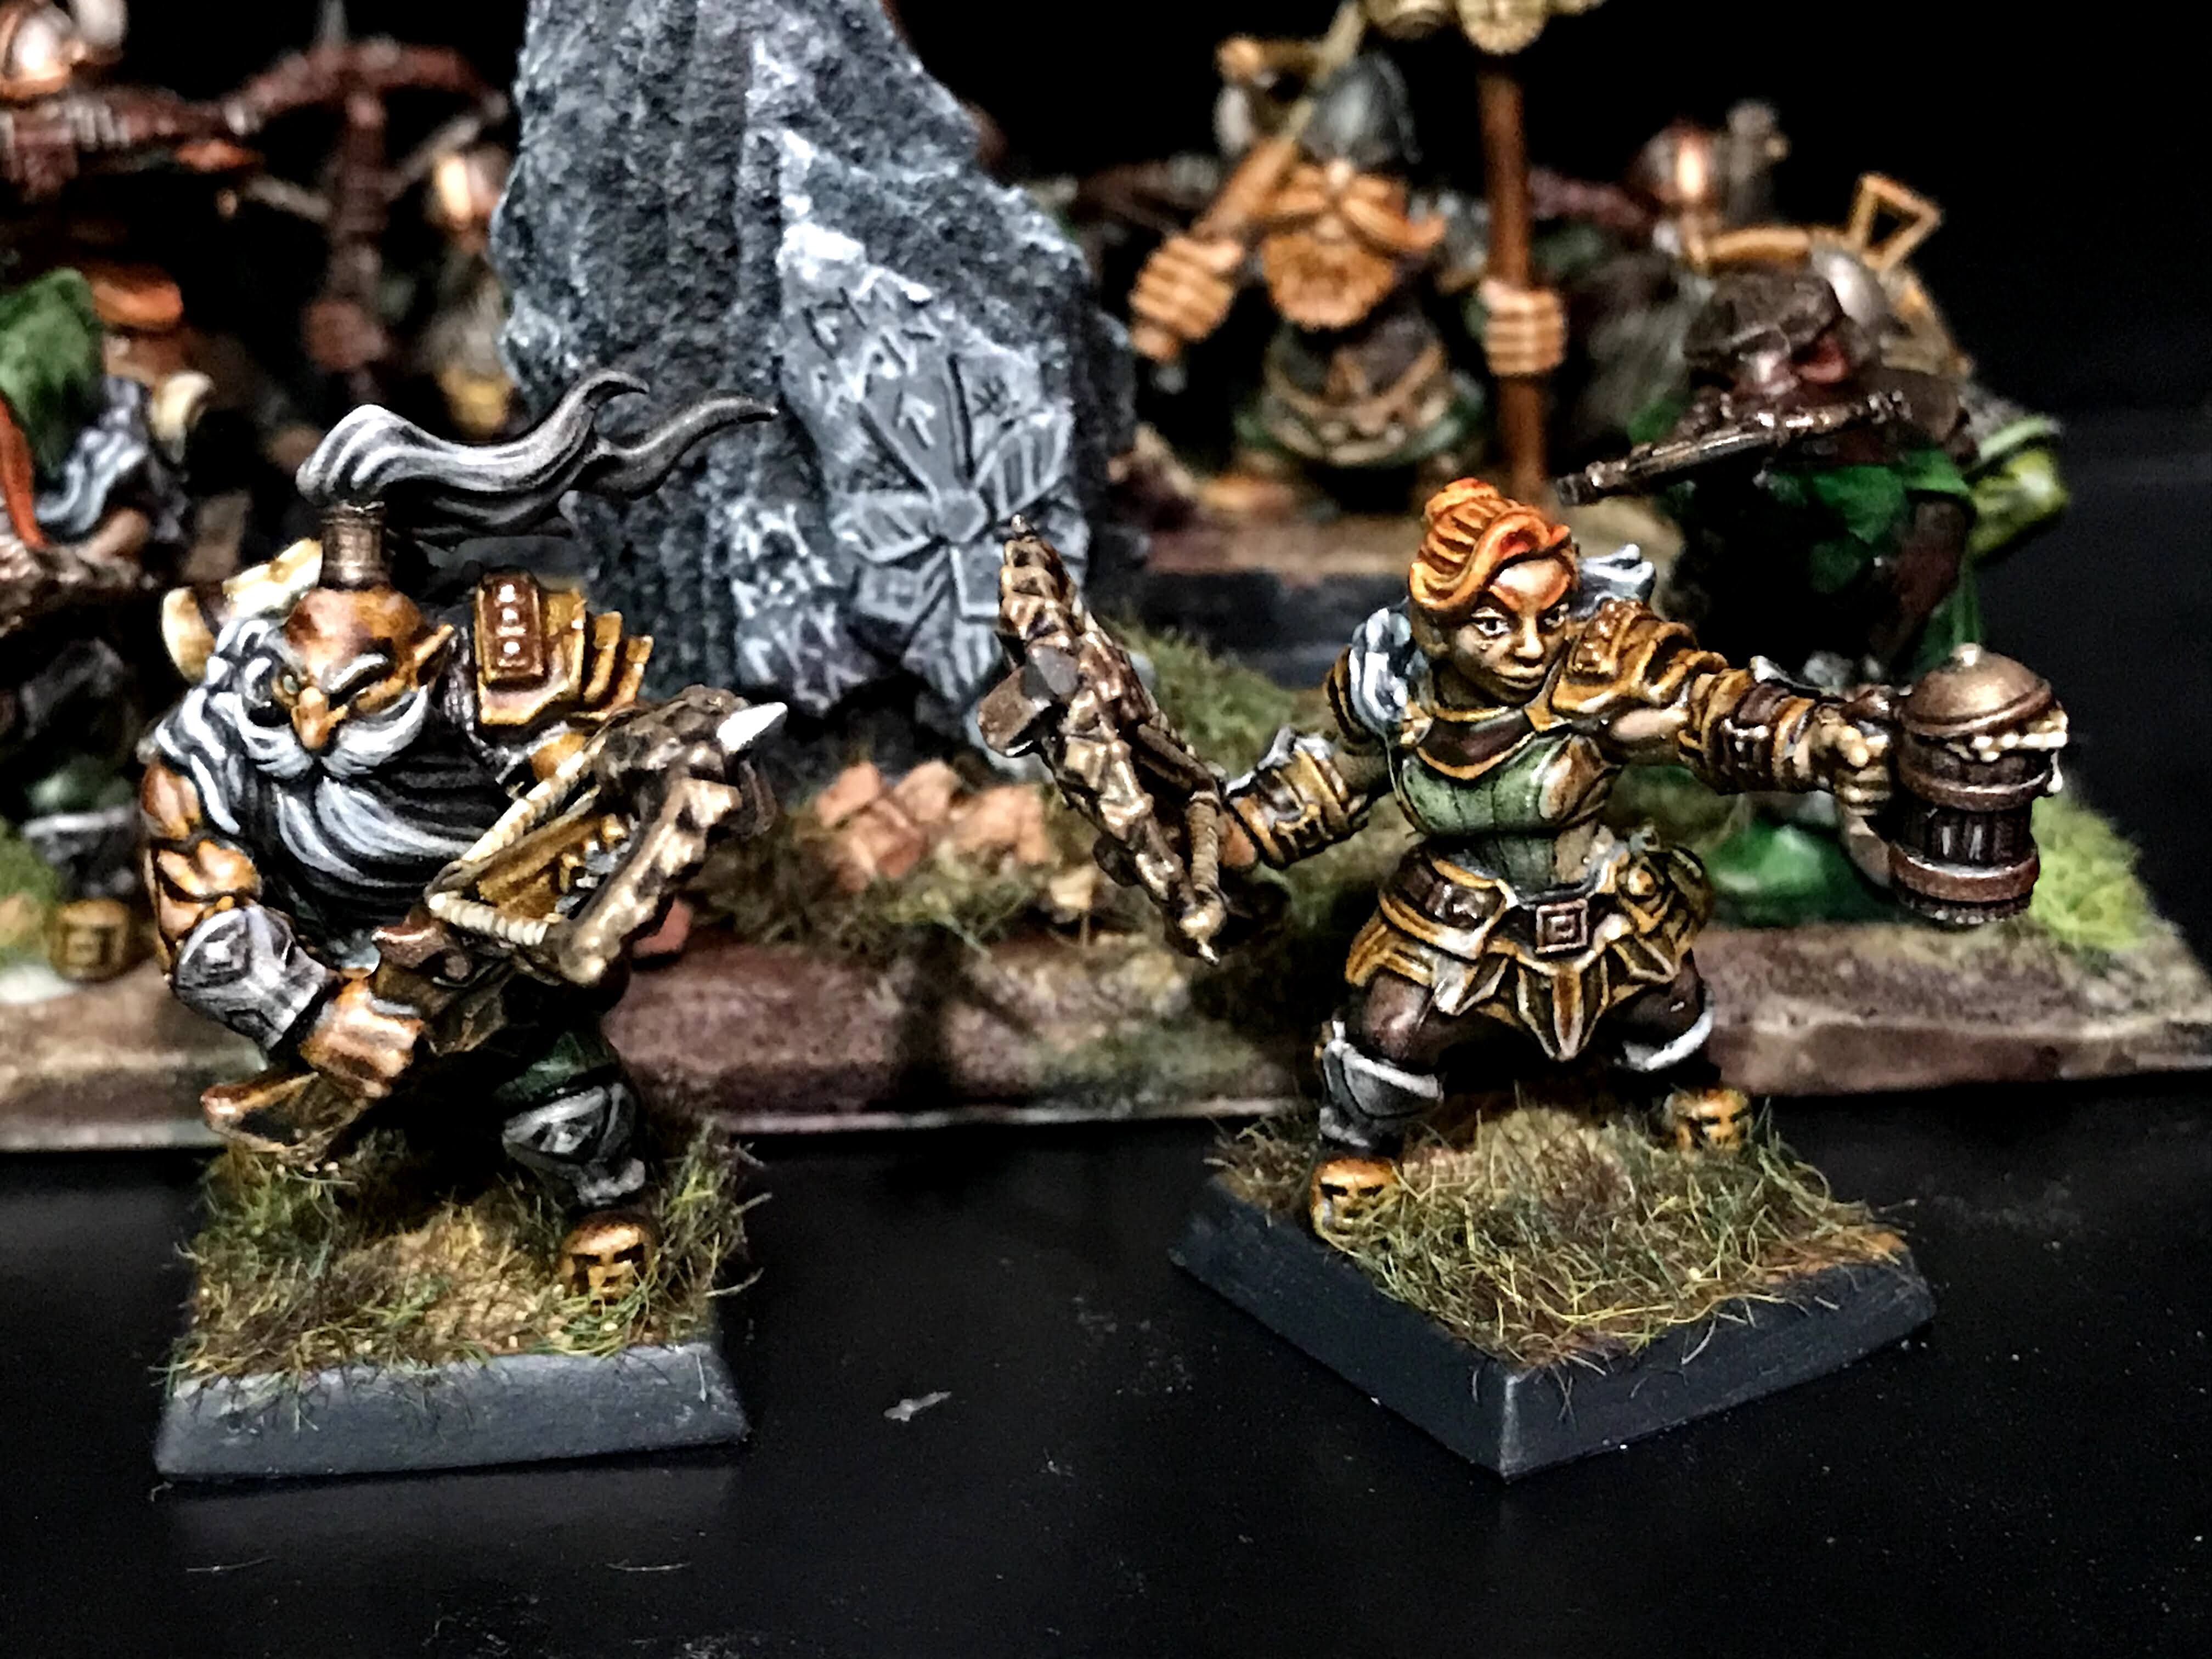
The regiment is led by Herne and Frigga Ironheart, who lead the team together despite Frigga’s near constant intoxication. I really love these minis, and can’t wait to see them on the table. Any table. Someday…
Herne knew that they were in trouble. His group of rangers had been trudging through the fen for a week now, and their spirits were dangerously low. More importantly, their provisions were running even lower. Frigga had been sober for close to four days, and her temper had been at a steady boil since waking that morning.
And a sober Frigga can’t hit the broad side of an ogre’s nursemaid, he mused to himself. But she is capable of making everyone’s life a living hell until she gets something to quench that fiery thirst of hers.
The ranger pulled himself up from his hiding spot, and flicked his fingers in a silent signal to the rest of the regiment, which had concealed itself in the muck and the mire of the fen. Much more of this skulking about, and these warriors wouldn’t have much fight left in them.
They had been tracking a troop of kobolds for weeks, after coming across a horrific scene of carnage that the diminutive beasts had inflicted on a human village. Honor dictated action, and the hunt was on.
Suddenly, in the brackish water up ahead of them, came the sloshing crash of something big moving through the bogs that littered the fen. Whatever it was, it just made the misfortune of becoming today’s distraction from boredom.
Herne leapt up onto a nearby stump and started whooping and hollering, hoping to draw the as yet unseen intruder out into the open. Herne began to dance about on the stump, and at one point burst out into a lewd song about a halfling barkeep’s daughter.
The fen grew quiet, and Herne grew discouraged. He heard a less than amused “tisk” from somewhere behind him, and he knew that Frigga was quietly running through a list of insults to riddle him with.
There was a muffled yelp off to his left, followed by a ferocious crunching sound, and an all too brief scream of pure agony. Something flew through the air straight at him, and Herne barely had time to duck out of the way of the mystery projectile.
Herne hopped down from his perch and hunkered down into a low crouch, darting from the log towards where the mystery missile had touched down. After a moments searching, he found his quarry… or at least what was left of it.
The upper part of Duggart’s body was laying face down in the mud, both arms twitching at his side. A bubble of air popped as it rose to the surface next to the corpse’s submerged face.
His legs were entirely missing, the wreckage of his lower torso only hinting that extremities could have ever worked there in the first place. Duggart’s blood was seeping out in a lazy torrent, eventually mingling with the muddy waters of the fen in slowly swirling eddies.
A low, throaty chuckle purred out from the misty expanse, at once nowhere and everywhere. The hair on the back of Herne’s neck stood straight up, and he slowly unbuckled his daggers. His time on this earth may be coming to a close, but he wasn’t going to go to the Eternal Smithy without a fight.
There was an explosion of movement through the underbrush, and a humongous beast lumbered out of the fetid waters. The creature’s stunted legs ended with gigantic webbed feet, while its long, willowy arms were graced with craggy talons. Its eyes were flashing with wild excitement, its gore caked maw erupting into a vicious grin.
“TROLL!!!” bellowed Herne, even as bolts flew straight and true from at least a dozen hidden ranger’s crossbows. The troll reeled back in pain, then shook off the onslaught and redoubled its advance on Hernes position.
The doughty dwarf shifted his footing into a low fighting stance, and he juked to the left as the troll attempted to barrel into him. He chuckled quietly to himself, knowing full well that the creature had overestimated its odds of a quick meal.
The troll reeled up in sudden pain, scrabbling frantically at its leathery back. Frigga had somehow managed to find a perch between the creature’s massive shoulder blades, and had secured herself to its neck with a climbing harness.
Herne stood by to admire his sister’s handiwork for a moment, then gasped in mock horror as the tirade of obscenities she was yelling went on.
“I don’t think you can do that with a goat, even with a cask of oil, sister!” He shouted out. She replied with a curt suggestion of what he could do with his opinion.
A moment later, the troll fell lifeless to the muddy embrace of the fen, its eyes gouged out and a four inch wide trench of butchered flesh running ear to ear.
Frigga was a sight to behold as she unfastened the climbing harness, the fierce whites of her eyes flashing murder from beneath a mask of bloody gristle and mud.
Slowly, she smiled. Herne laughed. With Frigga able to blow off some steam, their ragged little group might be able to finish off the kobolds and get her to a proper tavern before her temper became truly impossible to manage.
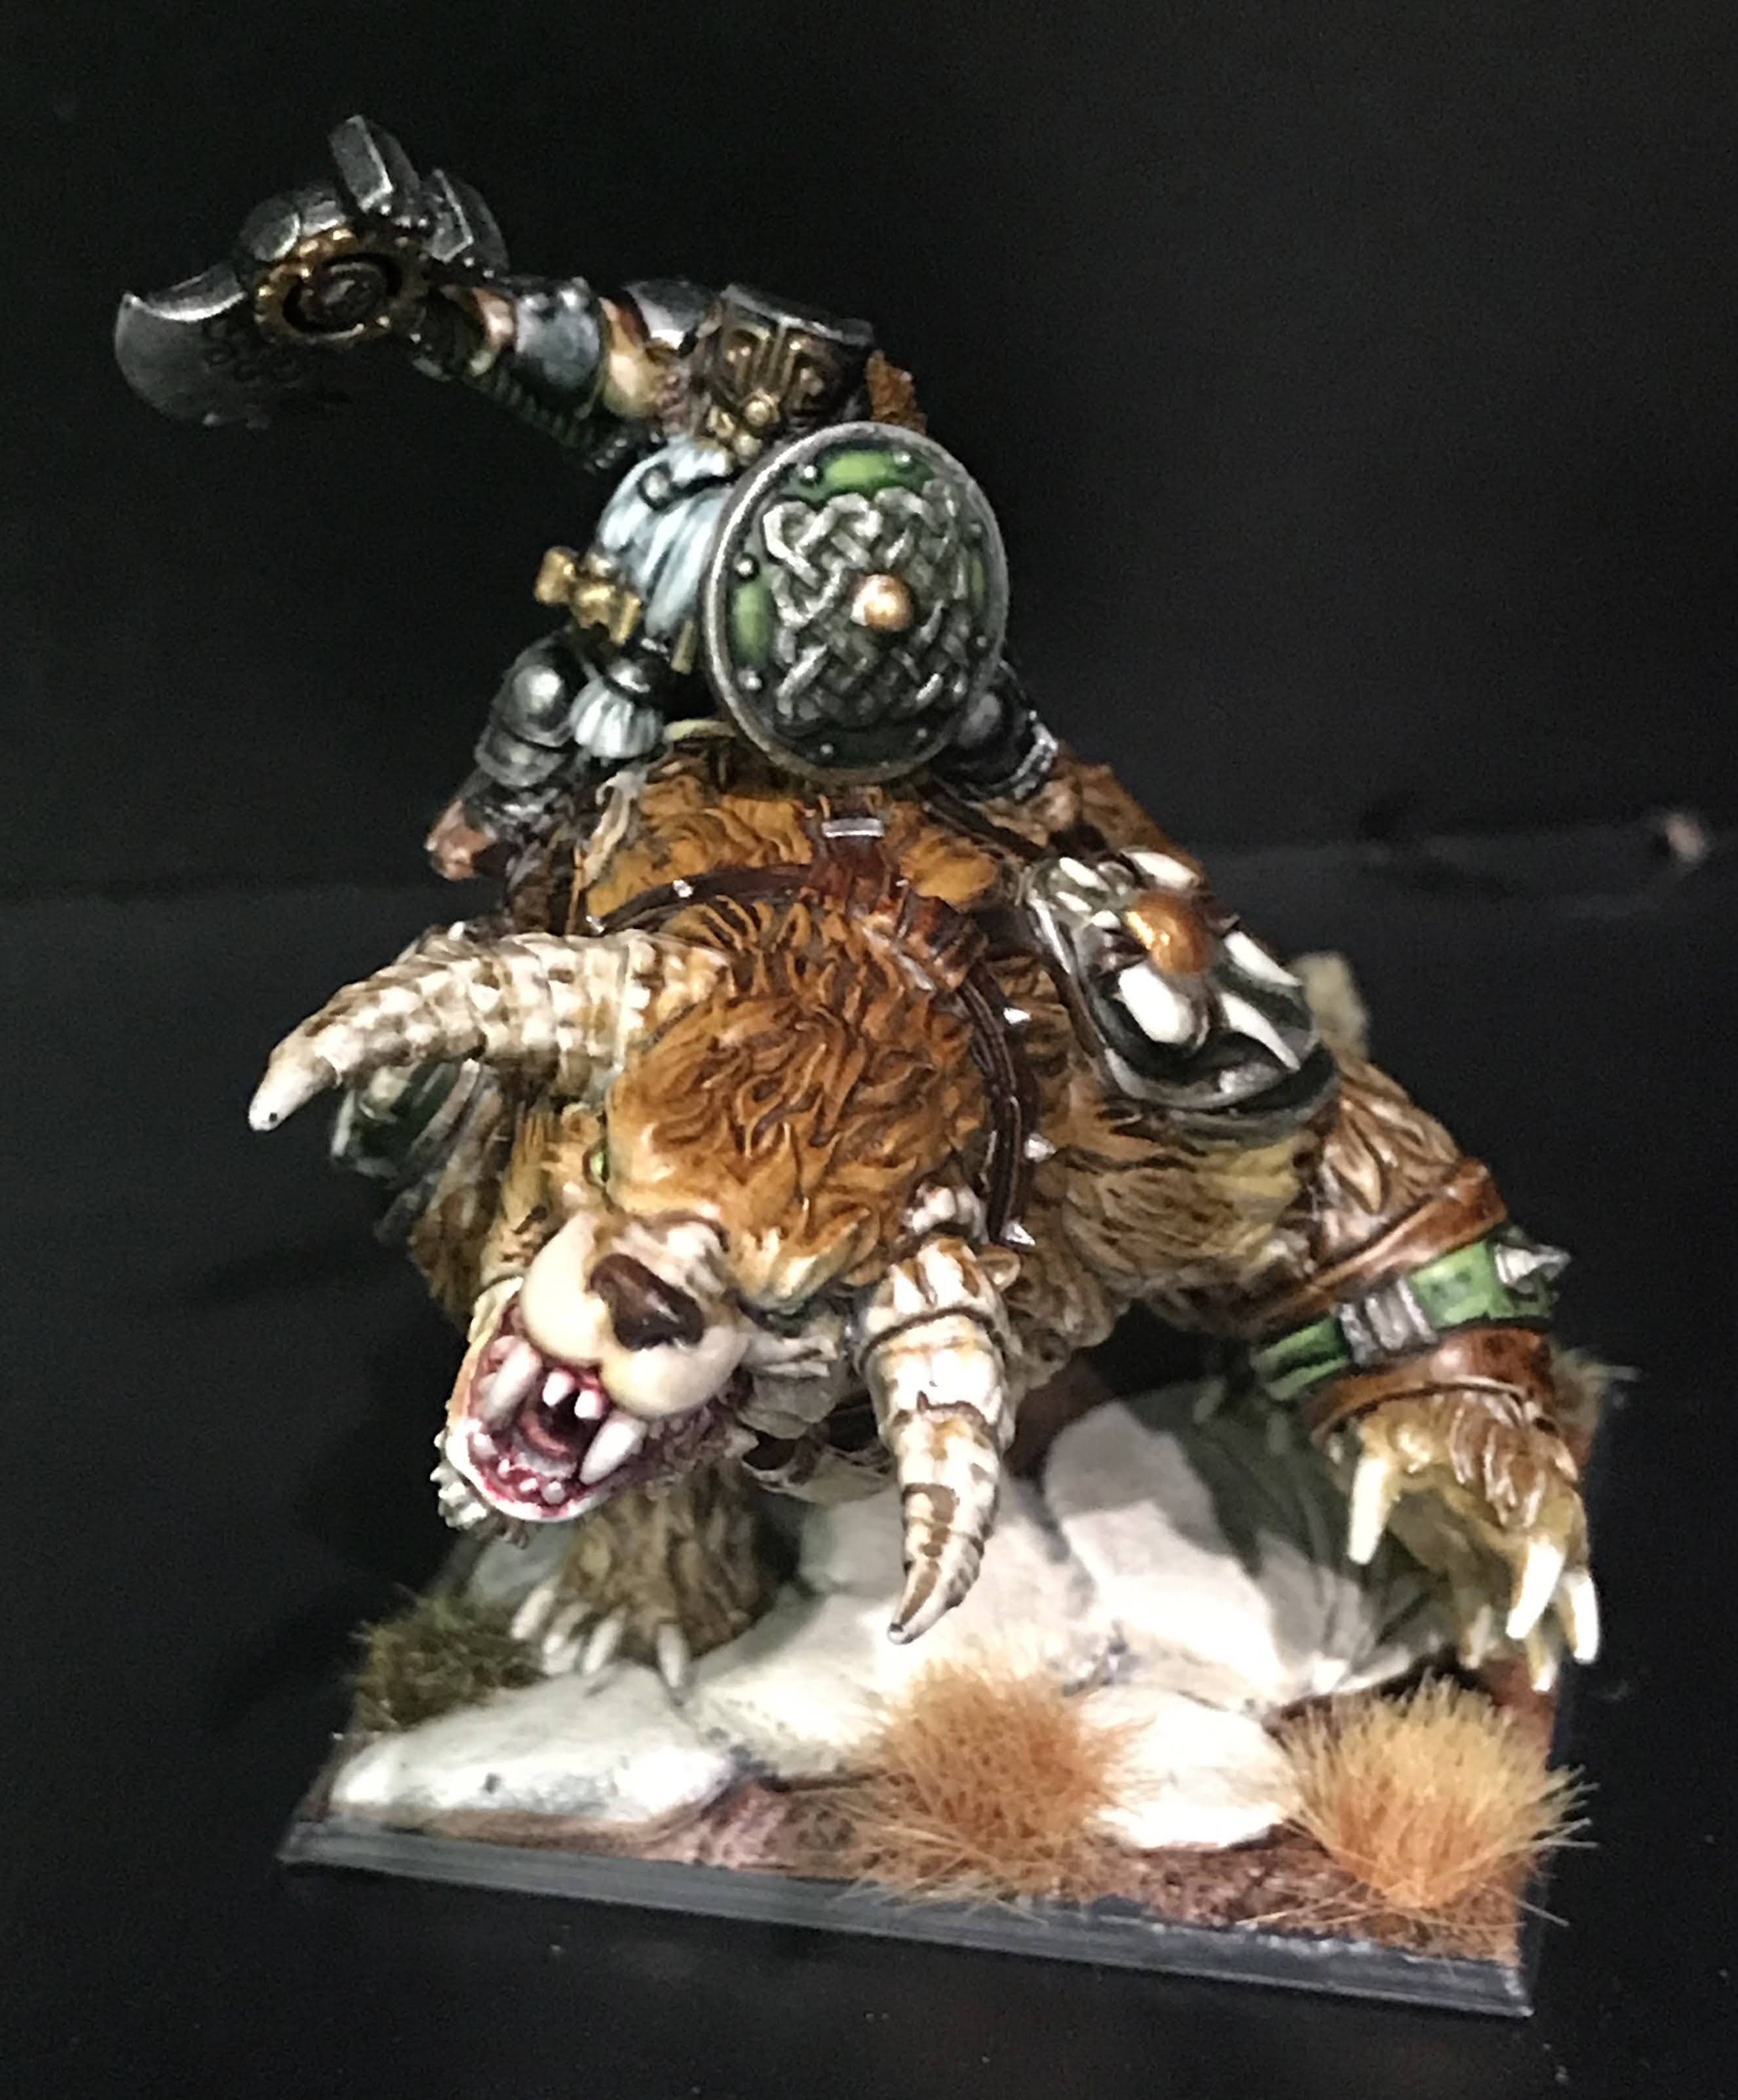
I got a little side-tracked while putting together my Ranger regiments for Kings of War, and decided it was time to get my heroes together while I was at it. I kitbashed a pretty nifty Dwarf King mounted on a nasty critter from some Northern Alliance bits I had kicking around, and a few choice plastic GeeDubs Dwarf bits. The end result is entirely unique to my army, and I couldn’t be happier!
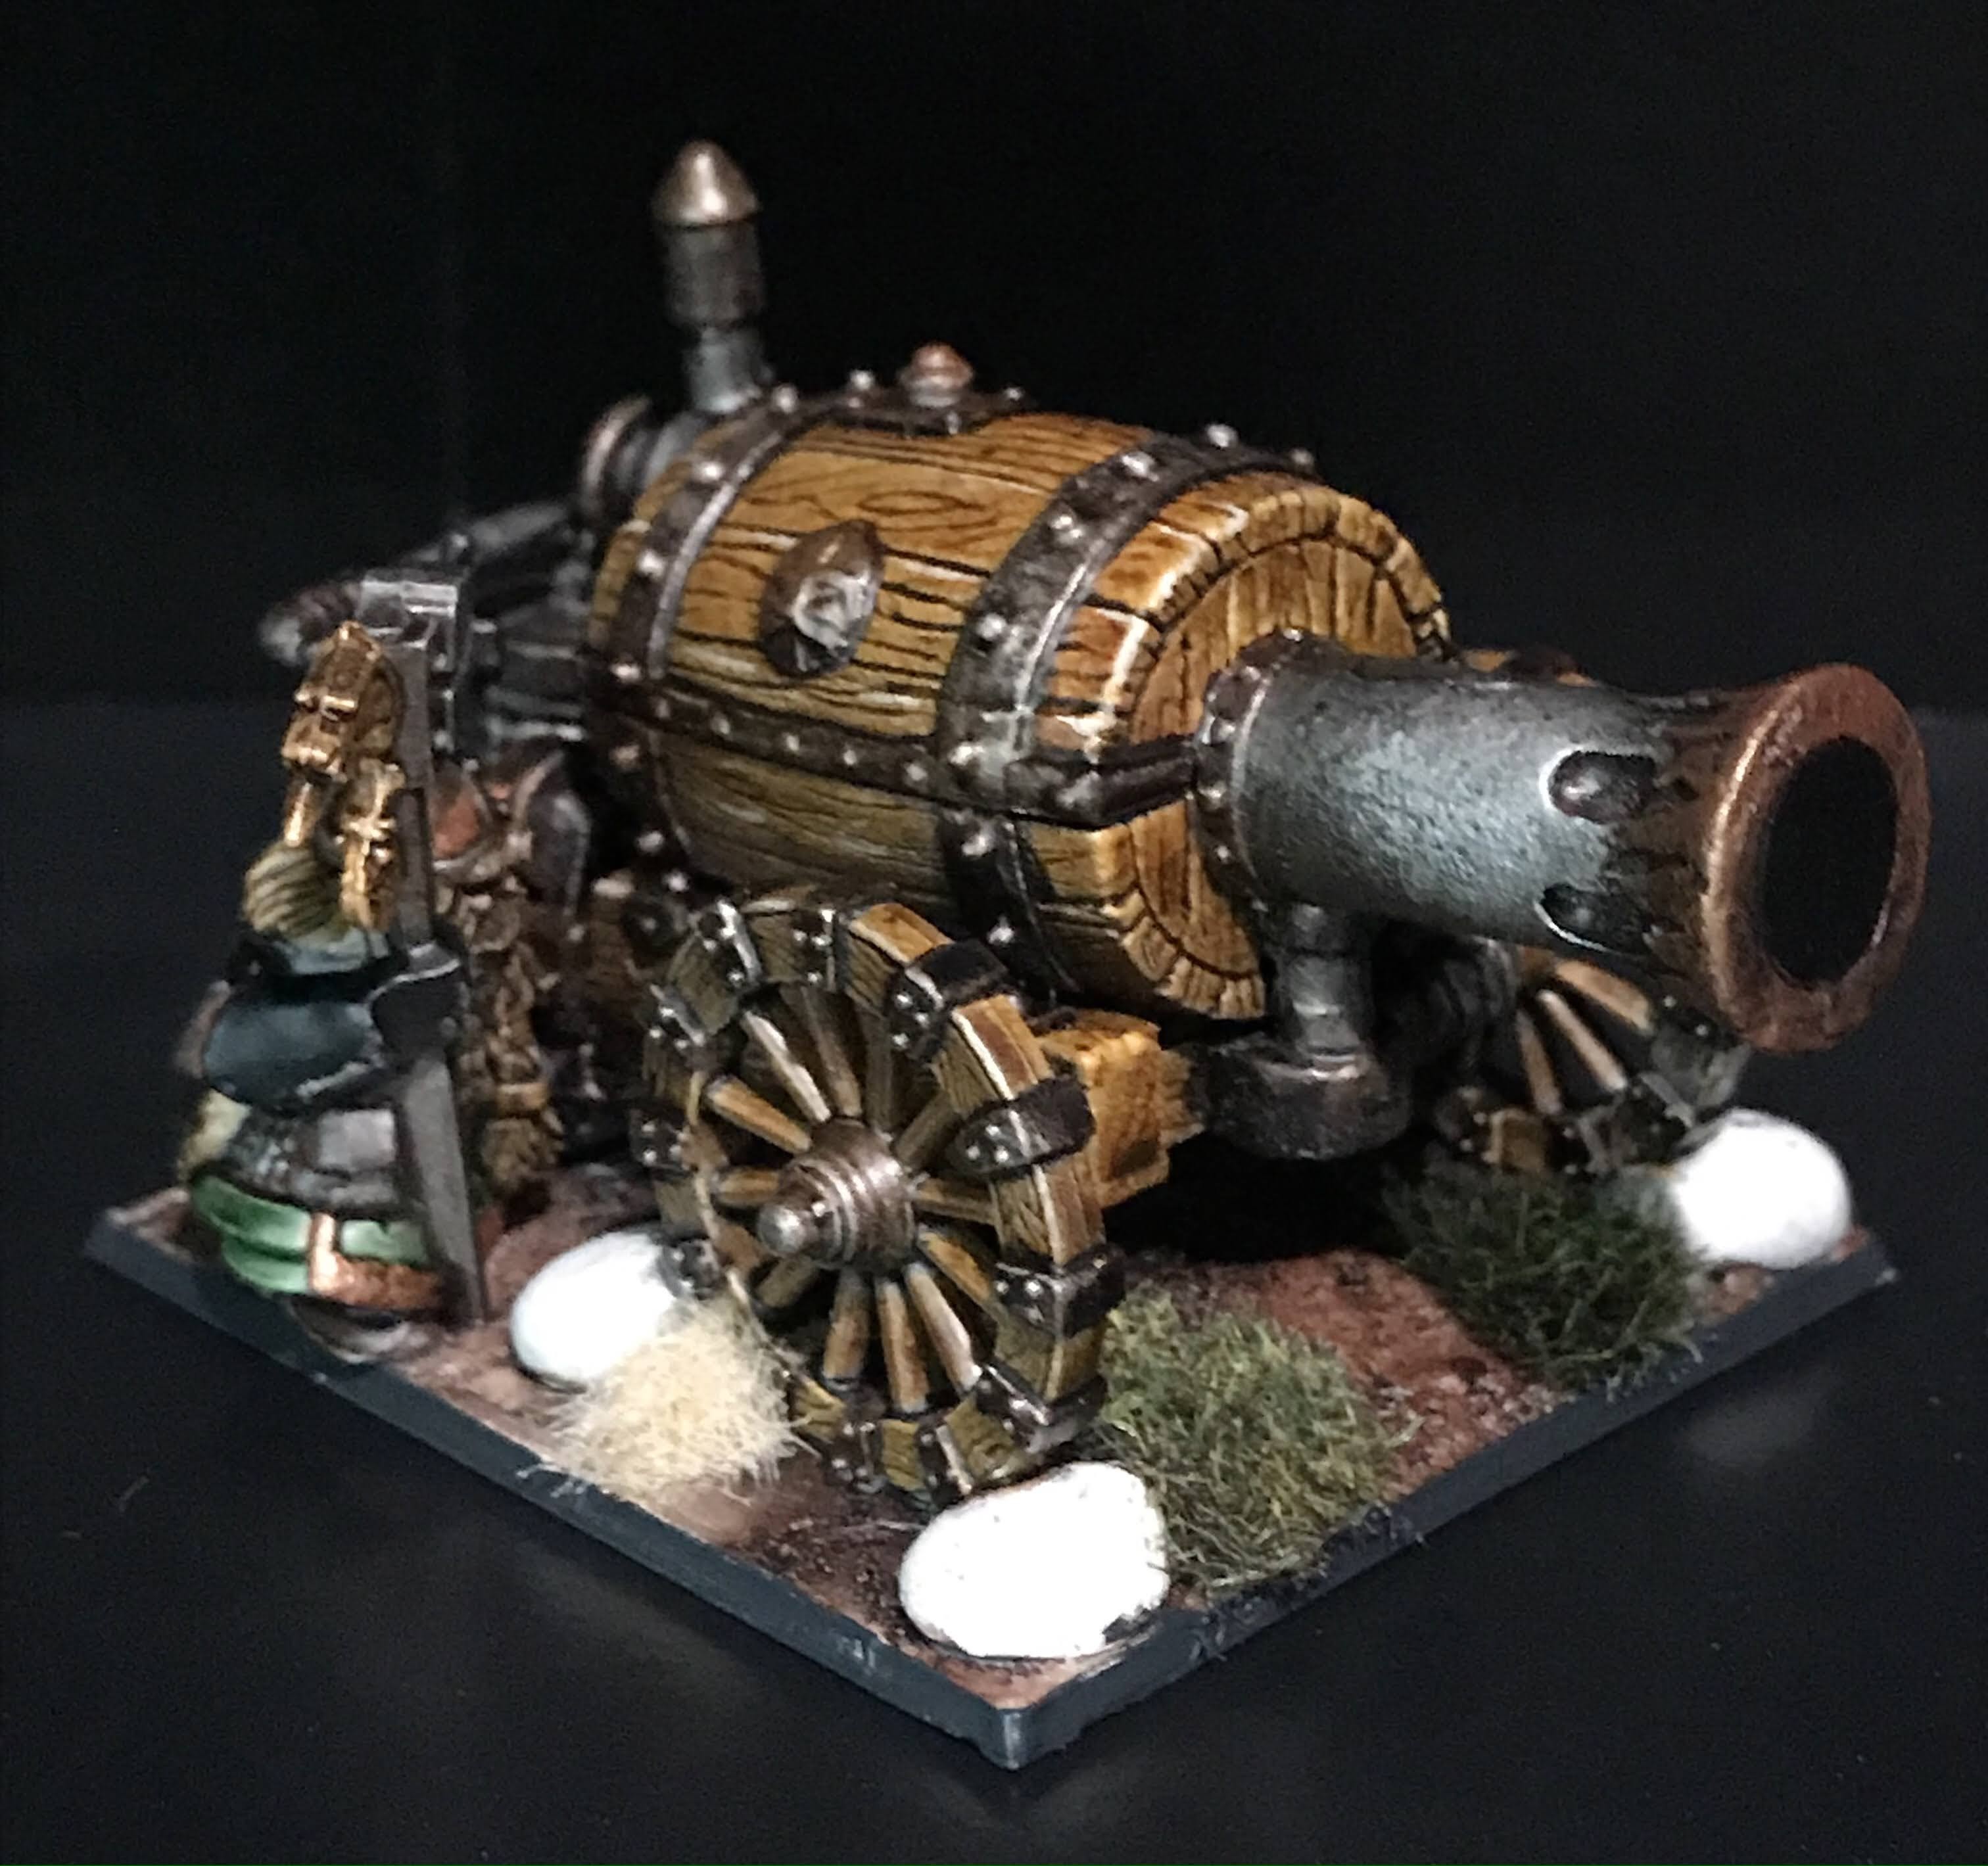
I was trying to find the perfect Iron Juggernaught, and settled on a pretty cool Keg Golem from Rocket Pig Miniatures. He’s pretty gangly and awesome, but he wasn’t Dwarfy enough for me yet.
I chopped up some more Dwarf plastics, and now have another unique model for both KoW and Vanguard. Meet Major Oakshanks:
Throgrim Oakshanks was, frankly put, one of the most stubborn Dwarfs to ever grace the Iron Hall, and that’s saying something. He refused to concede in any endeavor, no matter the stakes. If there was an enemy that needed a good thrashing, your best bet was to get Oakshanks riled up and point him at what needed killing. It didn’t matter how grievious his own wound would turn out, his sheer force of will would bring him back to the Iron Hall again and again.
Sadly, this stubborn determination wasn’t limited to just fighting. Oakshanks refused to be bested in anything, whether it be martial, or simple sport.
One fateful afternoon, Oakshanks became enraged when drinking with some younger recruits. The veteran warrior was well into his cups, and refusing to admit that the Youngbeards were putting his drinking prowess to shame. Oakshanks was beligerantly trying to down an entire keg of brandy when a cohort of goblins made the unfortunate mistake of attacking the tavern.
The Youngbeards held their own admirably, but they lacked the training to fight off a bloodthirtsty horde of seasoned killers. This was when Oakshanks entered the fray, laying into the throng of savage creatures with a roar of drunken enthusiasm.
Before long, the greenskins were slaughtered, and the Youngbeards surveyed the damage. The tavern itself was smashed and barely staying upright, with vital load-bearing supports splintered everywhere. The upper floor was groaning and visibly shifting without much to hold it aloft. And the entire scene was caked with the slimy green visera of dozens of butchered goblins.
Amidst the carnage was Oakshanks, propped up on a pile of gore. His left arm had been hewn raggedly from his shoulder, and his lifeblood was sputtering from the stump. His insides were most definitely no longer inside, and his neck barely had enough flesh left to it to hold up the old veteran’s head.
But Oakshanks didn’t care. He was grinning like a loon, and trying to encourage the Youngbeards to finish their contest. The recruits gathered around the venerable elder, and offered him sips of brandy and mead until he passed.
It was a fortnight’s march back to the Iron Hall, and the Youngbeards knew they needed to return with Oakshank’s body so that he could be entombed with his ancestors. They set about patching up the corpse as best they could, but soon realized that the stench of decay would draw un-needed attention from scavengers or worse as they made their way home.
Ranger Stonebrow searched the wreckage of the tavern and found a large barrel of spirits. He tapped the bung, poured off about half the contents, then carefully righted the barrel again. Slowly, he pried off the top of the barrel, then reverently lowered the remains of the old warrior inside. With the top hammered back down, the aged Dwarf’s body would be perfectly preserved during the long trek back to the Iron Hall.
****
Stonebrow and the surviving Youngbeards returned to the mighty fortress keep of the Iron Hall 16 days later. They had encountered brigands, raiding parties, and a troublesome Elf with a pesky habit of setting traps and snares. Despite all of these obstacles, they returned with the body of Throgrim Ironshanks, still immersed in a massive barrel of fortified spirits.
The Youngbeards and Ranger Stonebrow presented the remains to the Iron King, who ordered his bodyguards to take the honored veteran to the clerics, who would then prepare his body for burial within the Tombs of the Ancestors.
The clerics received the body with great care, and gently, reverently removed the pruny, pickled remains from the barrel that had held them so well for more than two weeks. They laid the corpse on a slab of granite, and set about the busy work of preparing the body for buriel.
That’s when they noticed that Ironshanks was staring at them. Then, to their horror, he started moving his lips, then started coughing up think globules of liquor and ichor. He finally hacked up a chunk of something black and wet, then took in a wheezing, challenged breath.
“Put me back in the damned barrel, you mangey taints.”
*****
To this day, whenever the Iron Hall marches to war, Major Ironshanks is sure to be present, charging into battle in a golem that holds his remains, eternally embalmed in the choicest Dwarven spirits. He is as stubborn as ever, but less inclined to argue with the Youngbeards as a sign of respect.